The main and mizzen canvas sail covers are 16 years old. The Sunbrella material was in good shape and we did some re-stitching over the years, but I’m always looking for something that improves or simplifies sailing.
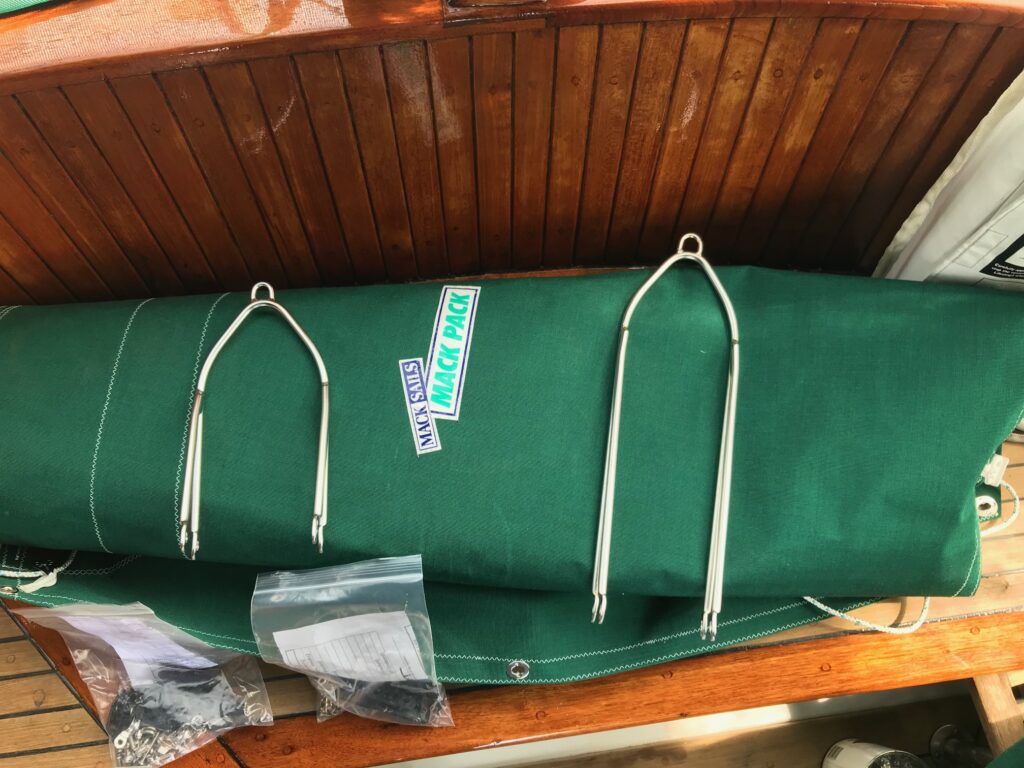
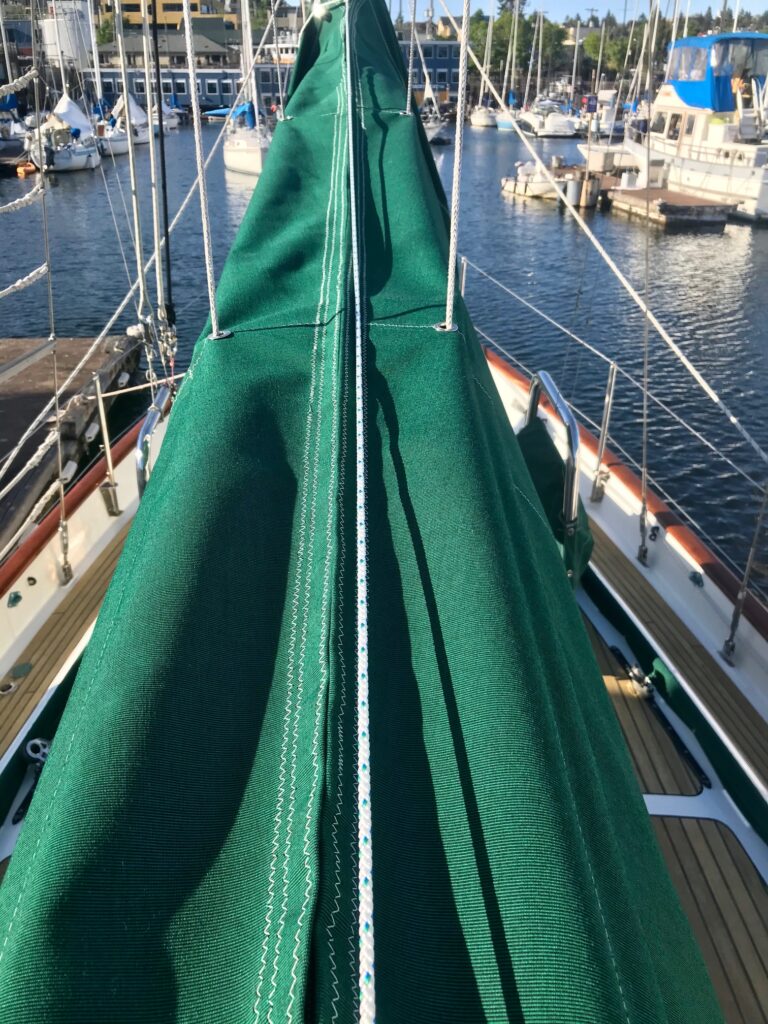
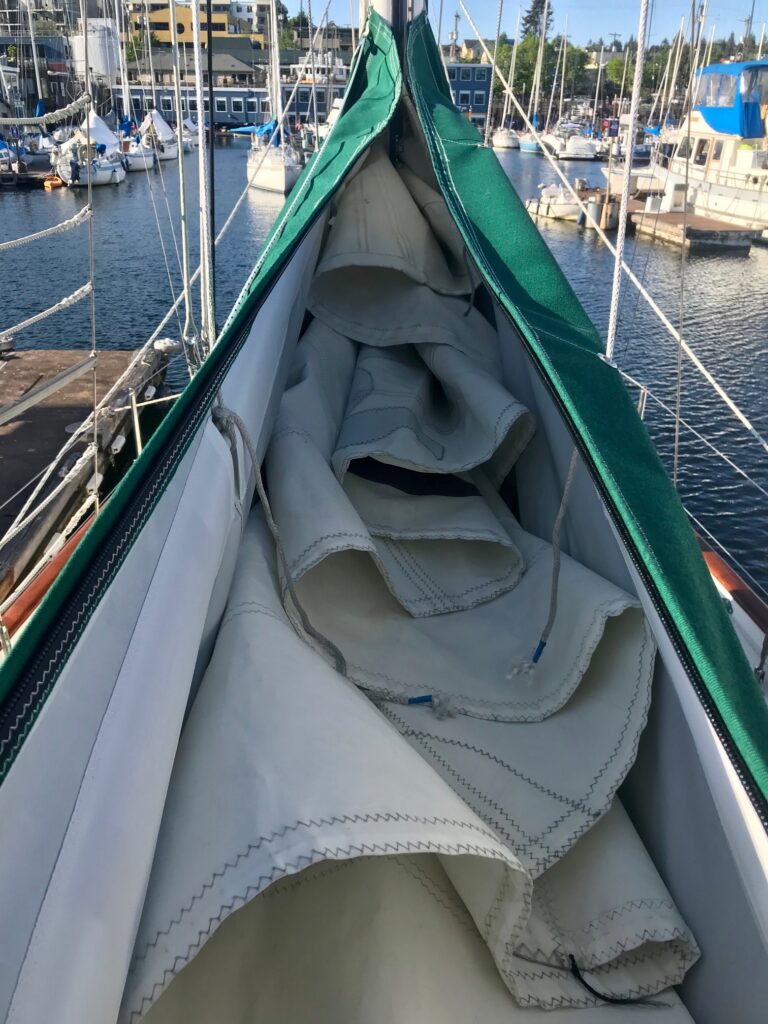
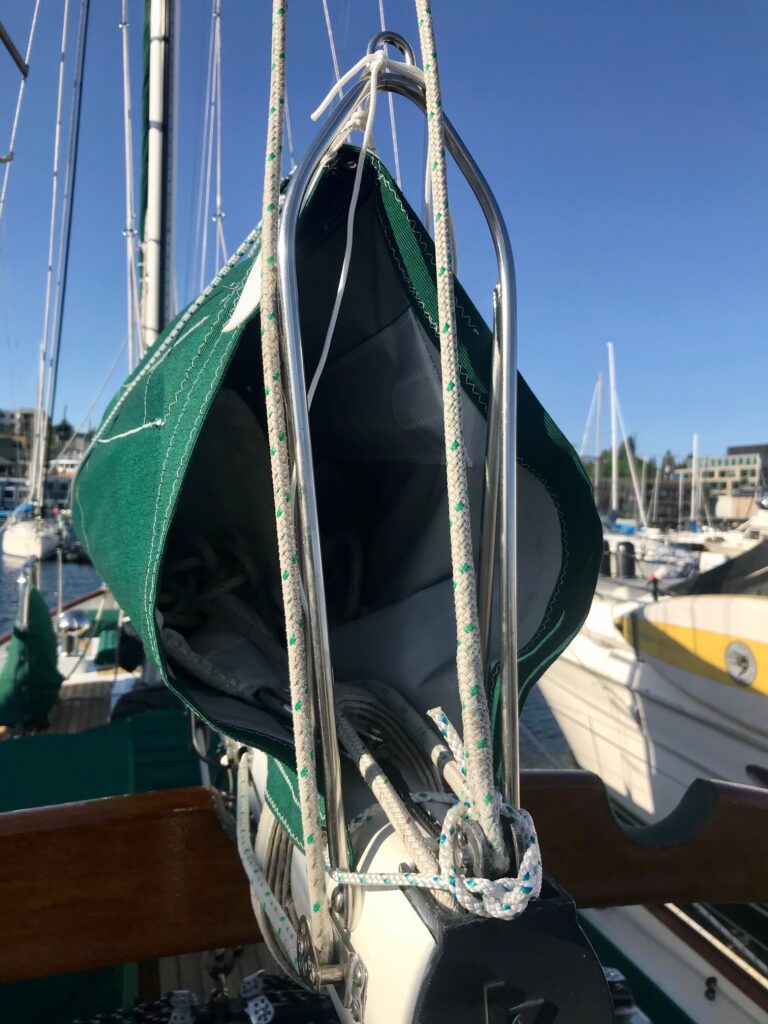
A stack pack combines lazy jacks with a sail cover. It allows the cover to remain in place while sailing. A continuous line with blocks is attached to a zipper along the top of the cover, so all you need to do is unzip the cover while standing anywhere along the boom, hook up the halyard, and raise the sail. When dousing the sail, just release the halyard and the sail drops down into the cover, which is held up by the lazy jacks. No more removing sail covers, stowing, then putting back on when done sailing.
The stack packs were made by Mack Sails and is one of their specialty items they make (they call it the Mack Pack). The design and quality is great. All you need to do is make a few measurements (very accurately), and they build them to fit your boat. Since I built my own lazy jacks years ago, I requested they remove that item from the kit. I added 3 options that I believe to be well worth it:
round battens that run along the top length of the covers on both sides make for a cleaner installation and more uniform look
lining the inside of the covers with Dacron sail cloth to prevent the sail from chafing against the canvas
ss brackets to fasten the aft end of the pack as opposed to tying it off to the topping lift
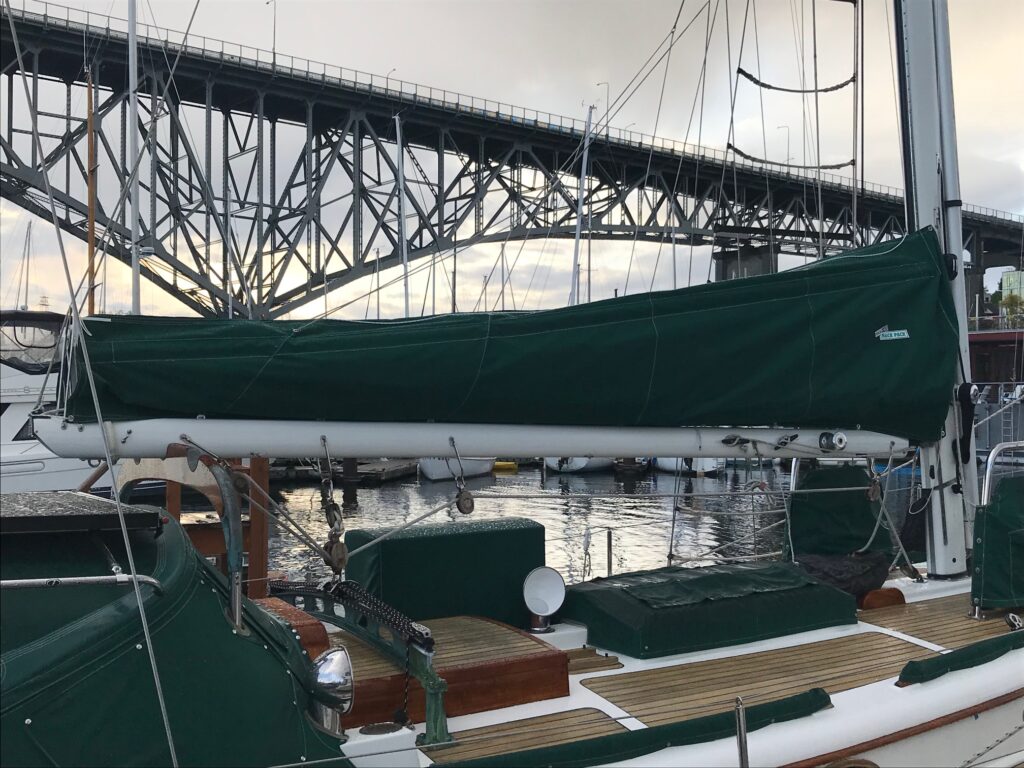
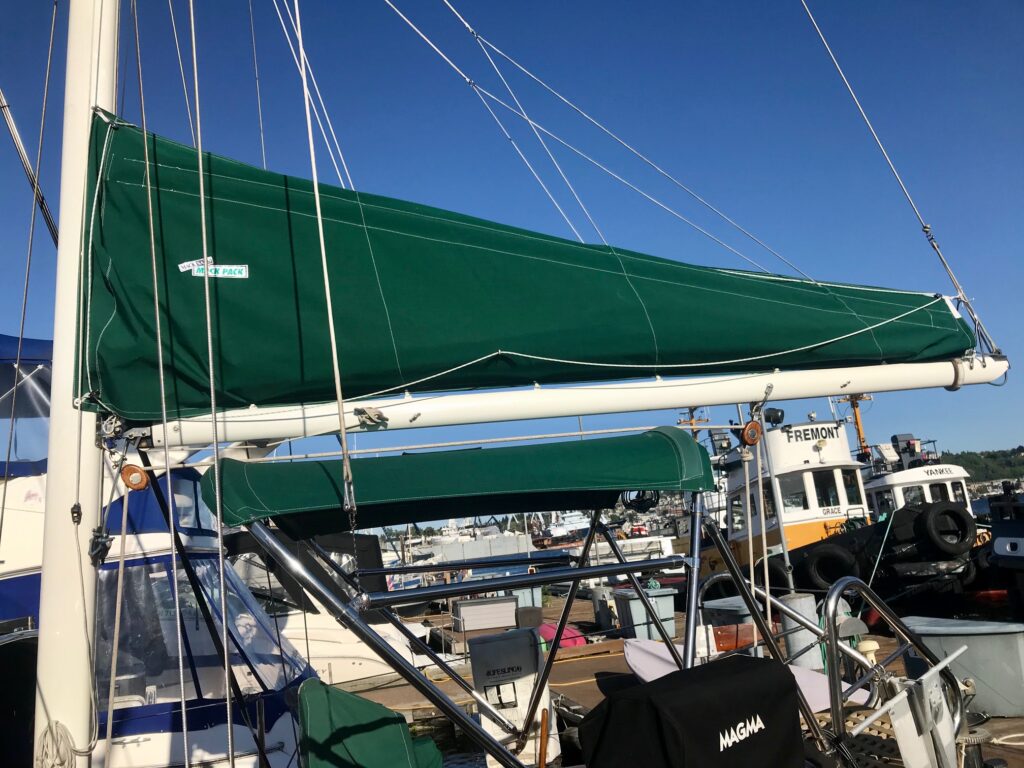
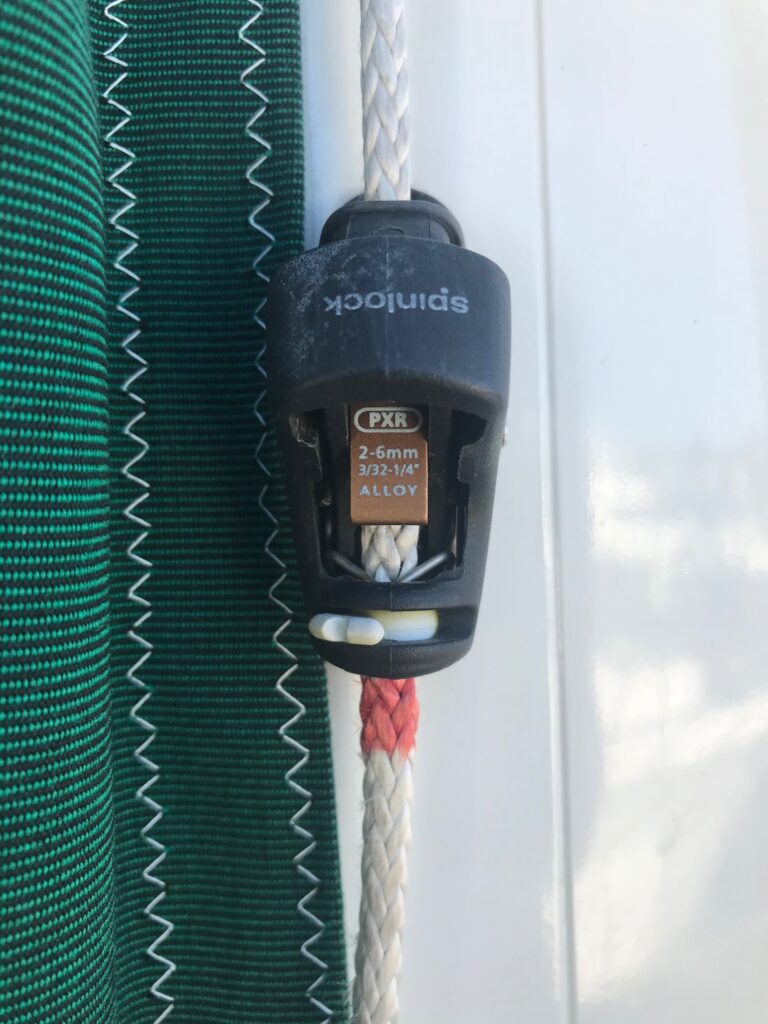
I also improved my lazy jacks by adding an extra leg to the main (went from 3 legs to 4) and the mizzen (went from 2 legs to 3). As with the original jacks that I made, I used grey amsteel line which is thinner and stronger than yacht braid. I also kept my design of running the jacks down the mast to a Spinlock cam cleat instead of using a horn cleat on the boom.
Installation was not too difficult, but did take some time especially since I had to modify the lazy jacks. The attachments of the cover to the mast was the hardest part and I spent a lot of time getting it to look good. The mizzen cover was more difficult to install because of how high the mizzen boom is, plus it requires working around the bimini. In the end, I was very please with the results.
Stack Pack KitCompleted Install on mainCompleted Install on MizzenZipped PackUnzipped PackStainless Steel BracketSpinlock Cam Cleat used to Tension Lazy Jacks
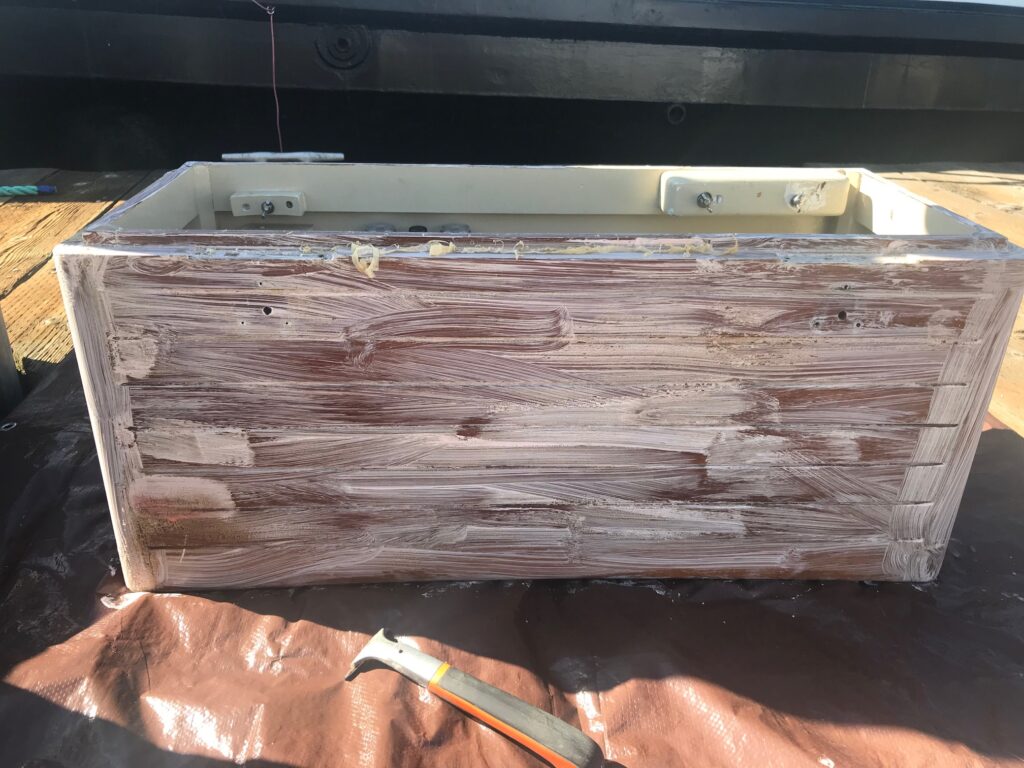
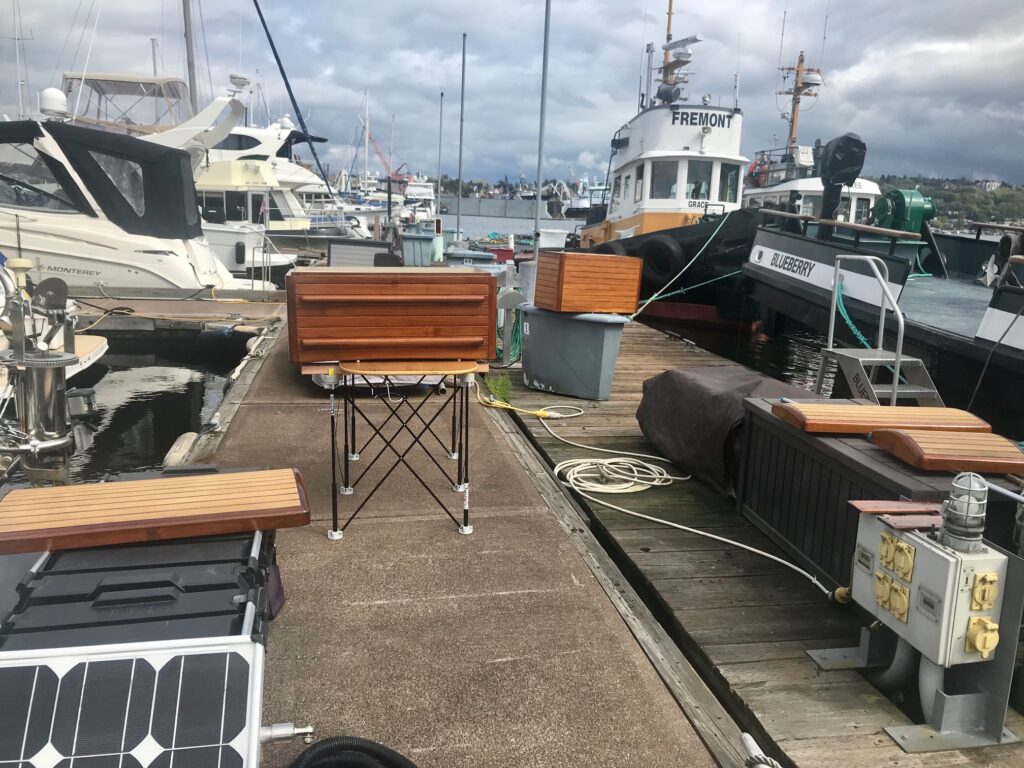
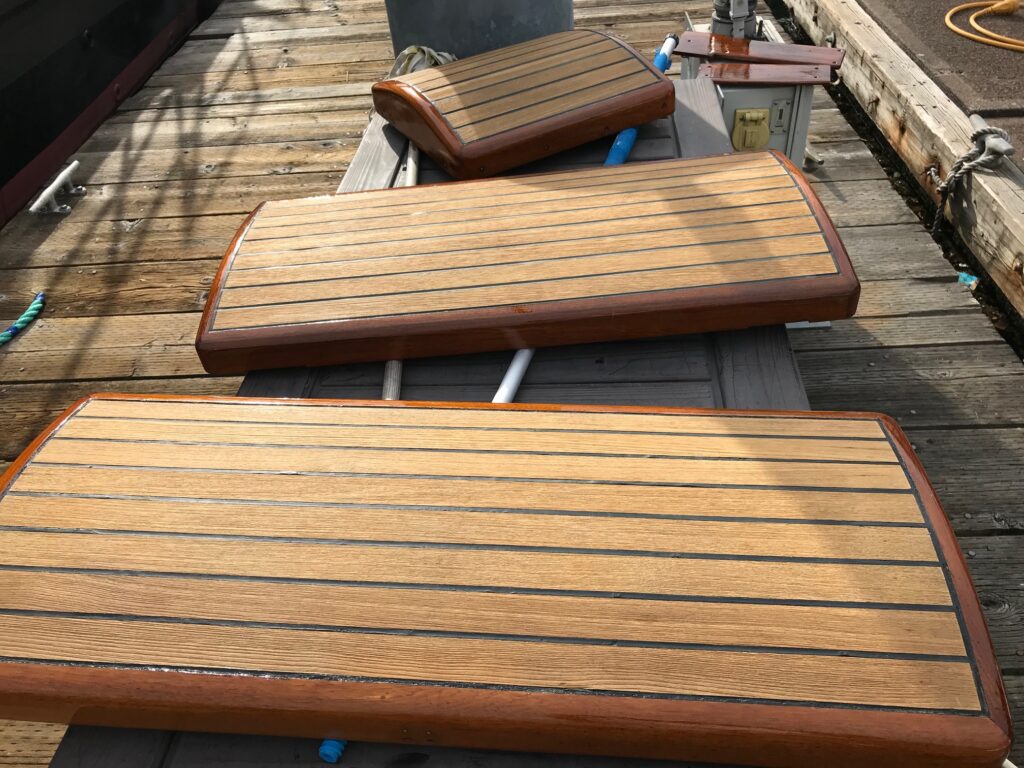
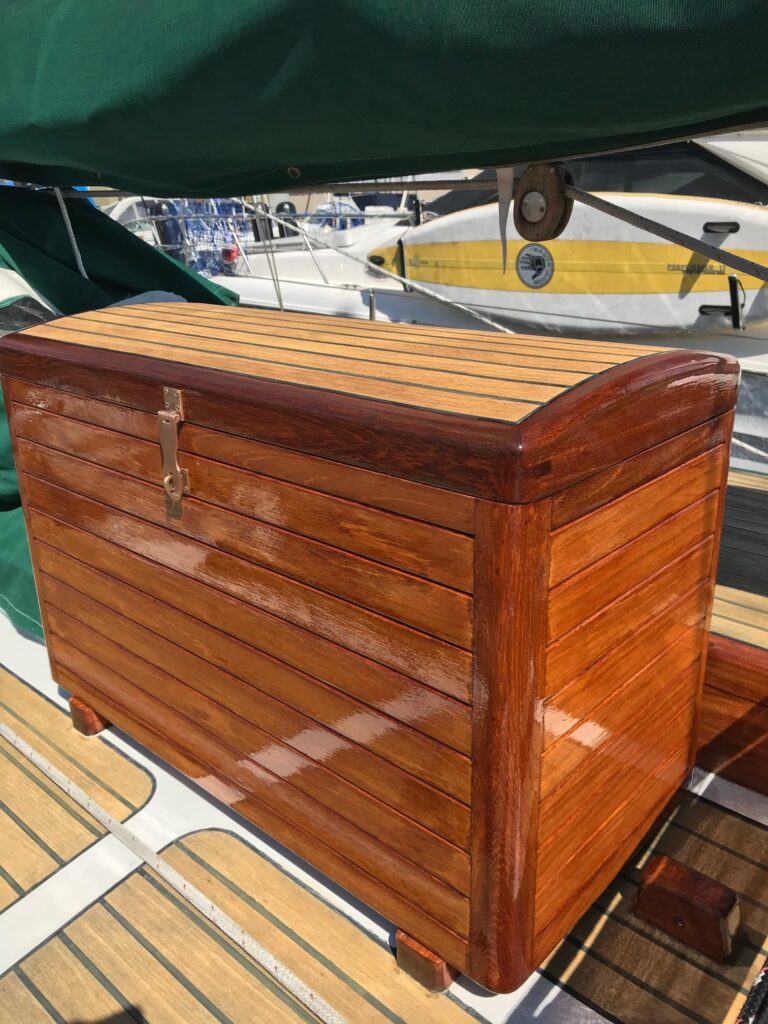
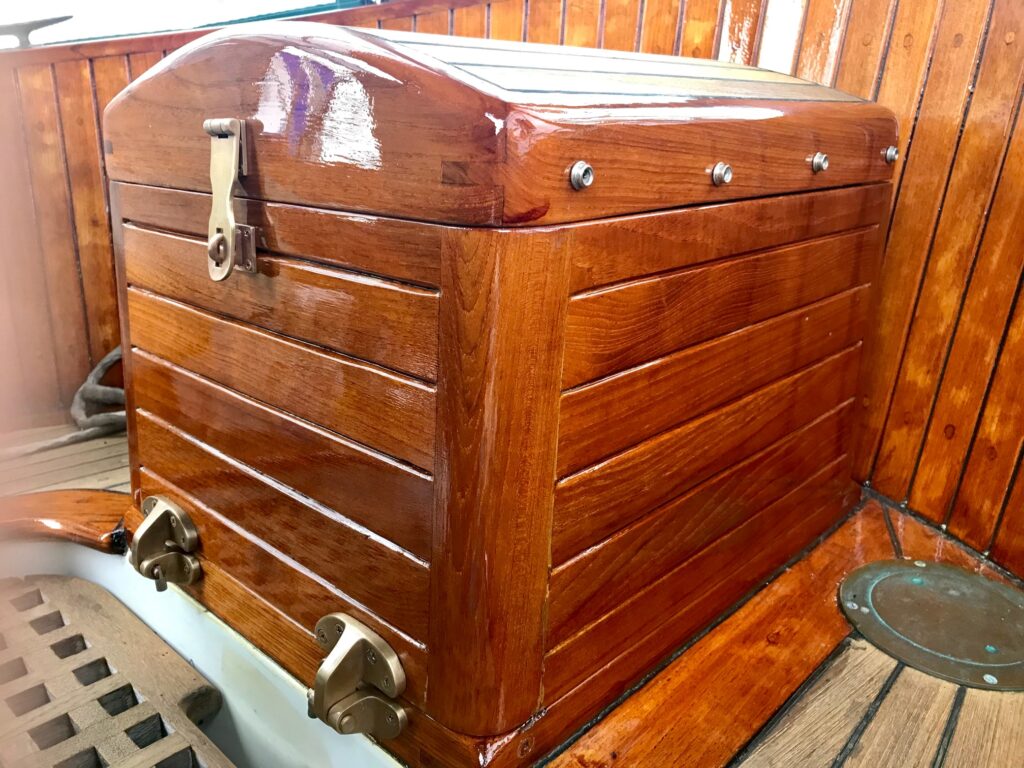
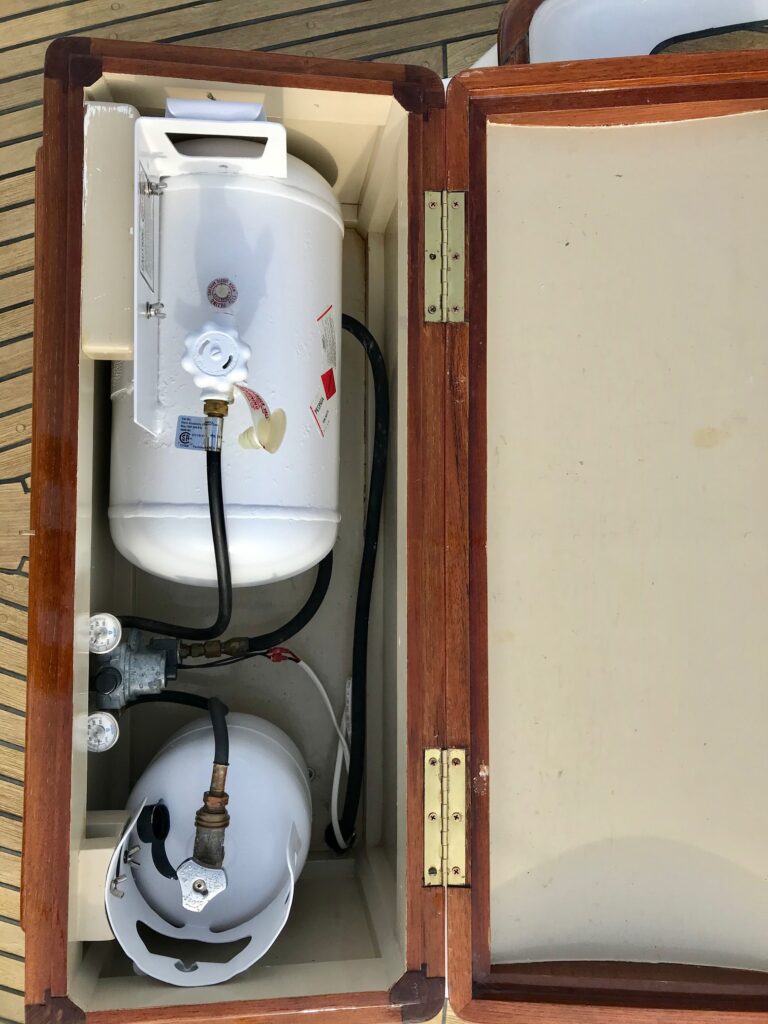
An unusually dry April in Seattle (driest on record) allowed me to get some brightwork refinishing in. There are only a few items remaining on Apropos that haven’t been stripped down to bare wood and re-finished with Awlwood MA Clear–2 deck boxes, the helm seat, and 4 grab-rails.
I started with the deck boxes. The propane box hadn’t been removed from the deck in over 16 years and was difficult to remove because besides the 4 screws holding it to the deck, there was also what I believe to be 3M 5200 permanent adhesive applied to the 2 teak mounting brackets. I eventually worked it free but had to repair some damage to the plywood bottom of the box using a wood repair product. After removing the lids and hardware from the boxes, I stripped the old varnish with a chemical peeler then scraped, then re-applied more chemical peeler and scraped, then sanded. I decided to try this method instead of the heat gun/scraping method I used on all the other brightwork and it worked well, but I don’t think it saved any time because there was a lot of scraping needed to remove many layers of varnish.
After all the old varnish was removed, I sanded with 120 grit followed by 320 grit, applied the Awlwood Primer, then 8 coats of Awlwood Clear. I cleaned up all the brass and bronze hardware and also sealed them with a clear lacquer before remounting.
Chemical Peeler (used to loosen old varnish before scraping)Working on the dockTops (Teak cleaned, brightened, and sealed with Semco)Finished Deck BoxFinished Helm SeatFinished Propane Deck BoxRe-painted propane tanks
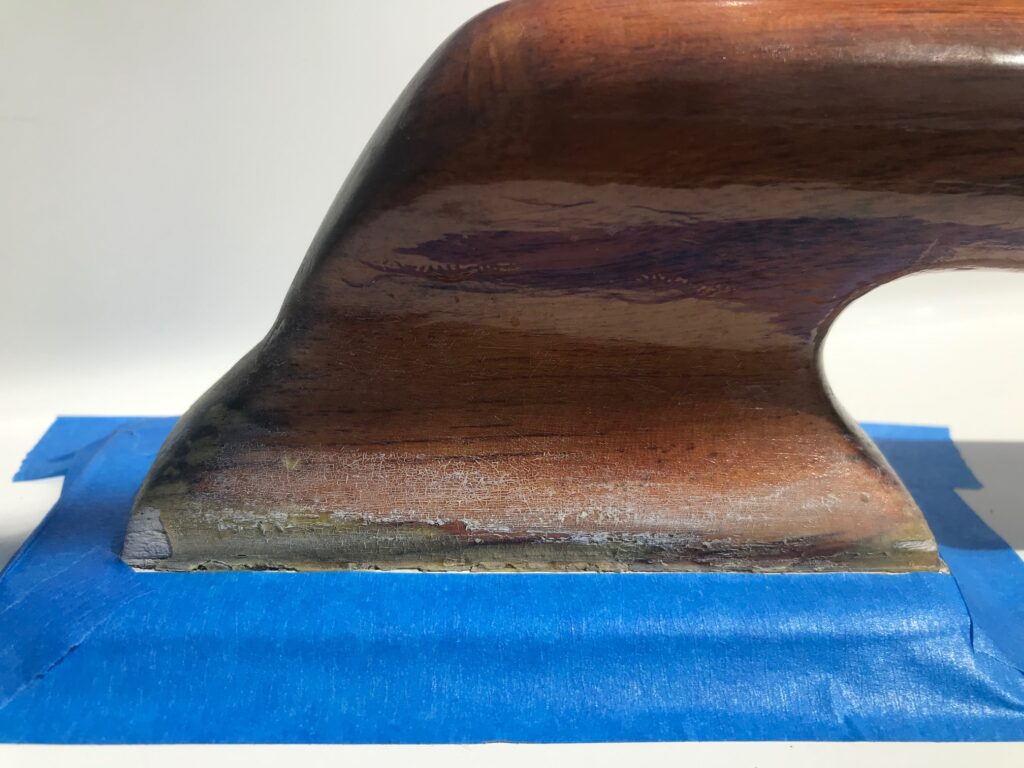
There are 4 grab-rails on the coachtop roof. Normally covered with canvas, they came back from the South Pacific trip with sun damage mainly to the bottoms where the canvas doesn’t quite cover. I knew these would require a lot of work to strip the old varnish off because of all the rounded surfaces, so I decided to tackle 2 of them initially. Here are the results:
Base of grab rail showing damage to varnishChemical Peeler appliedLots of ScrapingFinished Grab Rail
I replaced the incandescent bulbs inside all the overhead dome lights with LEDs many years ago. I also use LEDs in the courtesy lights along the floor throughout the cabin, brass reading lights, and inside most of the wardrobe closets. Most of these LED lights were bought 10 years ago and none have needed to be replaced so far, making their extra cost well worth it.
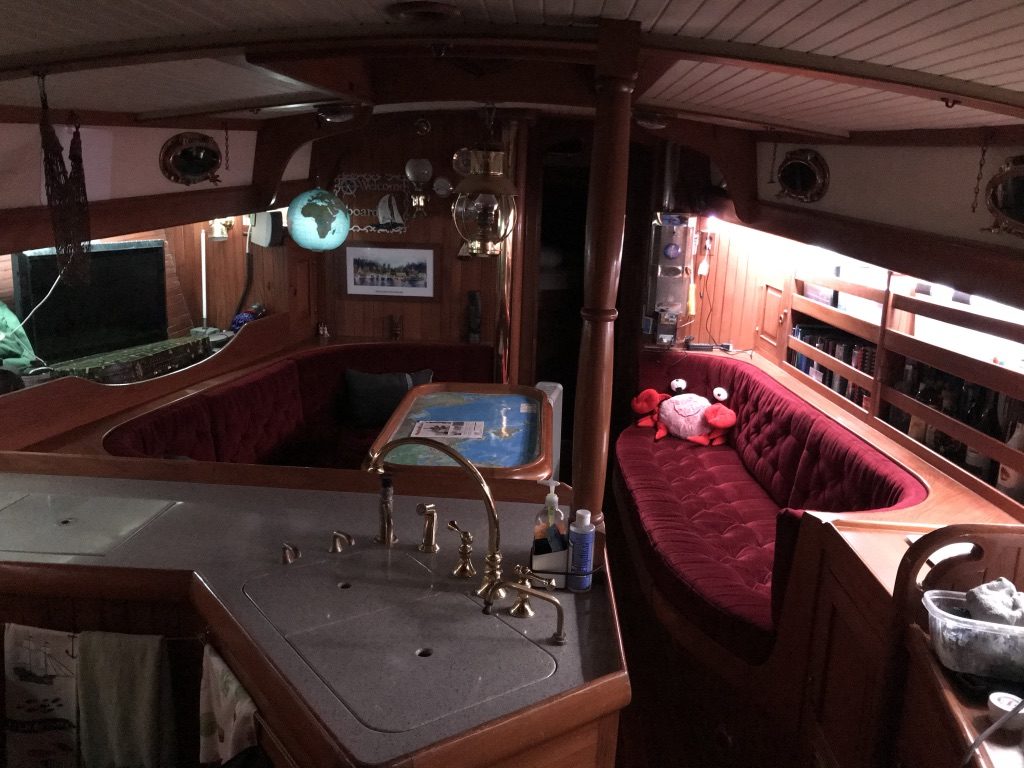
I’ve been wanting to increase the lighting in the main cabin and decided on LED strip lighting. Through reading articles and reviews on the many different types and brands of LED strip lighting, I came up with the following list of features:
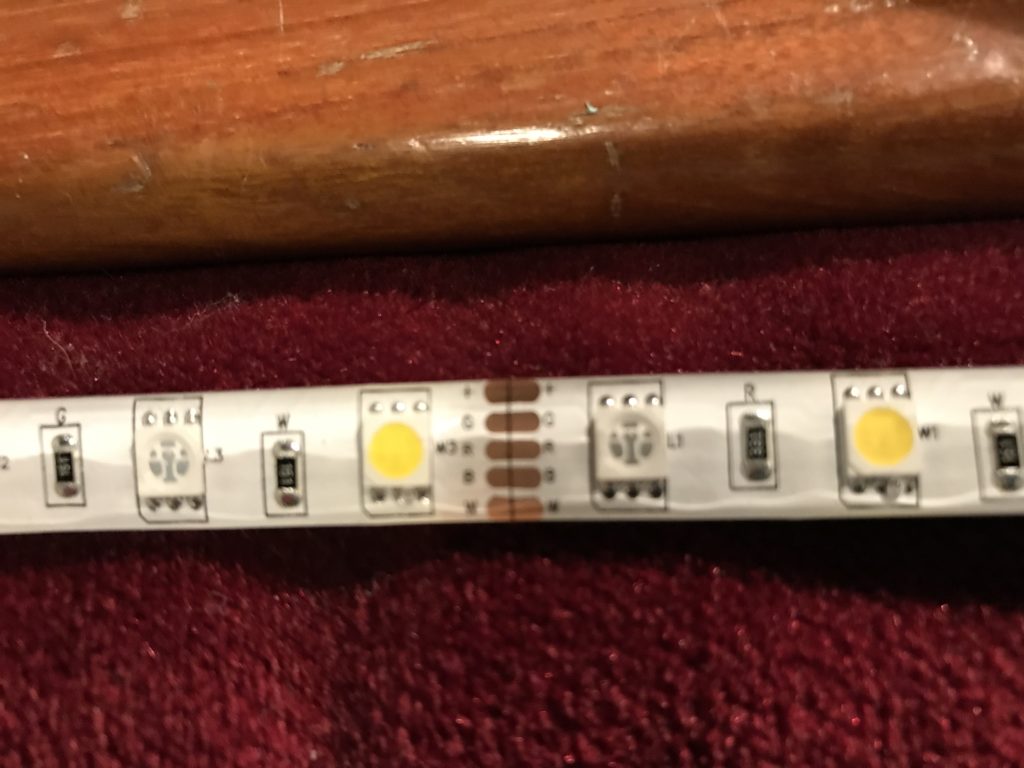
Color-RGBW stands for red, green, blue, white. This type has a RGB “cluster”, which are 3 closely-spaced LEDs that can produce millions of colors by varying the duty-cycle of each of the red, green, and blue LED individually, plus a separate white LED that can produce a warm white. In the strips that I ended up buying, the colored LEDs can be controlled separately from the white LEDs. Some LED strips are sold as RGB only, so the white is made by combining the red-green-blue and is not a true white (and definitely not a warm white).
Dimmable–most LED strips are dimmable. The ones that I bought have separate dimming for the colored LEDs and the white LEDs.
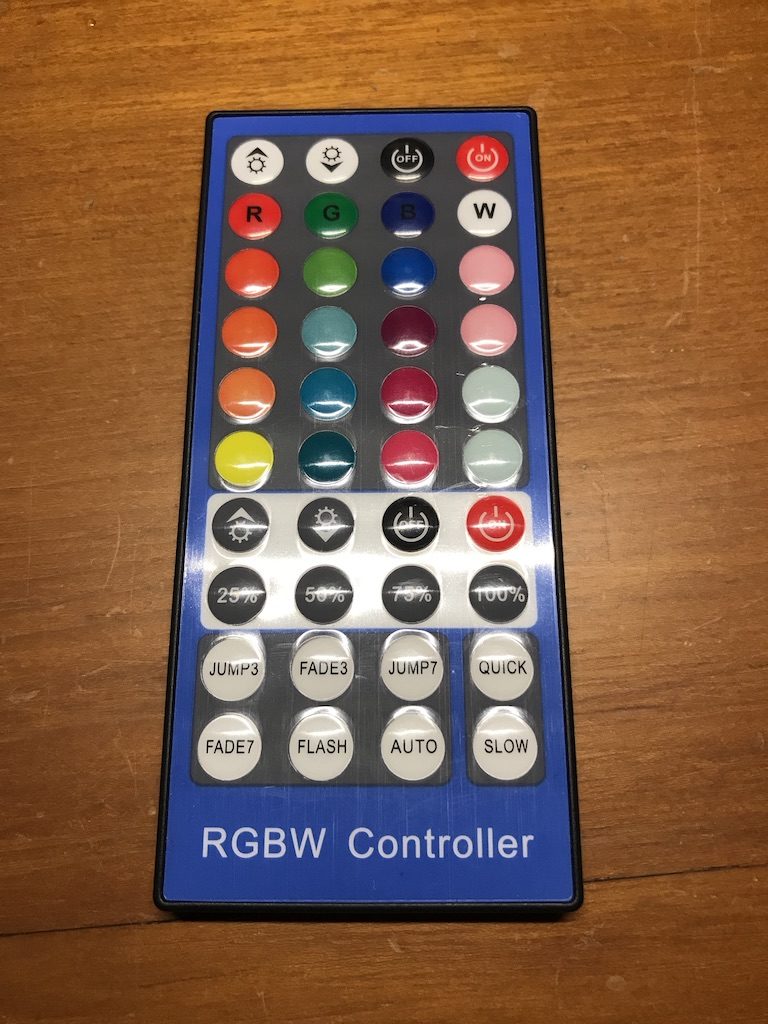
Remote controlled–I discovered there are many ways to control the strips–physical switch, remote control, phone app, and even Alexa control. I decided on a remote control.
DC Powered–Most kits I looked at were AC powered. Since I want to connect them to 12V, I made a DC adapter that powers the LED strips through a standard DC outlet. This gives me the option of powering them with AC or DC.
Misc.–Most LED strips are sold in 16′ rolls. Some are encased in a silicone sleeve to make them water resistant, a good idea for boat applications even they will be “indoors”.
Connectability–Not all LED strips have a connector on both ends, so running 2 strips in series is not possible (sell my first attempt below).
Layout on Boat-
I wanted the LED strips not only for adding brighter lights to the main cabin, but also for adding colored and dimmed accent lighting. I also wanted the strips on port and starboard sides to be hidden from view as much as possible. As it turned out, a 16 foot long strip was just about the exact length from galley to forward bulkhead on port side, and nav station to bulkhead on starboard side. The main layout problem was to figure out how to run both LED strips with a single controller and where to place the controller.
First Attempt: I ordered an LED set that contained 2 16′ RGBW strips, a controller with on/off switch and function control (brightness, color, mode). It was Alexa controllable (though that’s not a feature I would use on the boat) and came with a smart phone app for remote control. The controller output had a Y-connector that both strips were meant to plug into. This required me to modify the wiring by adding 12 feet of 4 strand wire to one of the legs to allow one of the strips to cross over from port to starboard along the cabin top. After soldering and heat shrinking both ends of the 12′ long 20 gauge wires, I discovered that the LED’s in the strip that the wire was added did not match the color or intensity of the LEDs in the other strip, probably due to the added resistance. I determined these would not work for the boat, so I removed the 12′ extension to get them back to the original lengths and found another use for them–my daughter’s bedroom!
Second Attempt: I researched and found another LED set that I thought would work better. It also contained 2 16′ long RGBW strips, a controller, and a remote. The main difference is that these strips had connectors on both ends and had a 5-wire bus vs a 4-wire bus. The reviews said that 2 16′ strips could be run in series. They also sold connector wire in 6′ lengths with pin connectors that matched the LED strips. This would allow me to run 1 strand on the starboard side, then add 12′ of extension wire in order to reach the beginning of the second strand on the port side. The 12′ extension did not affect the color or brightness of the second strip. Installing them was easy with the 3M tape attached to the under-side of the strips. I ran them along the back side of the wood trim so they are not visible. The remote works from anywhere in the main cabin. Here’s a link to these LEDs:
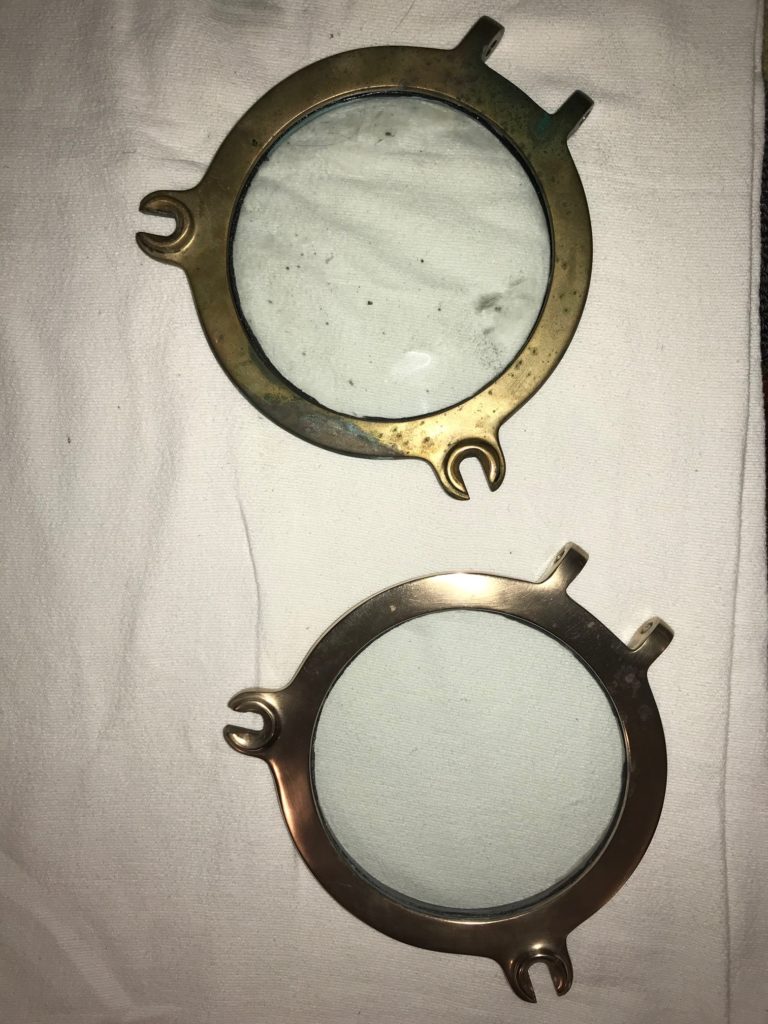
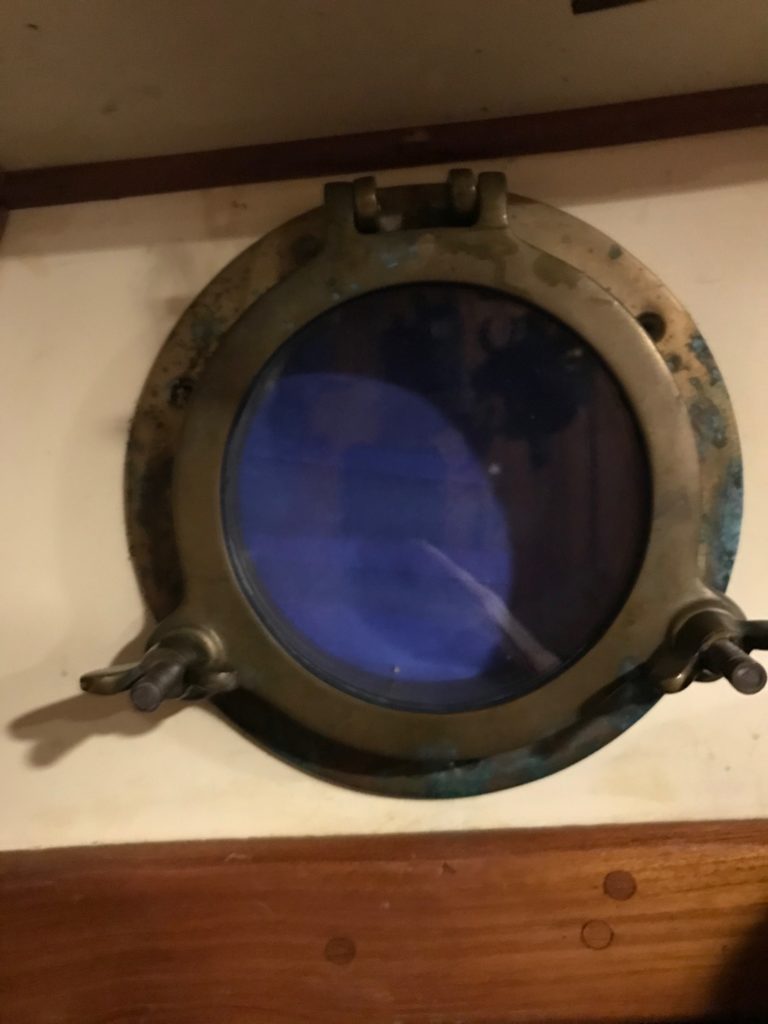
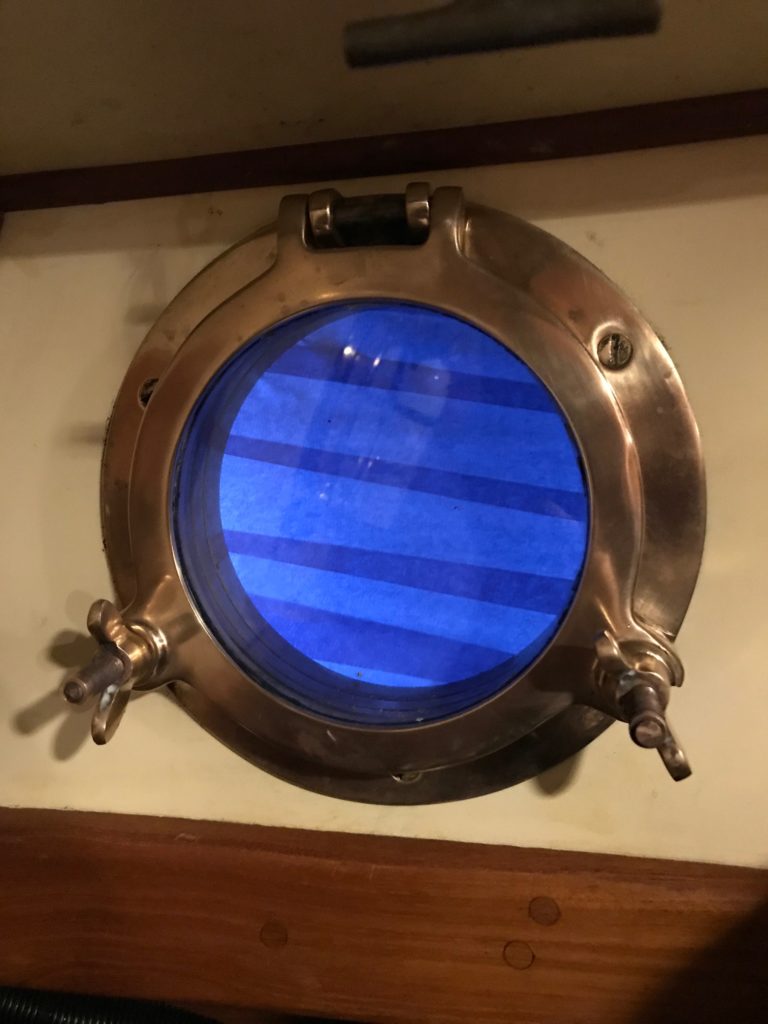
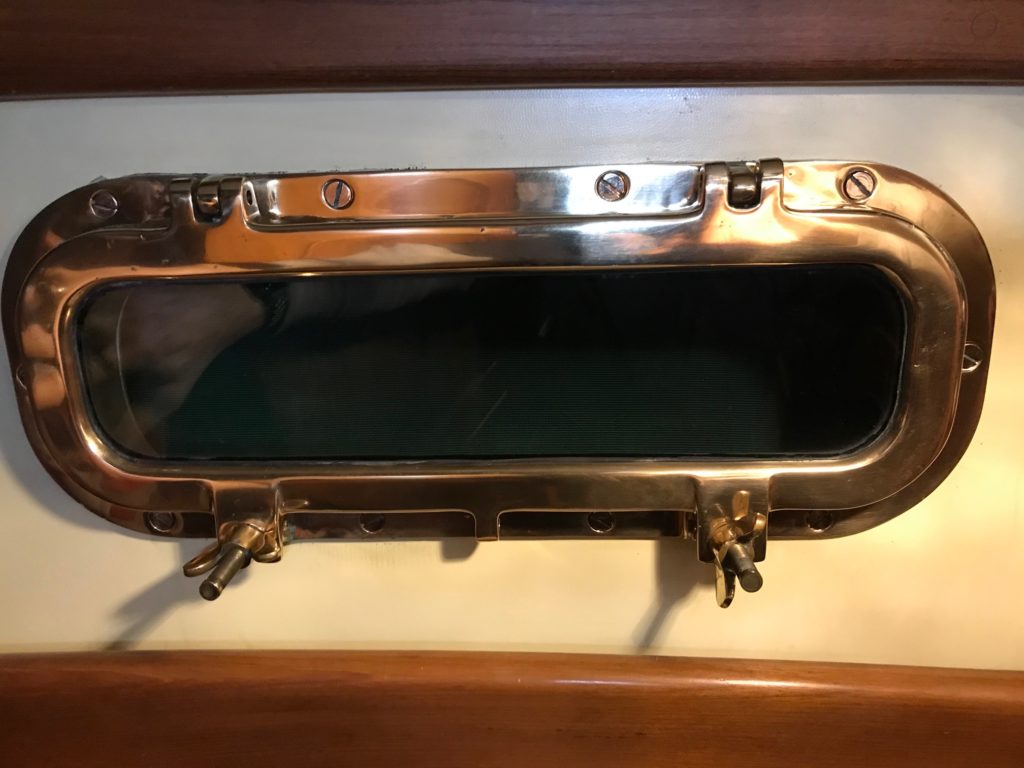
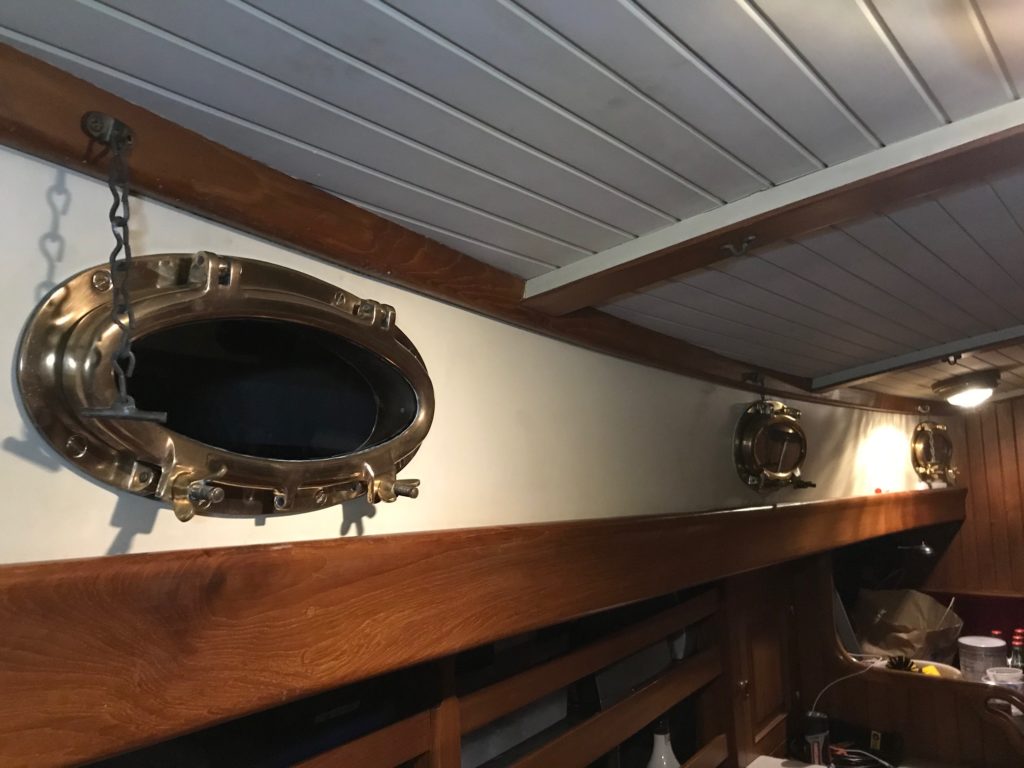
Winter in Seattle is a good time for tackling interior boat projects. I’ve always kept Apropos’ bronze exterior ports polished, but it’s been over 10 years since I polished the interior-side of the port openings. Apropos has a total of 14 openable ports–8 oval ports, 4 small 7″ round ports, 1 large 13″ round port and 1 rectangular port. Some had a nice patina color, but most showed signs of salt water that had come in contact with the bronze, resulting in green or white corrosion markings. So over the course of a few months, I removed each port along with the 2 thumbscrew/latches, and brought the pieces home to work on bringing them back to shiny using a dremel tool, some chemicals, scotch-brite pads, and a polishing compound. The outer frames could be removed but I decided it was easier to just polish them in place. Some of the pins holding the port to the frames were difficult to remove, but letting them soak overnight with an anti-corrosion spray did the trick.
Once the interior side of ports are polished, it’s easy to keep them that way with a quick hand-application of Flitz polishing compound once or twice a year.
Here are a few before and after shots.
Unpolished vs Polished Badly tarnished port in aft starboard berth (this port was once left open during a rough passage and let in gallons of saltwater!)Polished port in aft starboard berthRectangular port 3 of the 8 oval ports after polishing
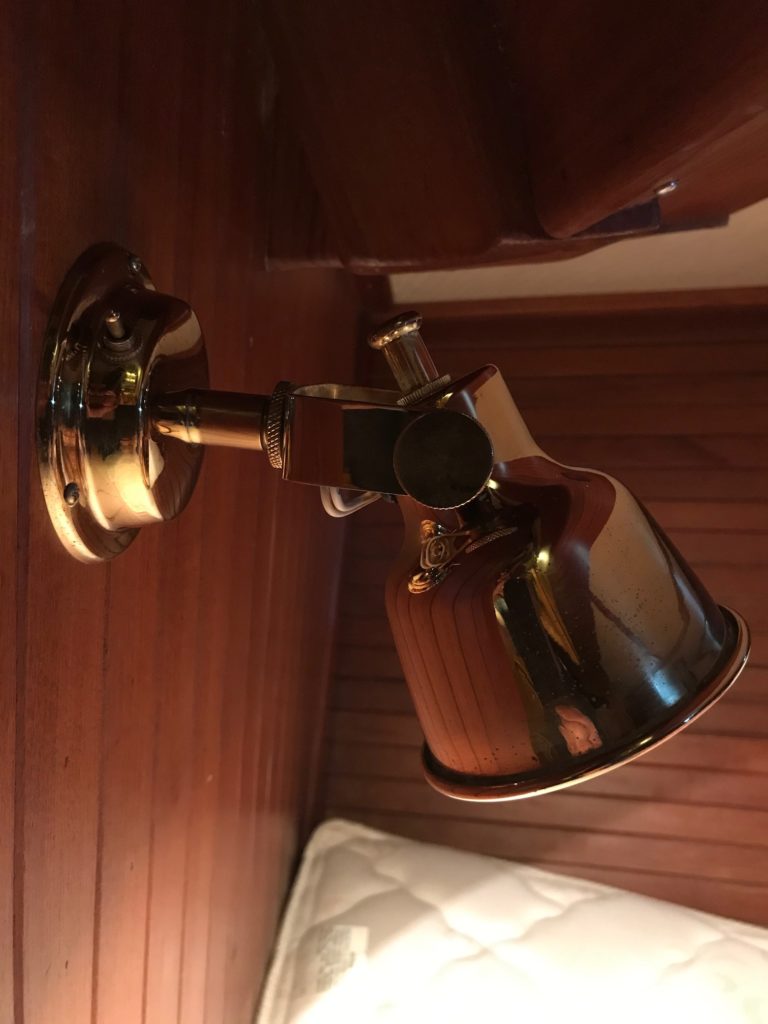
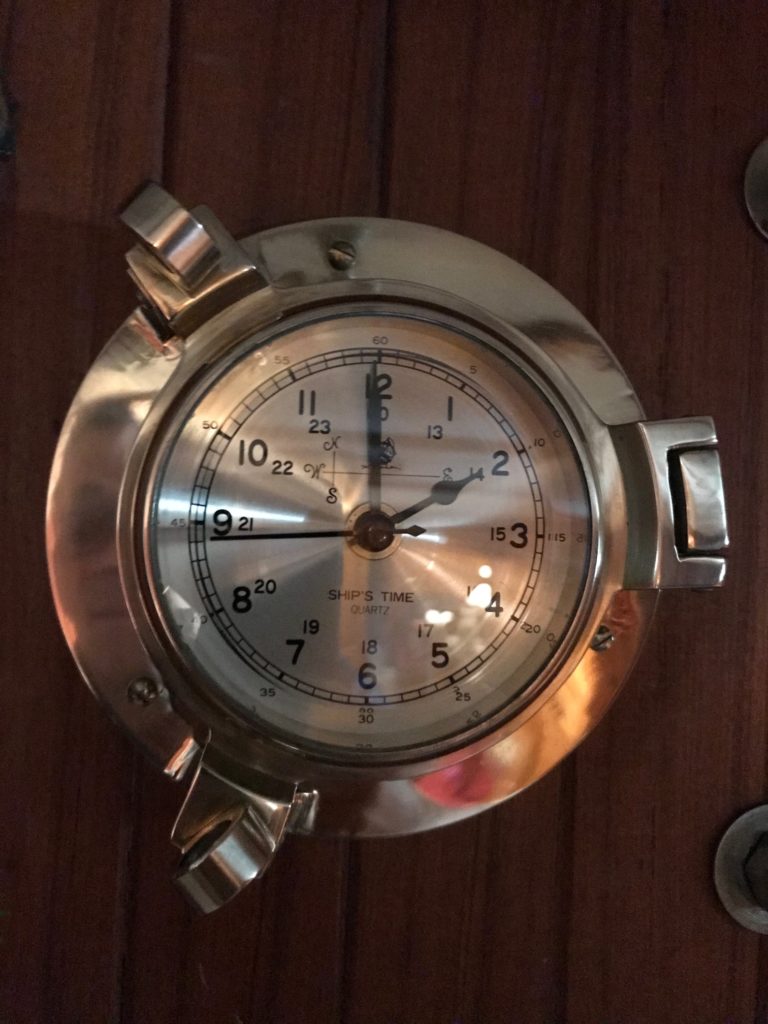
Some other brass items I polished were a couple of reading lamps and a clock. The clock is mounted in the v-berth and had stopped working a few years ago due to a broken quartz movement, so I was going to toss it. The new ones I looked at were over $100 and had light-weight molded brass surrounds, not cast like what I had. I also liked the nautical face and the bevel around the outer edge of the glass, so I thought it was worth repairing. I ordered a new 4″ quartz movement for under $10 and adapted it to my clock, then polished it up and it looks (and runs) like new.
Polished reading lampPolished clock with new quartz movement
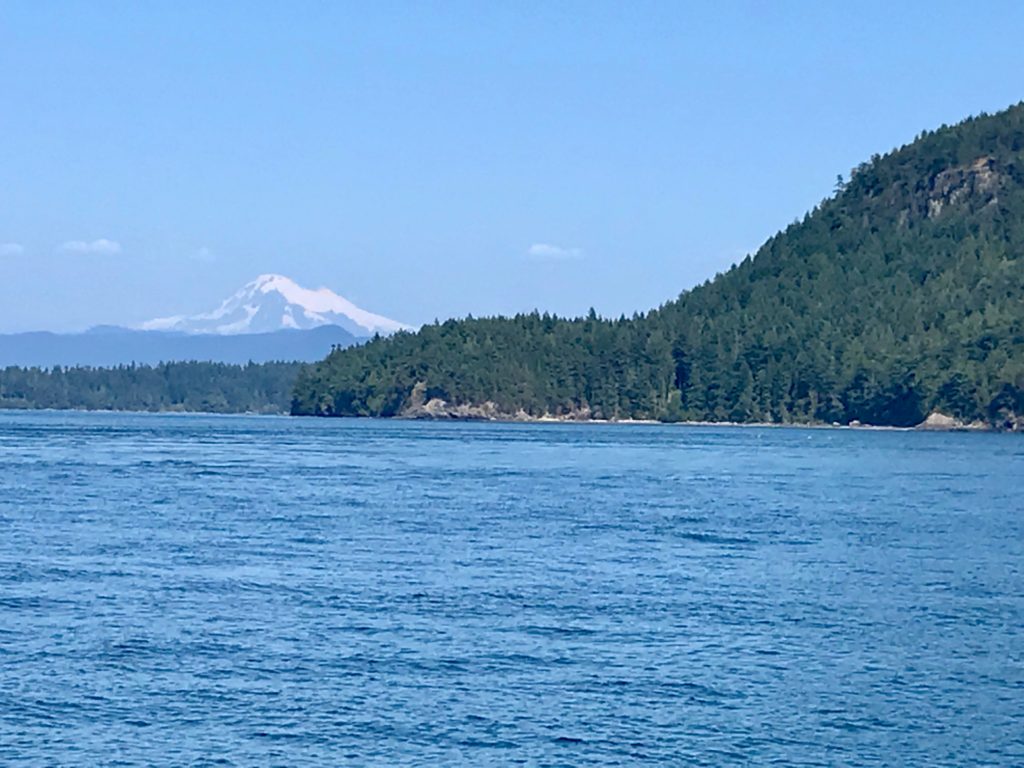
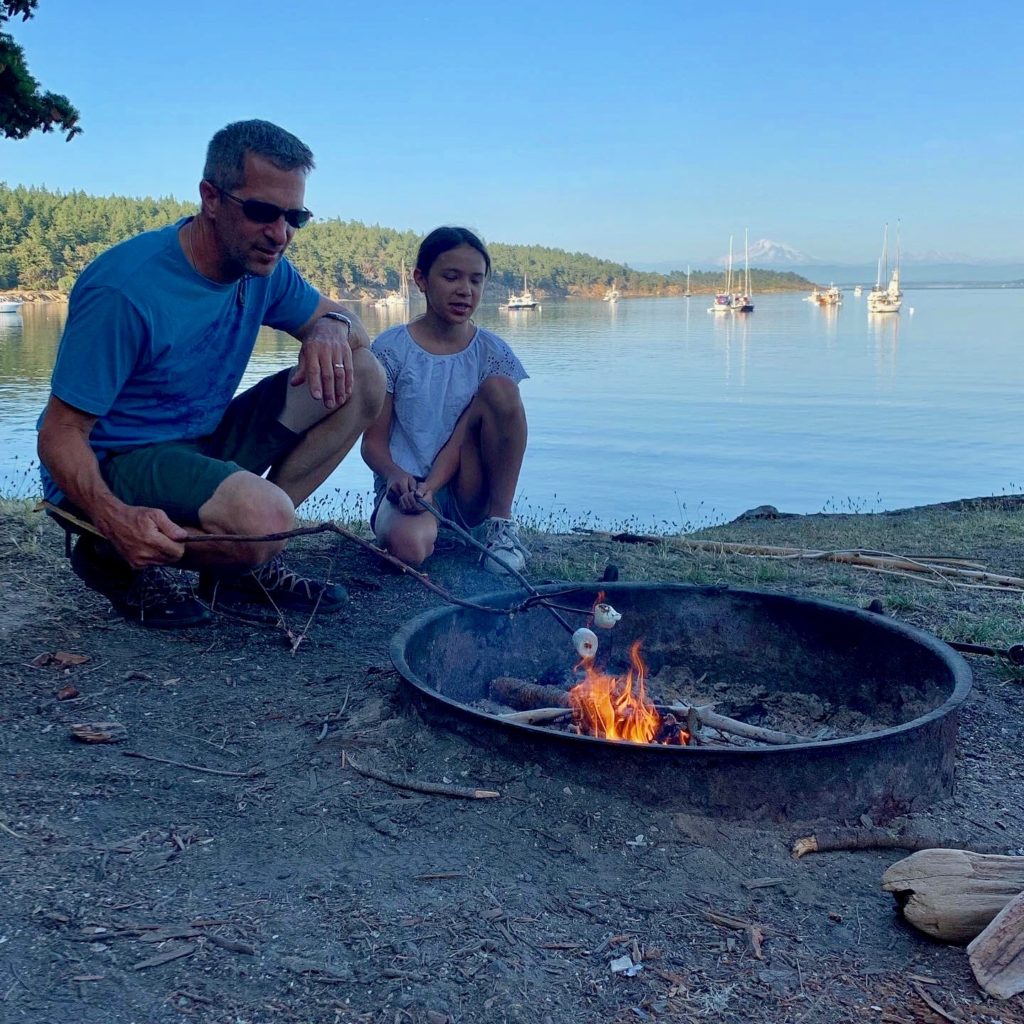
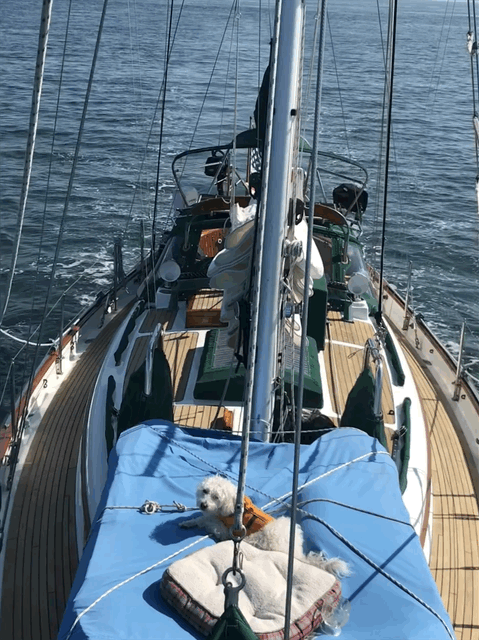
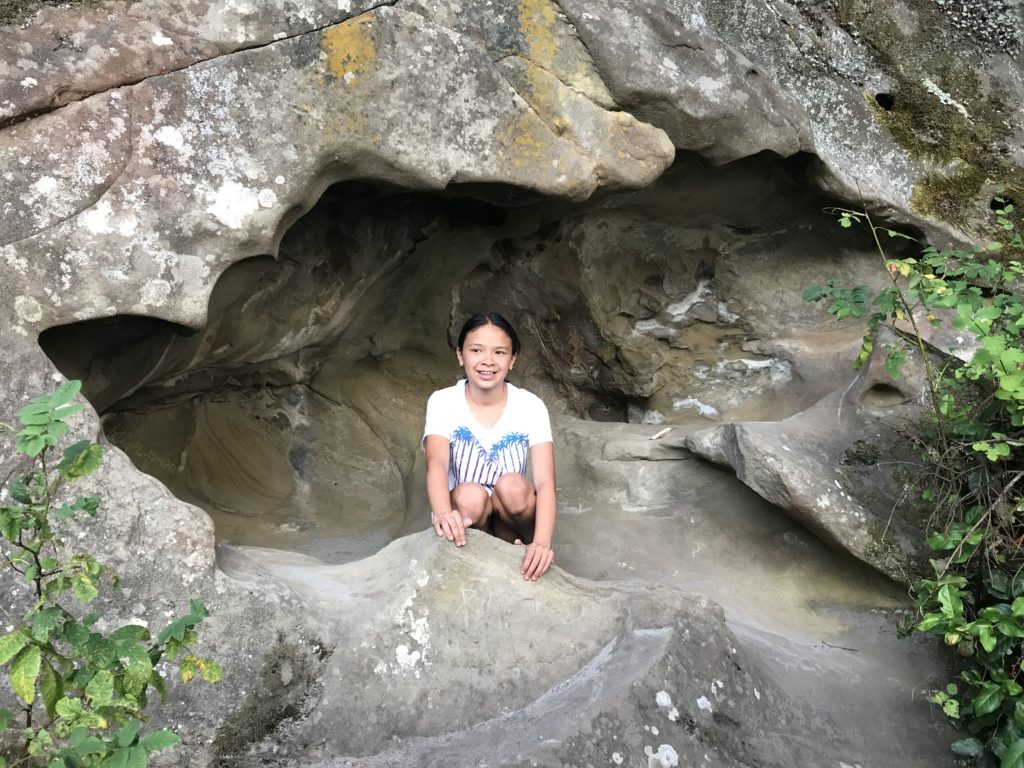
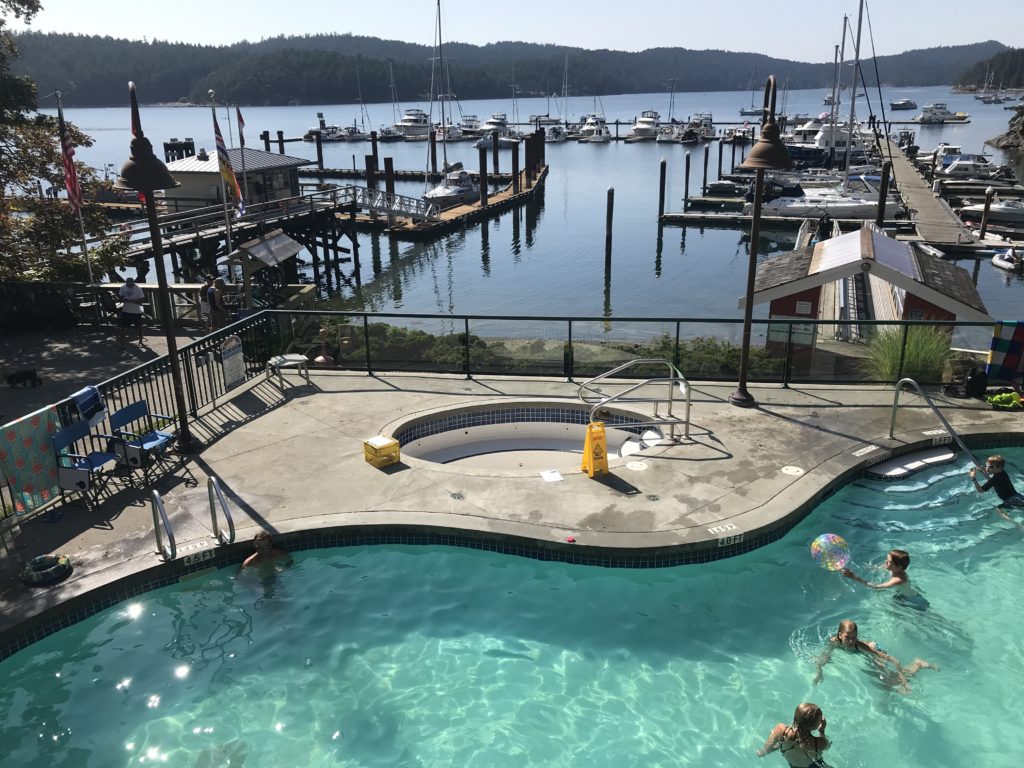
Pictures from an 8-day (3oo nautical miles round trip) sail to the San Juan and Gulf Islands. An overnight stop at Port Townsend was followed by mostly motoring across a flat Strait of Juan de Fuca. We did a big counter clockwise loop with stops in Sucia Island, South Pender Island, Piers Island, and San Juan Island. We made the return trip from Roche Harbor to Lake Union in 14 hours by waking up at 5am to ride an ebb tide down Haro Strait and into Jaun de Fuca Strait, then hitting Port Townsend and Admiralty Inlet at max flood. We reached Kingston at 4pm so decided to keep going since we had 3 sails up on a broad reach, sailing wing on wing with the Genoa and Mizzen sails to starboard, and Mains’l to port.
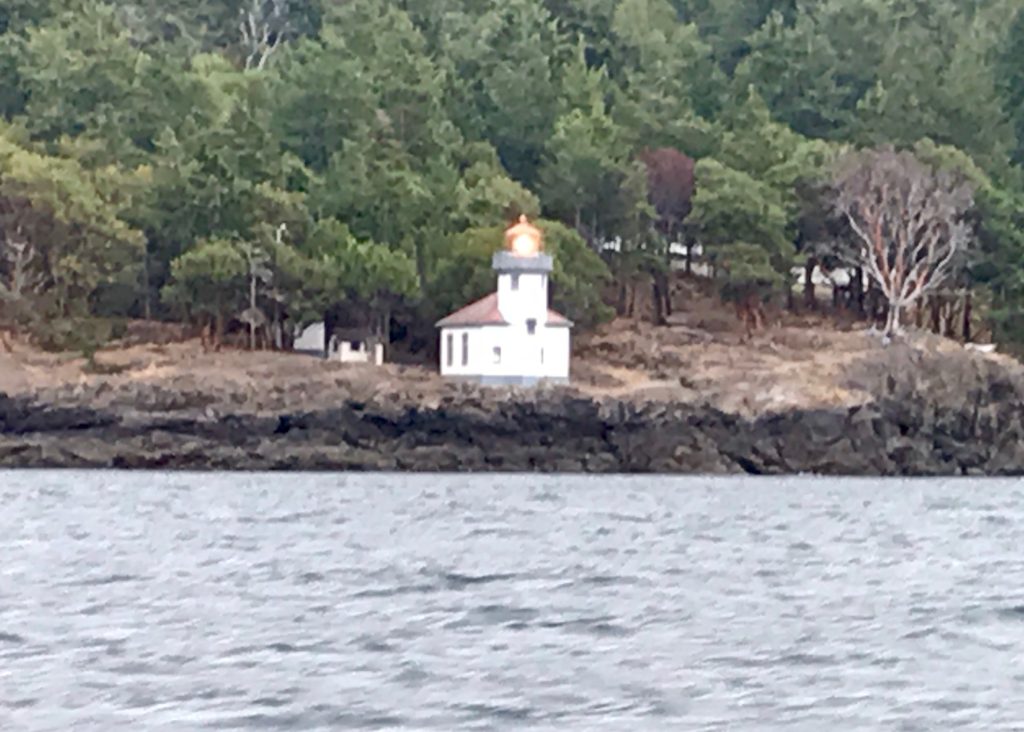
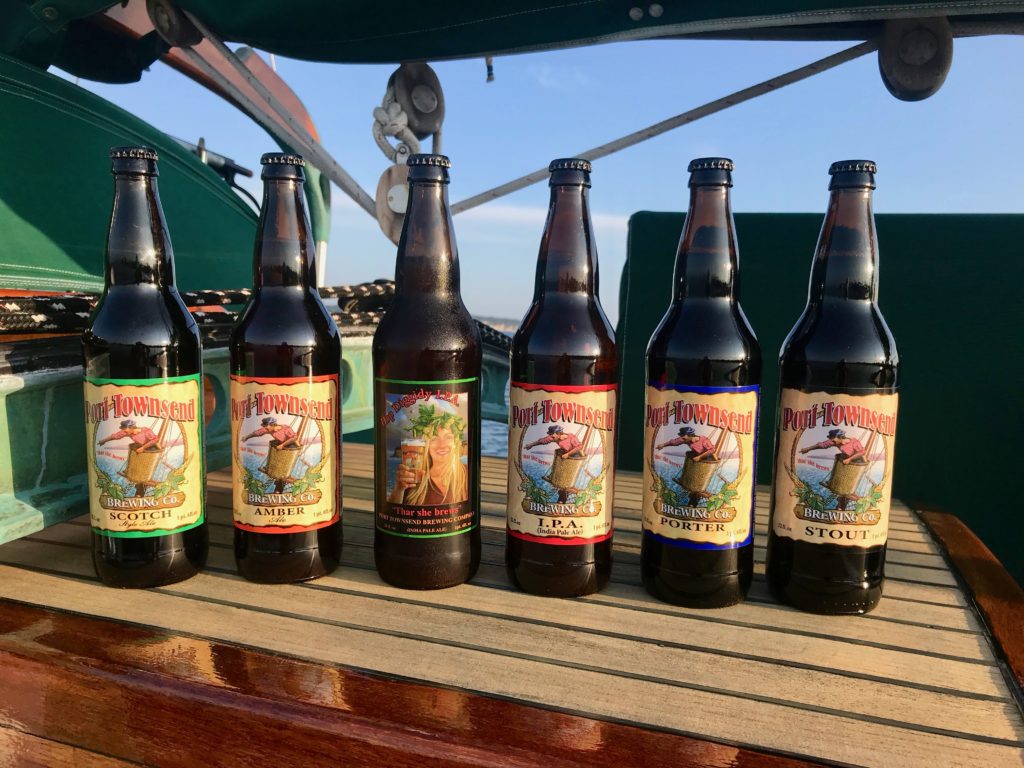
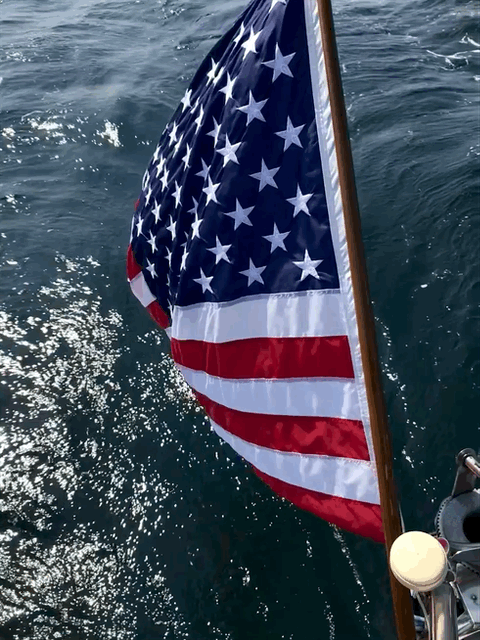
Anchored at Port TownsendMt. Baker from Rosario StraitSucia Island anchorageToasting marshmallows on Sucia IslandChamps favorite place on passagesExploring limestone caves on Sucia IslandUsing the pool at Poet’s Cove (South Pender Island, BC)Champ got dyed with blackberry juice while on Piers Island, BC (credit Jacintha, Billy, and Gracie)Roche Harbor, San Juan IslandLighthouse on San Juan IslandSailing wing-on-wingPort Townsend BreweryStern flag
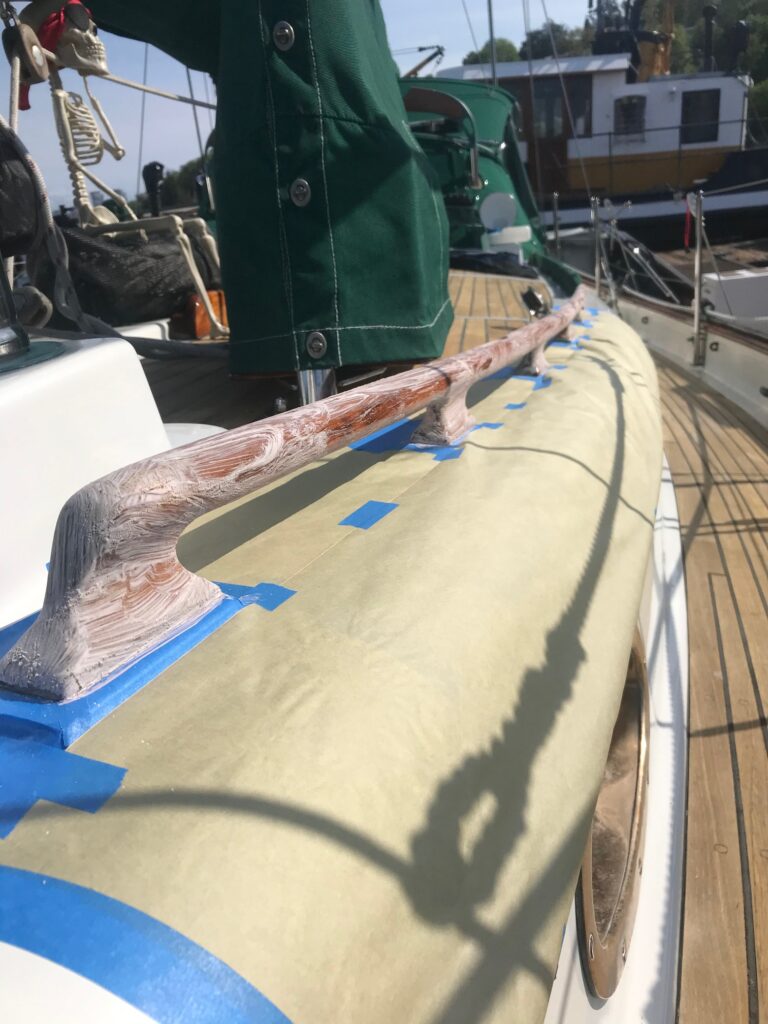
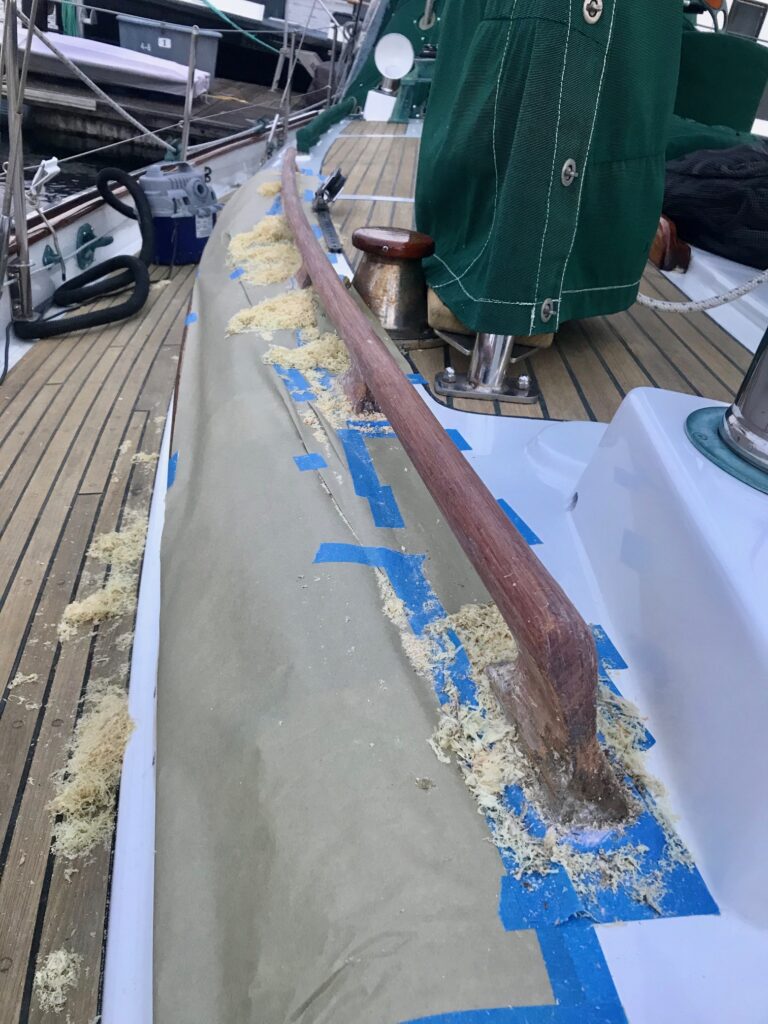
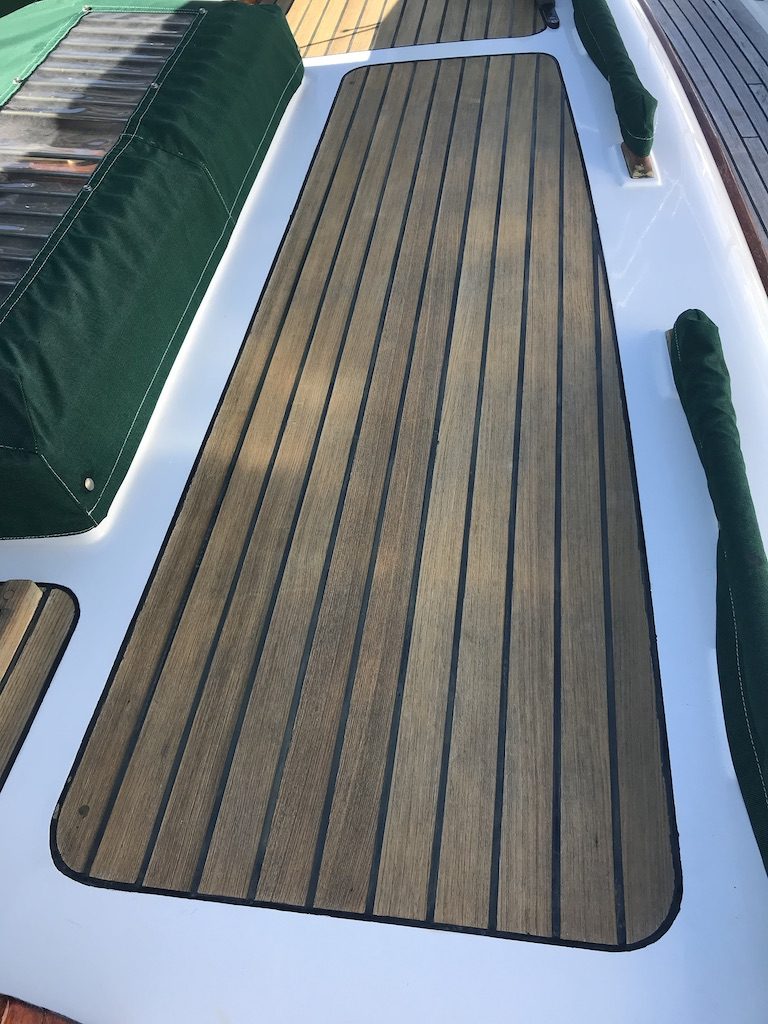
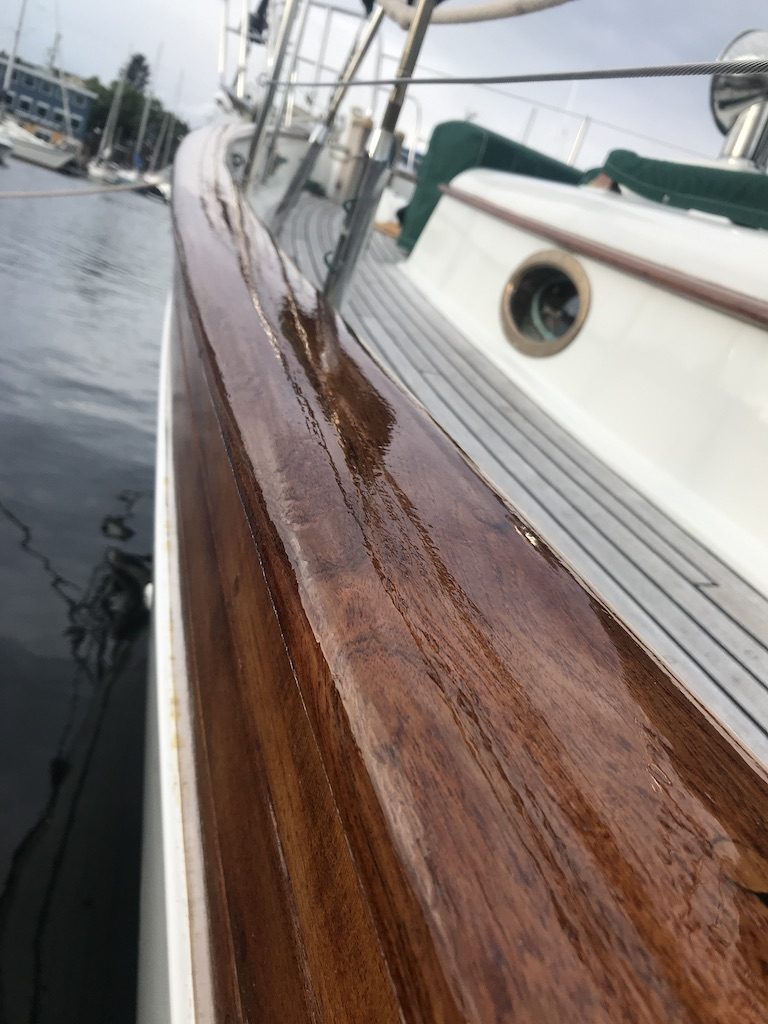
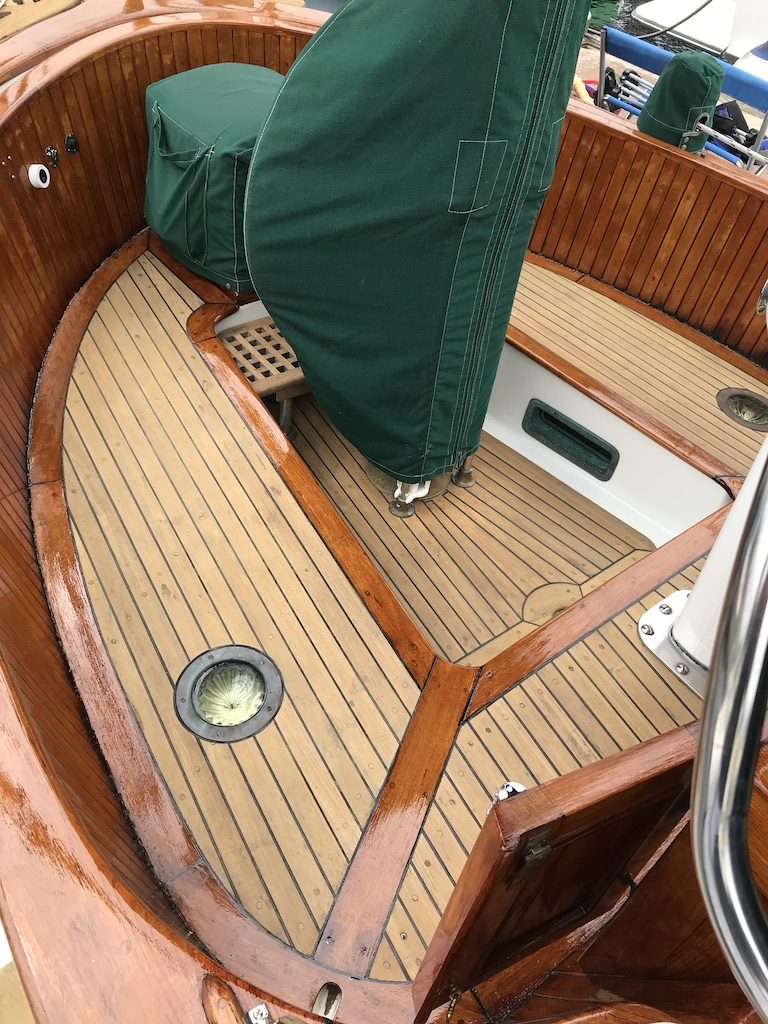
I’ve always let my teak decks go to their natural grey color. A lot of boats with 36 year old teak are ripping up the teak planks and replacing it with low maintenance finishing such as Awlgrip Nonskid. Usually the reasons are because the teak has worn thin from age, scrubbing and bleaching or the deck is beginning to leak. I love the look and feel of teak decks and am starting to worry about the remaining life of the teak on Apropos, so I decided to take some action. First of all, I believe there is plenty of thickness to the teak planks on Apropos, and I don’t know of any leaks in the decks. I figured since the boat sat covered on the hard in arid San Diego for 12 years (by the previous owner), the teak hasn’t aged as much as most boats the same age. Plus I’ve been careful about not scrubbing them with stiff-bristle brushes, and have never pressure washed them. I also believe the best shape they were in was during our trip where they were constantly bathed in saltwater, which is a good natural cleaner for teak.
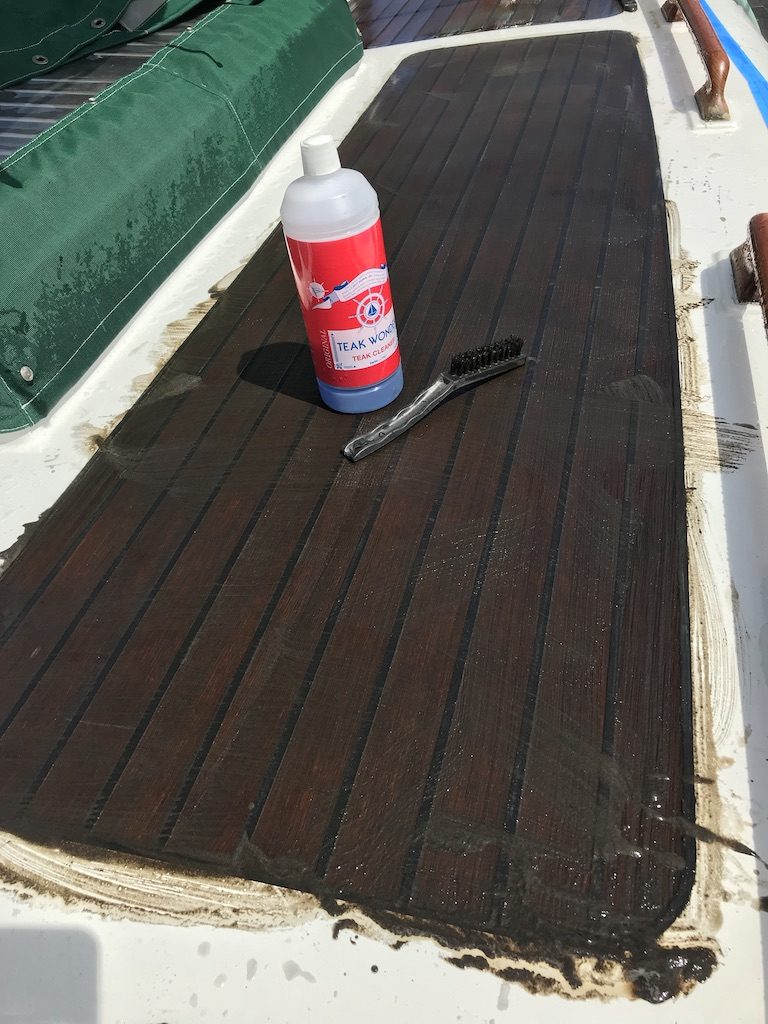
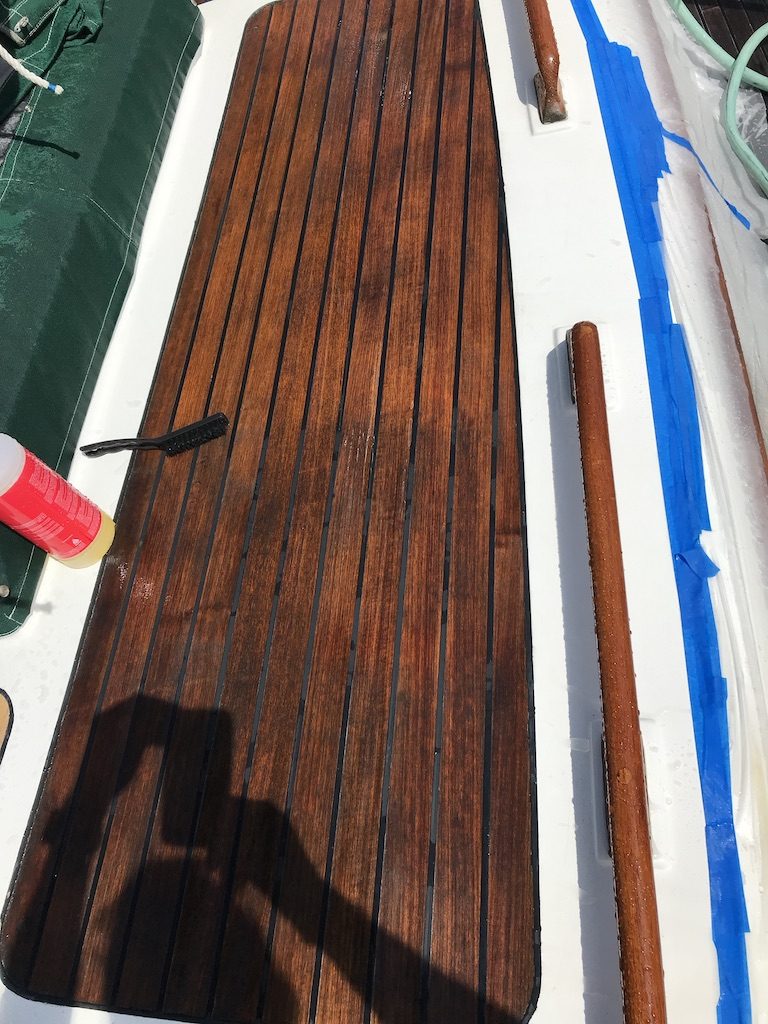
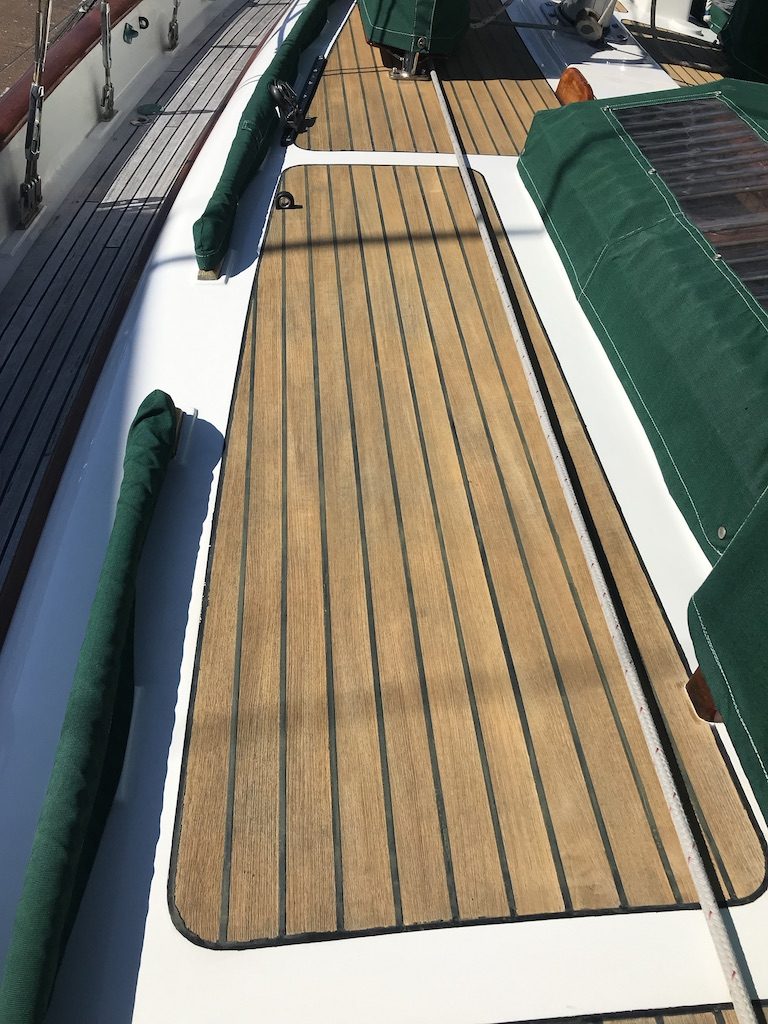
I’ve been hearing and reading about a product called Semco that is used to seal teak decks and thought I’d give it a try. Initially I was only going to treat a small part of the boat–the cockpit, but I liked the results so much that I ended up doing the entire boat. The procedure is to first clean the teak, then brush on 2 coats of Semco in the same day. After that, a seasonal coat should be all it takes to keep the teak looking a natural color. And more importantly, it should help preserve the teak without scrubbing.
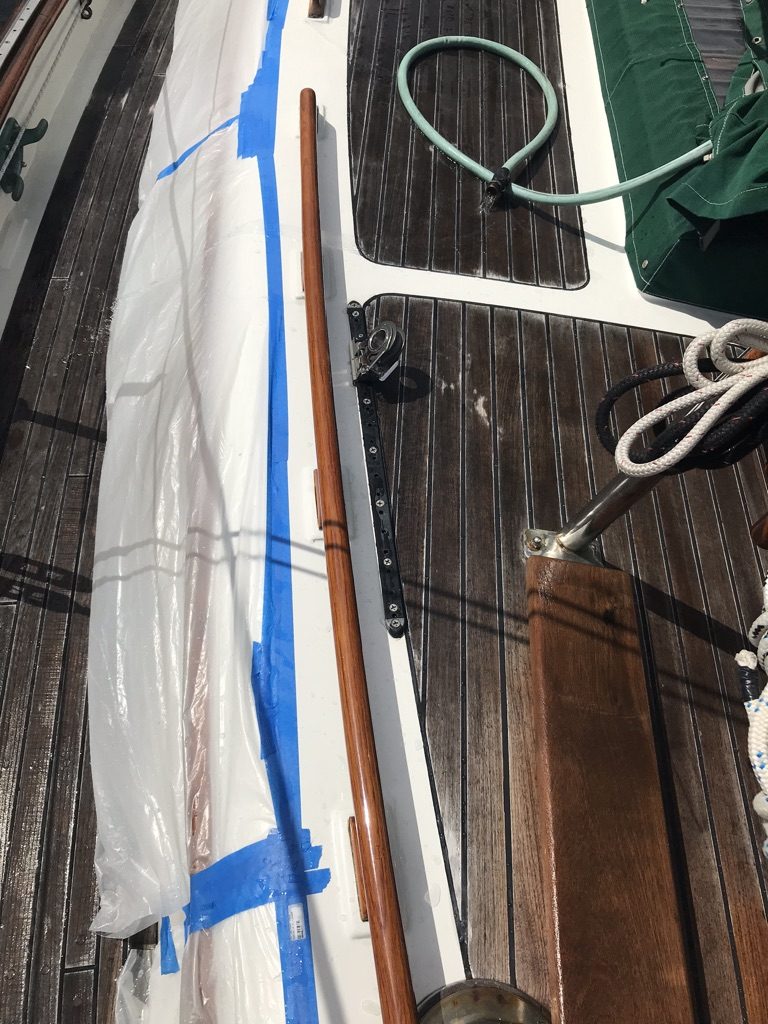
The cleaning is the worst part because it requires strong chemicals that could harm the deck if done incorrectly. There are several products for this and I chose Teak Wonder, which is applied in 2 steps. First is the Cleaner solution that is applied to a wet deck in small sections at a time, not allowing it to dry. I applied it from a squirt bottle and worked it into the wood with a soft nylon brush, scrubbing against the grain of the teak. I allowed it to work for a few minutes before hosing it off. It must take off a very thin layer of wood along with the dirt because it’s pretty grimy before hosing it off with lots of fresh water. The second step is to apply a brightener and gently brush it in, letting it sit for a few minutes before hosing off. I was careful about not letting the cleaning and brightening chemicals to come in contact with the brightwork by masking it with plastic. This cleaning is definitely something I wouldn’t want to do every season. If it works as advertised, I should only have to apply the sealer from here on.
Applying the Semco sealer is very easy–just brush it on with a foam brush. The first coat seemed to soak in more of the sealer, which has a natural pigment and is the consistency of water. The instructions recommended applying 2 coats in the same day. After drying, the decks looked pretty good and appeared to be well sealed as water beaded up when sprayed on the deck.
Grey weathered look before cleaning & sealingApplying Teak Wonder CleanerProtecting newly treated brightwork from the cleaner & brightenerAfter applying Teak Wonder cleanerApplied the Teak Wonder brightener to the top half of this panelAfter cleaner and brightener and allowed to dryAfter 2 coats of Semco sealer (contrast to side-deck that was done later)
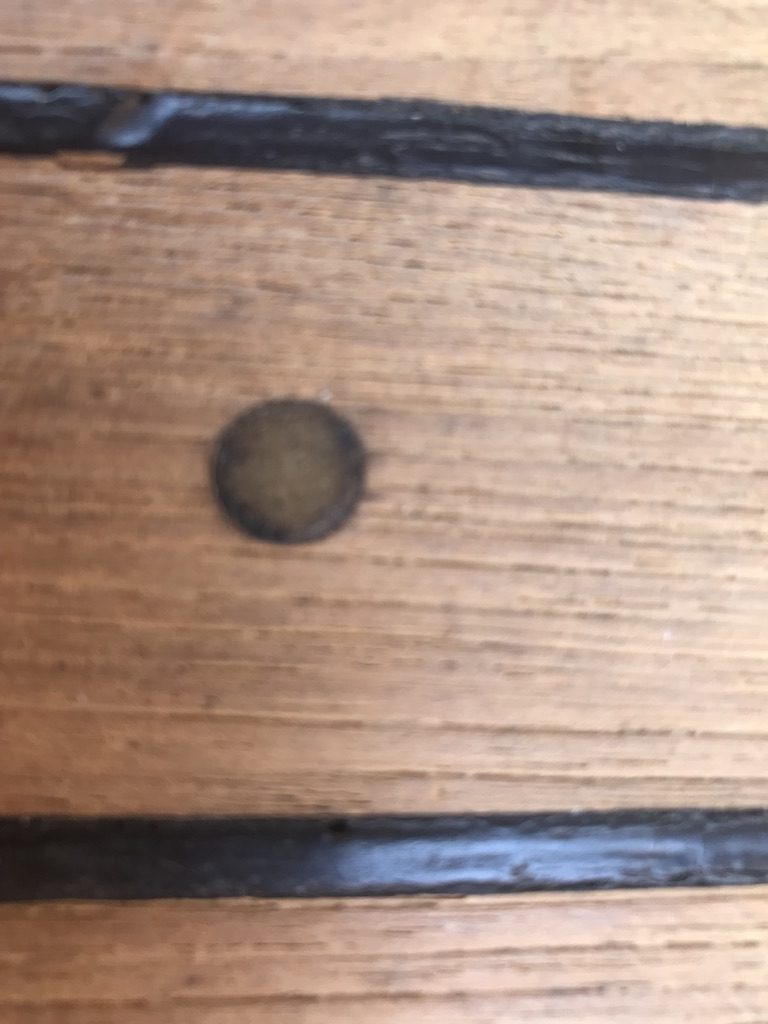
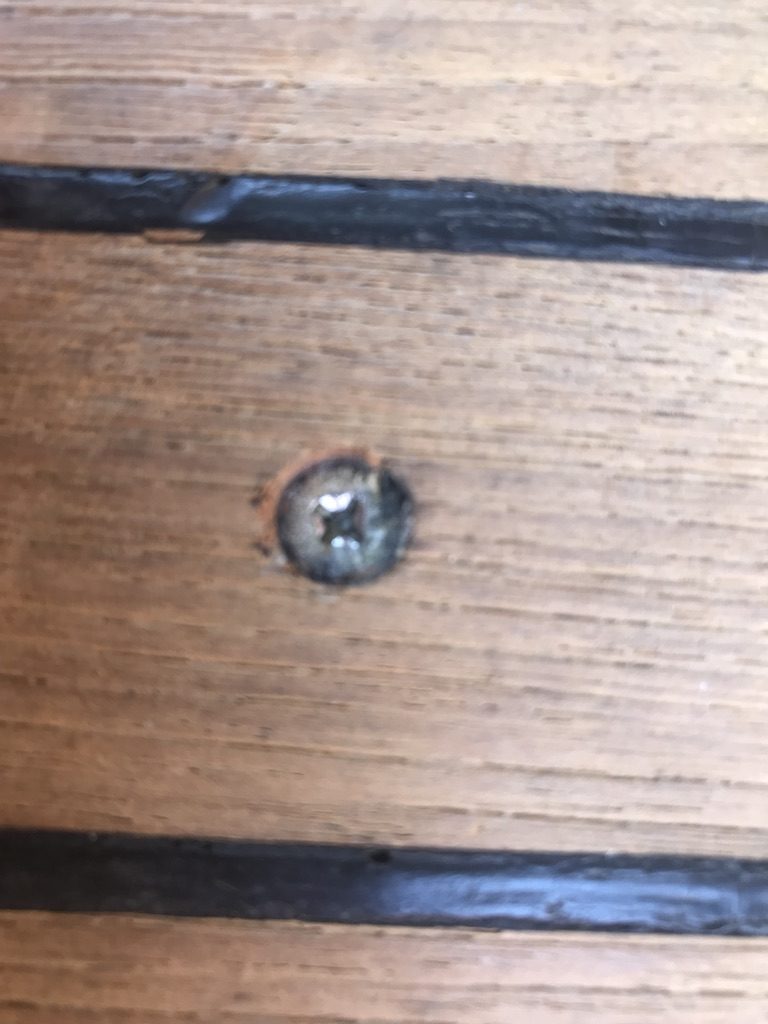
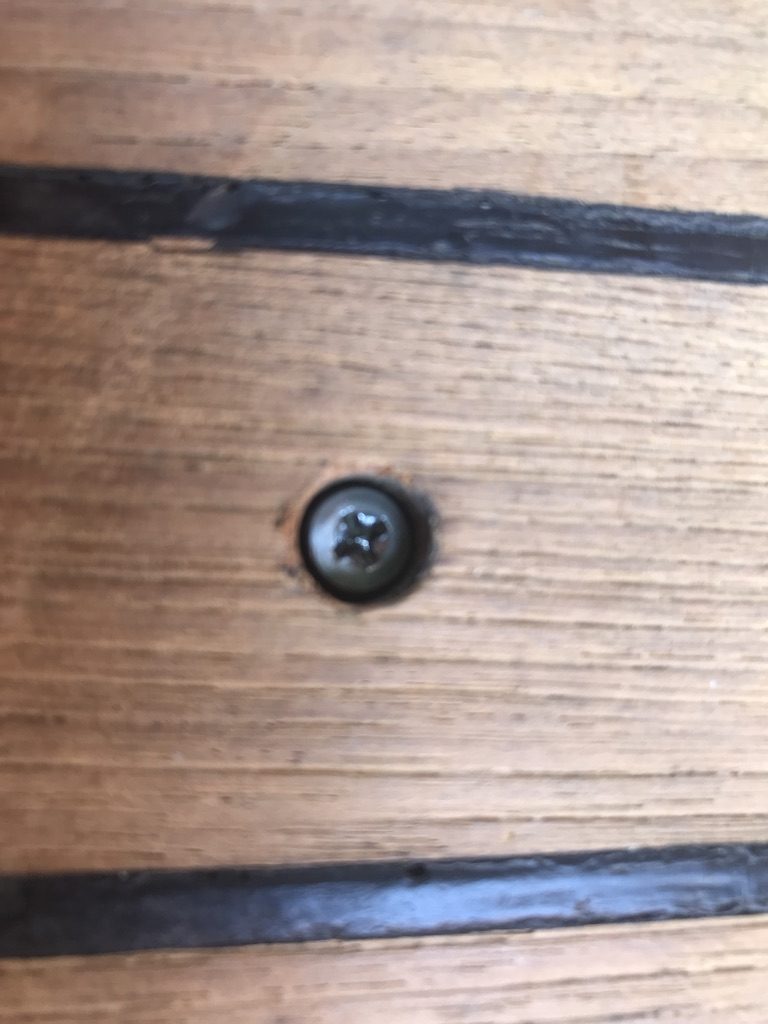
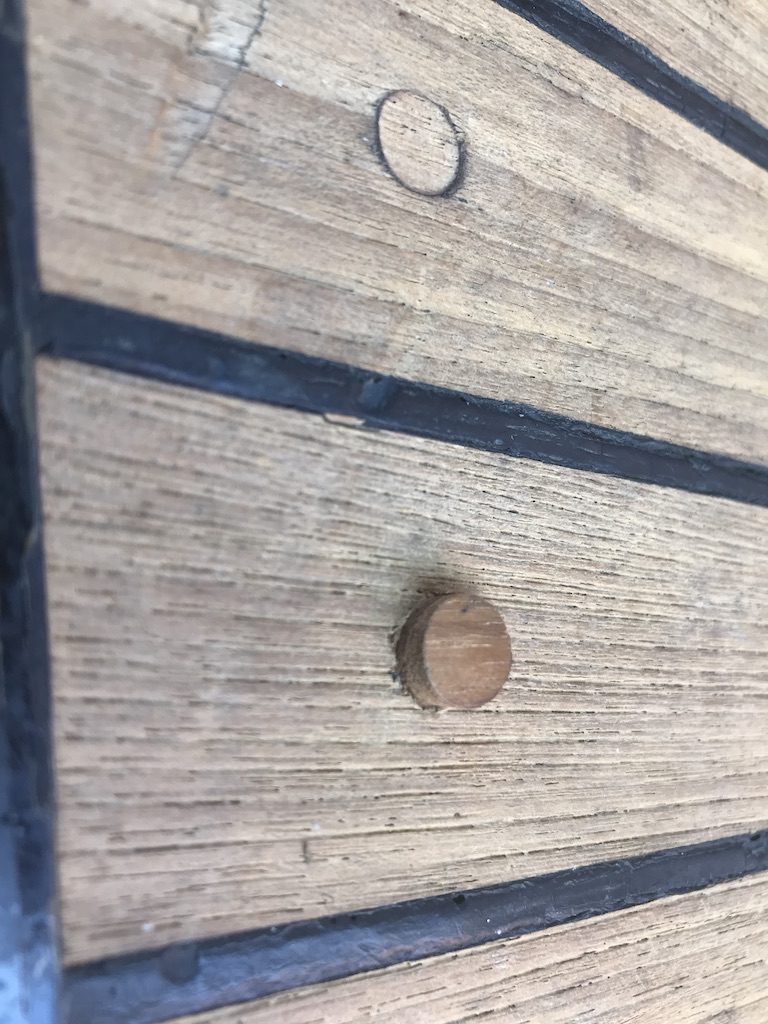
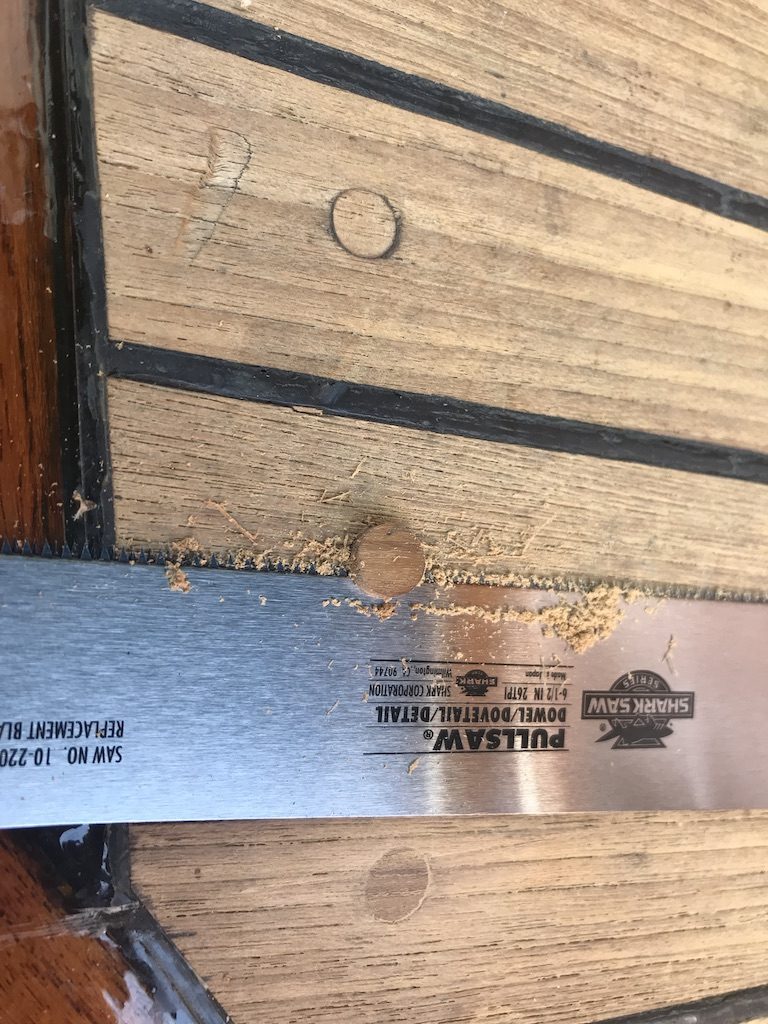
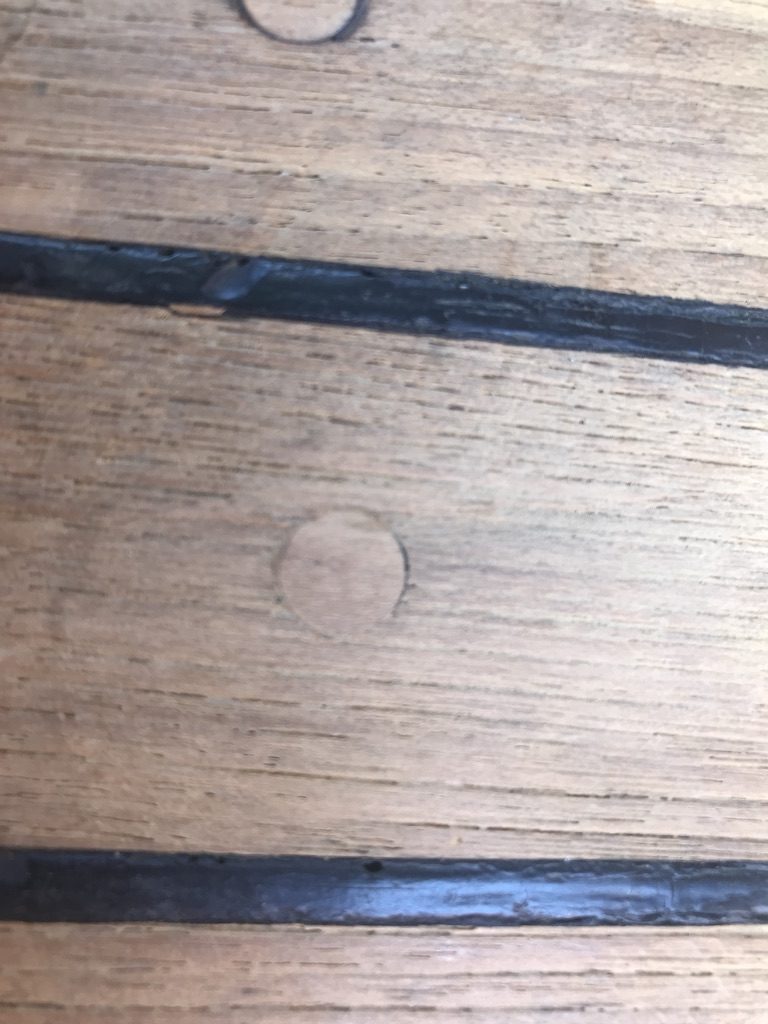
Teak Plug Replacement
The cabin-top decking has no plugs so it must have been glued down, but the sidedecks and cockpit decking is all screwed down. Every now and then a teak plug, or bung, either falls out or wears thin. I recently went around the boat and replaced around 20 plugs. Here’s pics from one example:
This plug was filled with epoxy because it was too shallow for a teak plugAfter removing epoxy to expose screwAfter drilling a deeper hole and screwing in a shorter screwNew teak plug Cutting off excess with a flexible pullsawFinished after sanding
It took me 2 summers to restore all of the brightwork aboard Apropos by removing the old varnish and applying 7 coats of Awlwood MA Clear (varnish alternative). Some parts of the boat have gone 3 years and some 2 years since the new brightwork and it was holding up well, but starting to show minor wear and scratches (after all it is a boat and we have a dog). So I spent a couple of evenings and weekends lightly sanding and applying 2 refresher coats of Awlwood MA clear. It brought the shine back!
Cap rail after 2 refresher coats of Awlwood MA ClearCockpit Brightwork
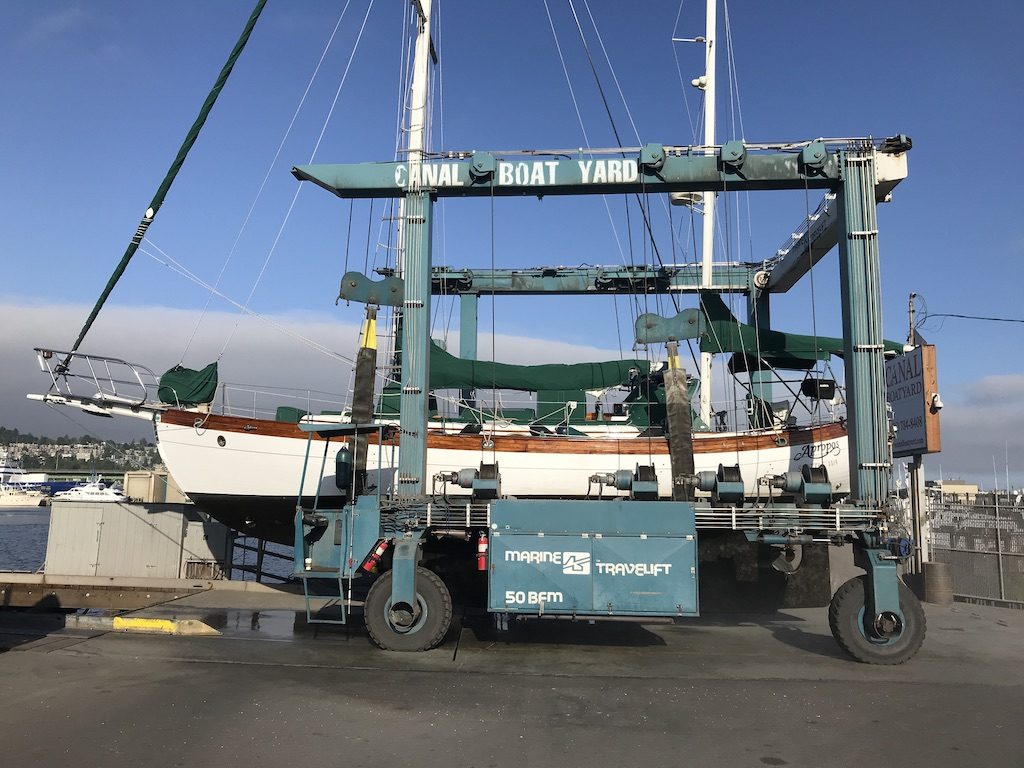
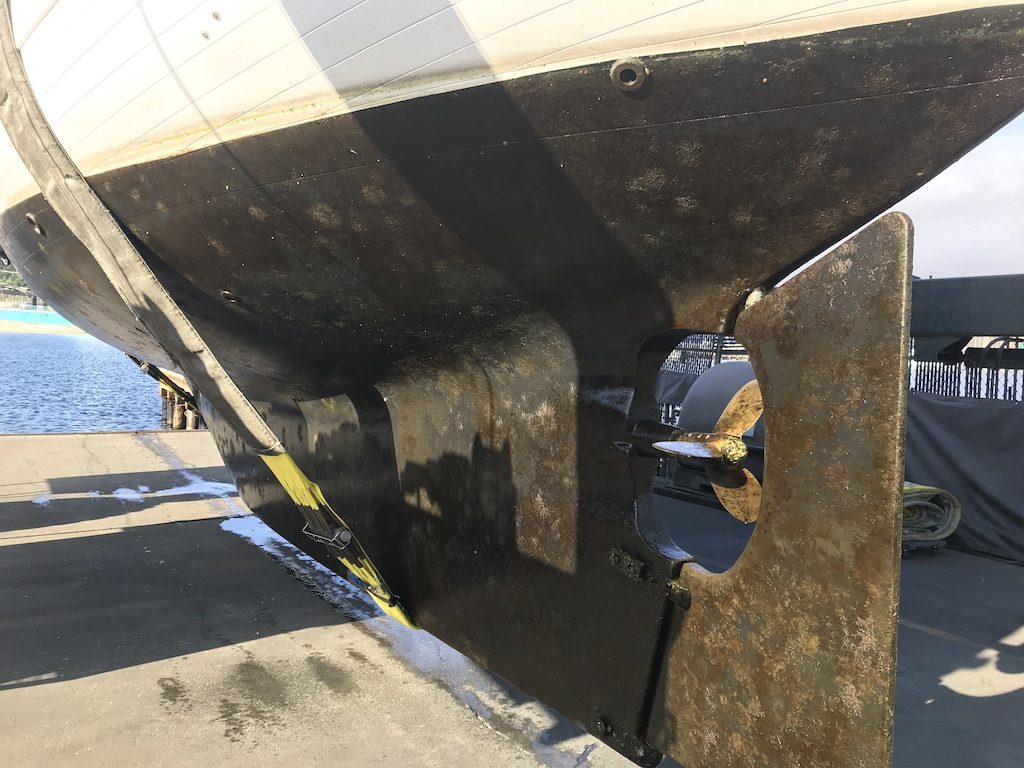
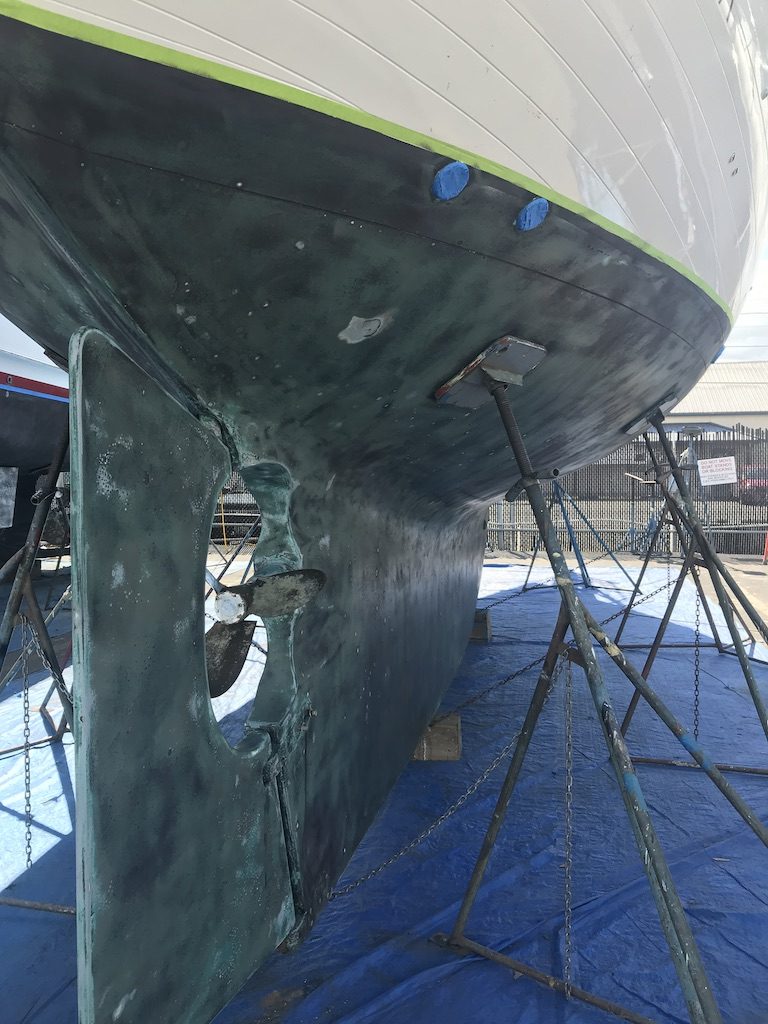
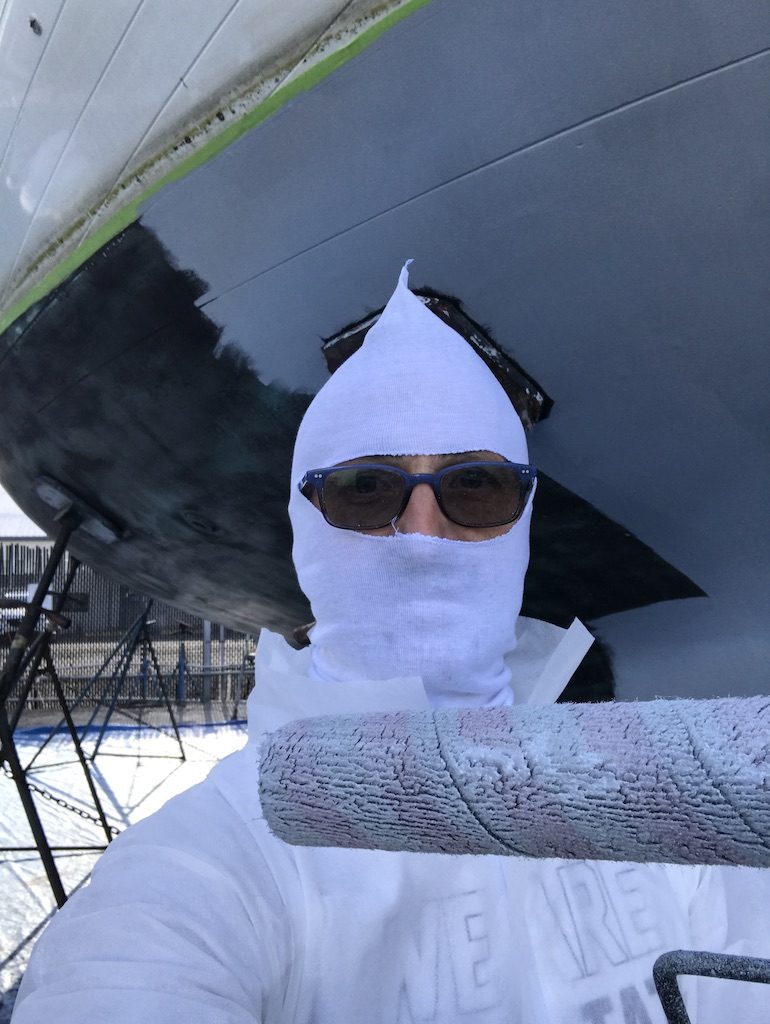
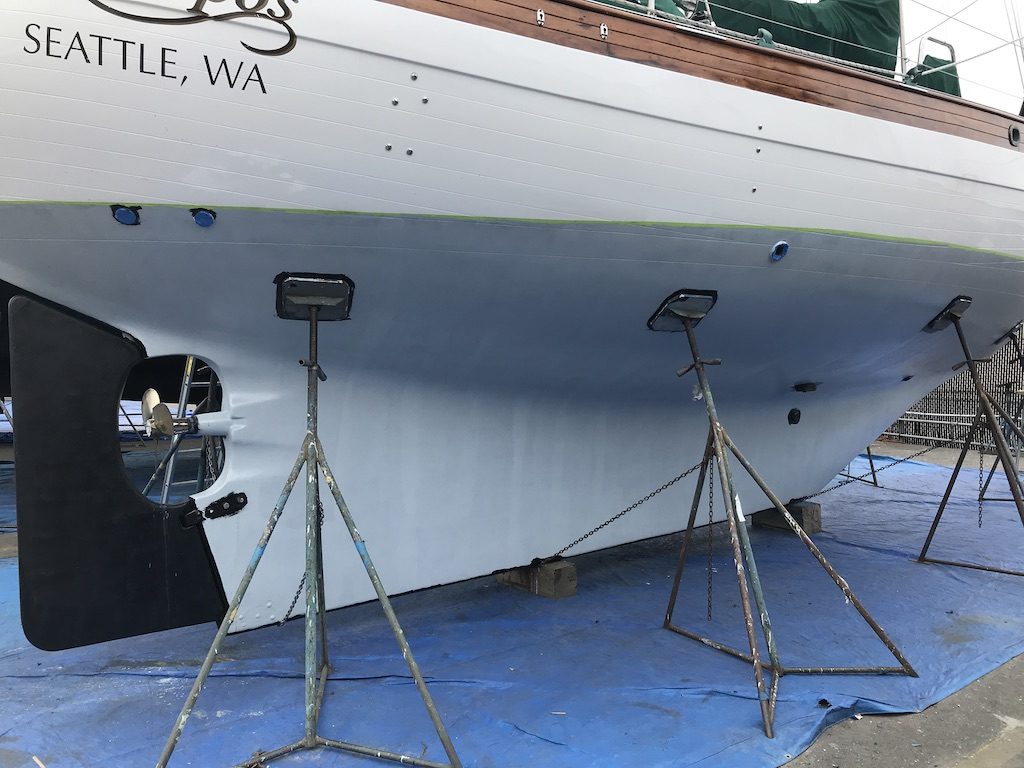
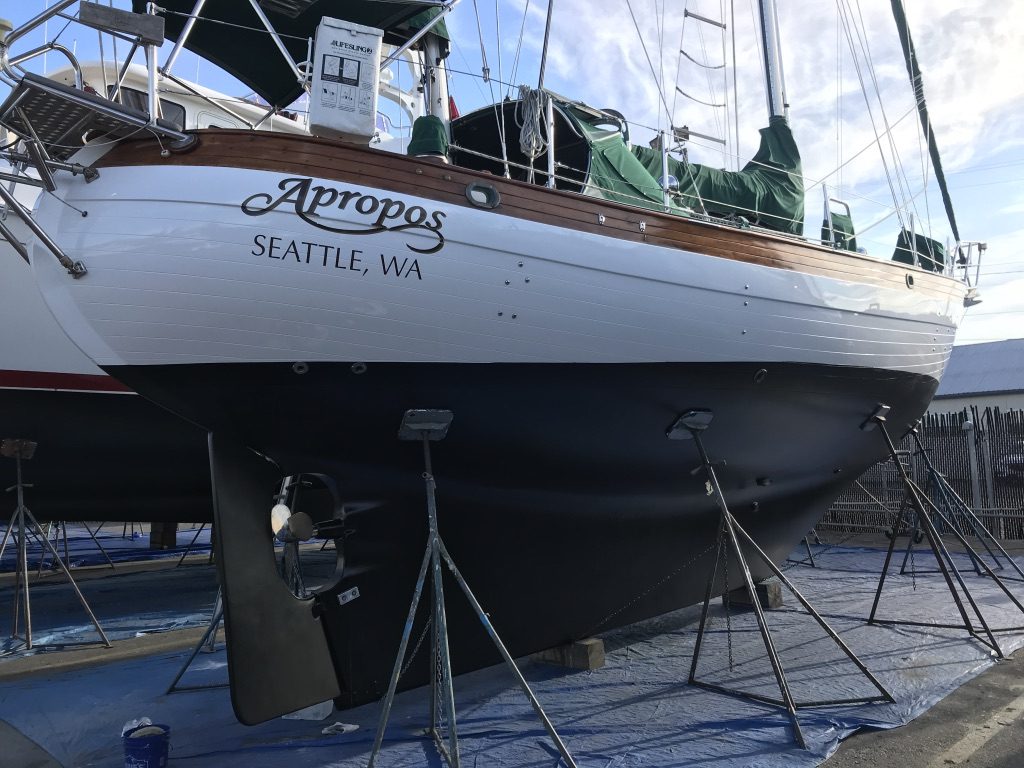
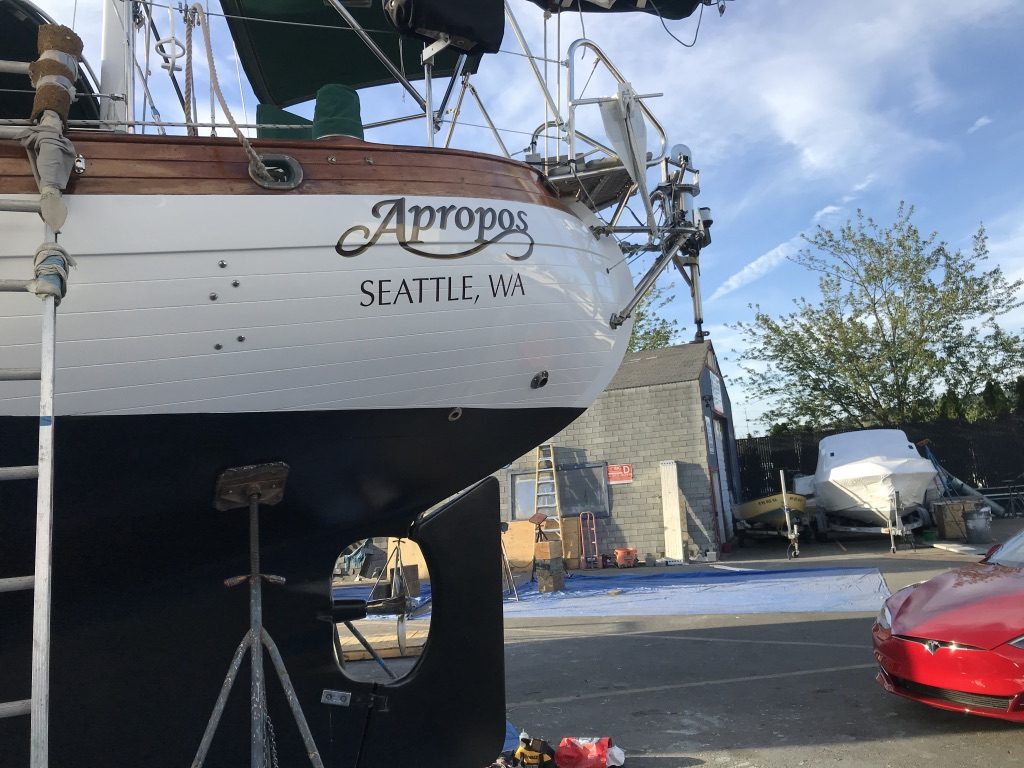
Apropos hasn’t been out of the water since April 2016 when she was in Fiji, so she was due for some new bottom maintenance. We hauled out on a Thursday morning and put back in the water the following Monday morning. During those 4 (*very long*) days, the following took place:
Roll on 2 coats of Interlux Micron Extra bottom paint (me)
Clean outer hull with Meguires Cleaner/wax (me)
Machine polish the outer hull with Marine Polish & variable speed polisher (me)
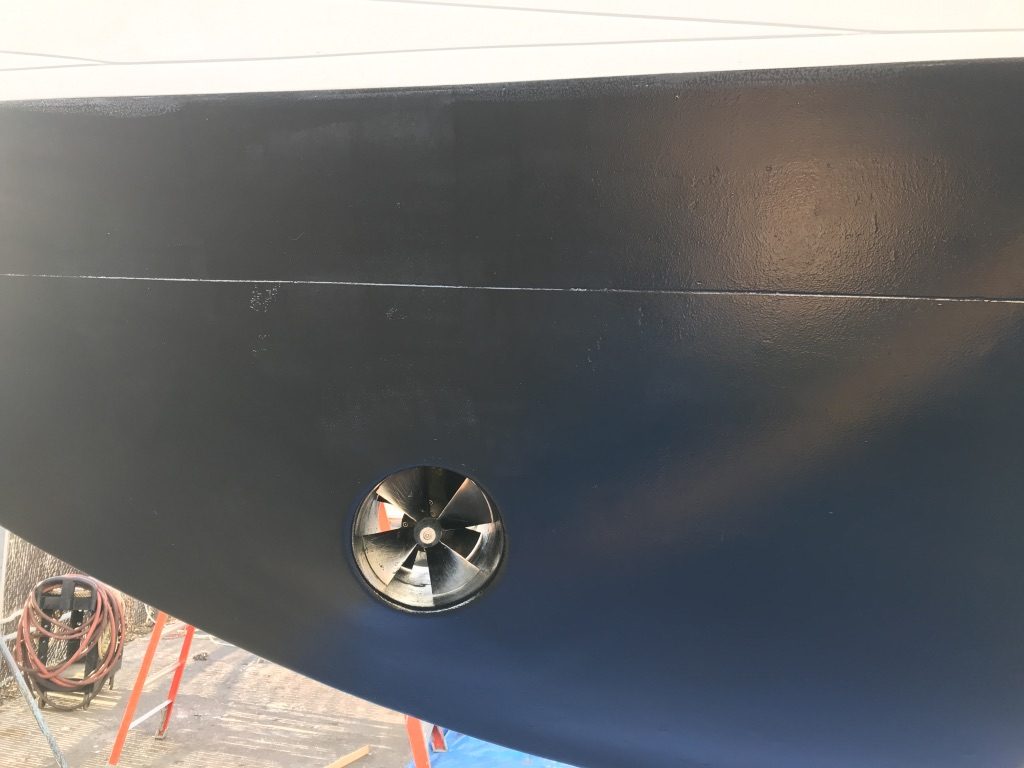
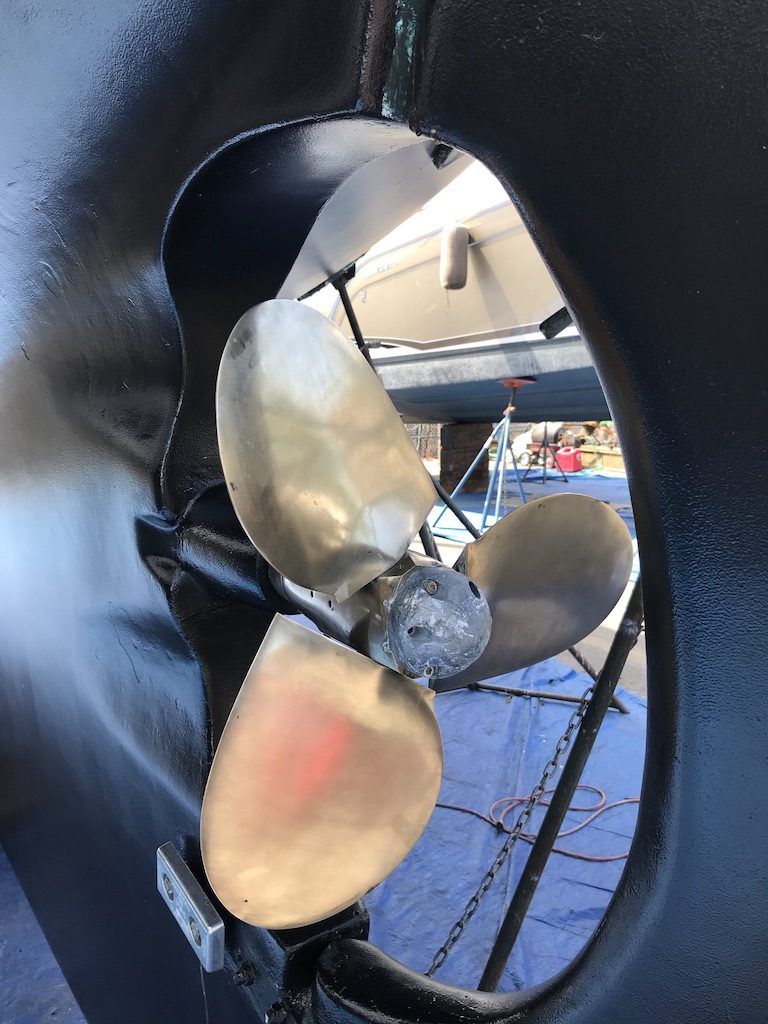
Change all 6 zinc anodes (me)
Polish and lubricate propeller (me)
Replace speed transducer and rewire (me)
Apropos in travel lift at Canal BoatyardOver 6000 nautical miles with that bottom paintAfter power sandingIt’s good to cover up as much as possible!First coat of bottom paint done in Shark Grey for contrast when applying 2nd coatFinished 2nd coat with blackCleaned up bow thruster and replaced zincsCleaned and greased Max Prop feathering propCleaned and polished hull
Main Halyard, Spinnaker Halyard, General purpose Halyard
4- 10, 1-speed
Mizzen Halyard, Mizzen Sheet, Main Out-haul, Main Reefing
Winch numbers (multiplied by 100), are standardized according to their strength. For example, size 28 is capable of 28,000 lbs of load.
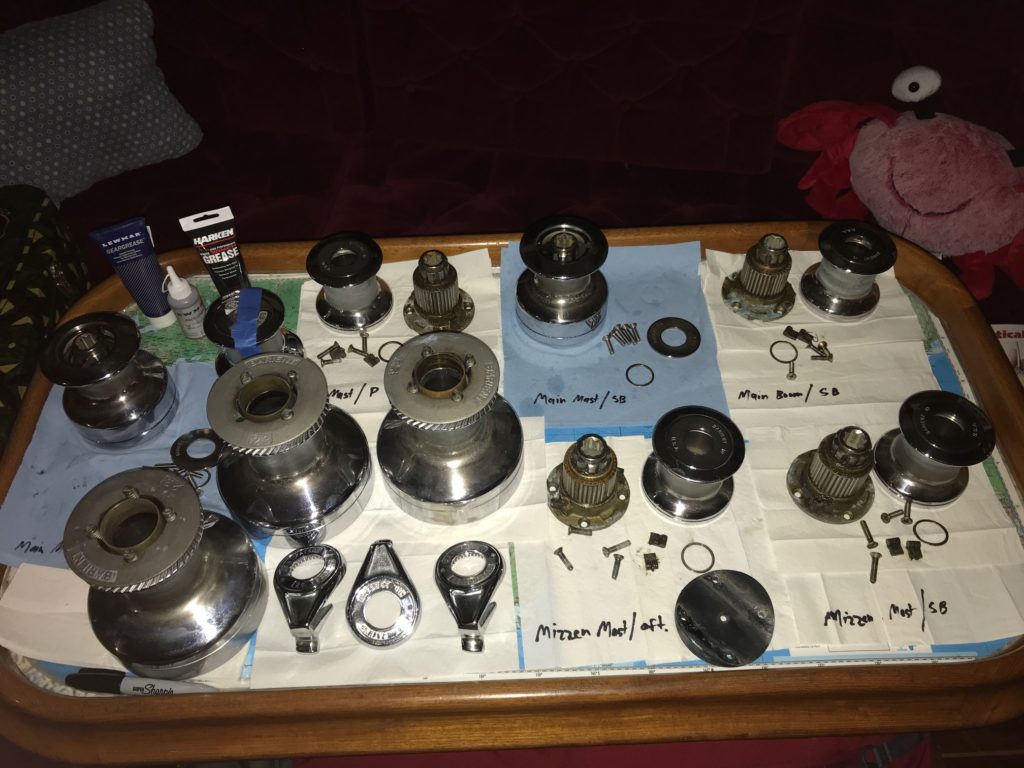
All winches were serviced in 2004 during a major refit just before I bought the boat. We serviced the 2-28s and 3-23s in 2014 before our South Pacific cruise. So we were far-overdue for a complete cleaning/lubing of all 12 winches.
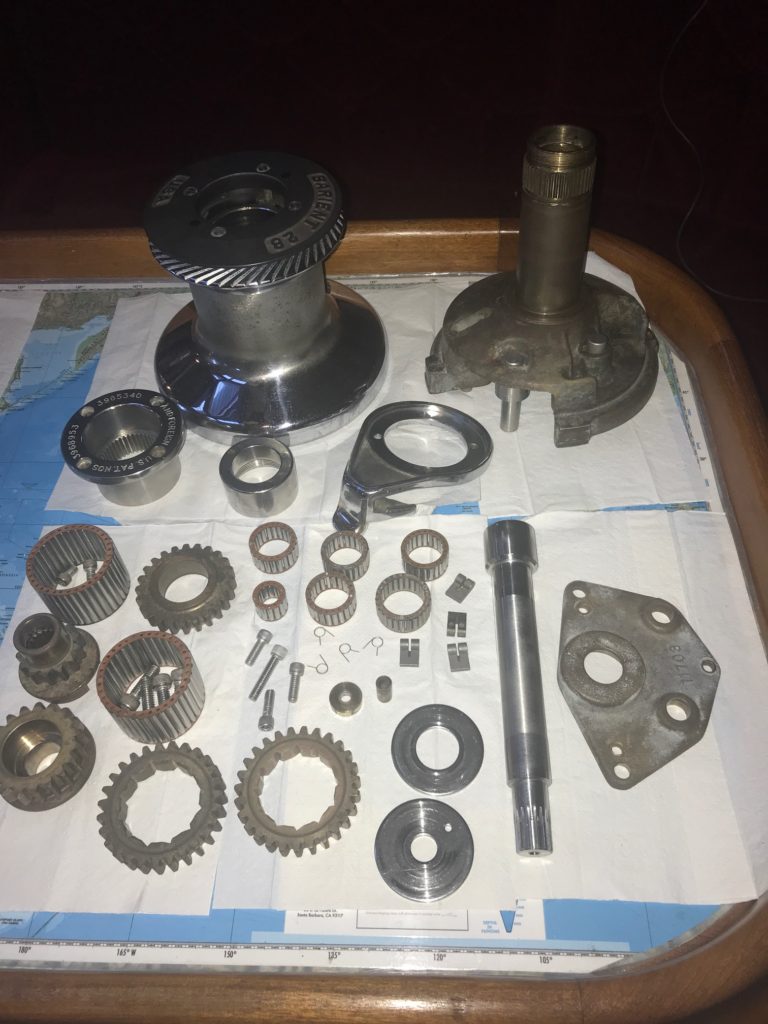
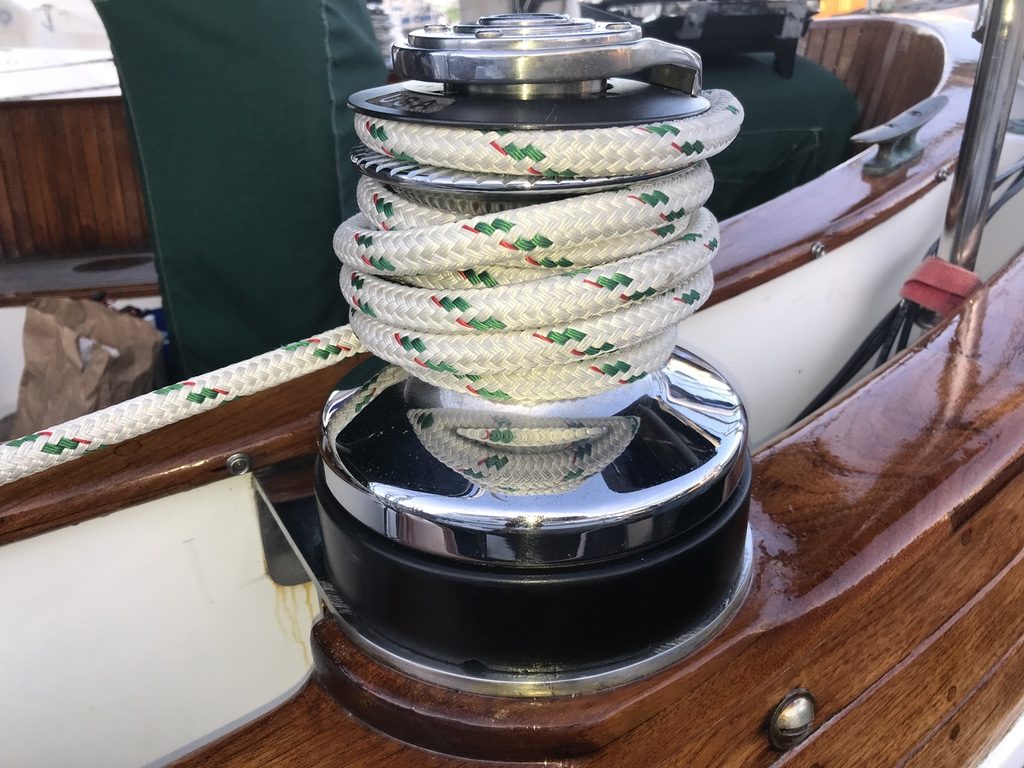
4 Barient 10s, 3 Barient 18s, and 3 Barient 23s
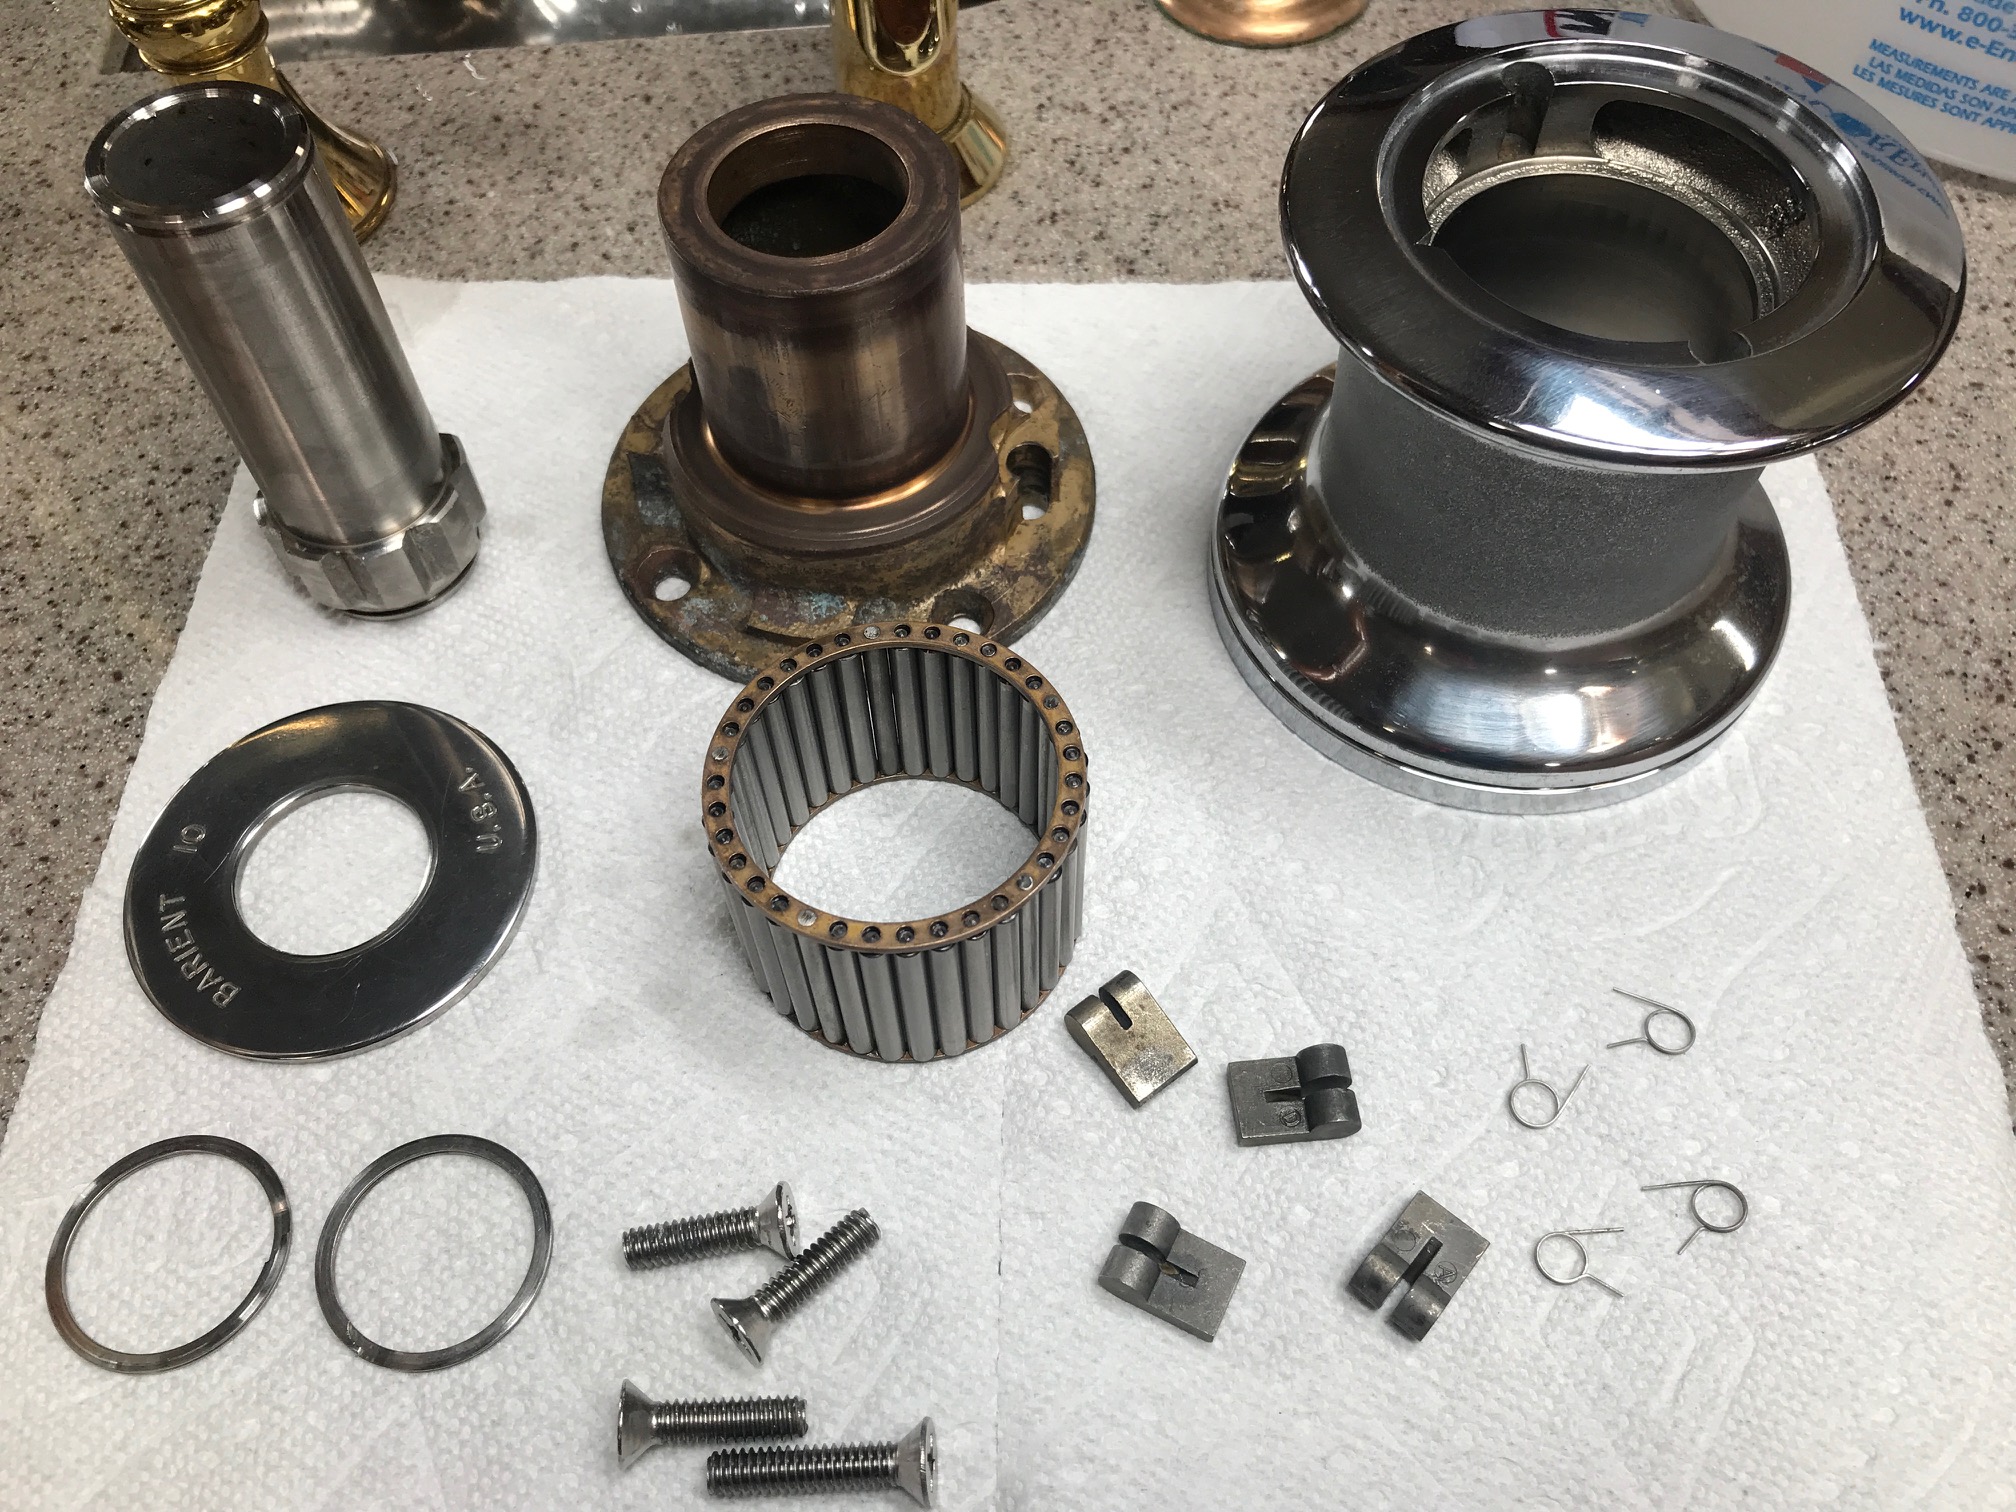
The 7 smaller winches (Barient 10s and 18s) are fastened to the masts or boom with 4 or 5 ss screws and can be easily removed for servicing. But the 3 Barient 23s are mounted with ss screws but also bedded down to the cabin top with something not easily removable. These can be serviced by disassembling the winch in place. The 2 Barient 28s can also be removed but requires unbolting 5 ss hex bolts that attach them to aluminum winch bases.
The Barient 10s and single speed winches and are the simplest to take apart and clean. Here are the basic steps for servicing these small winches:
Separate the drum from the internal parts by removing the snap spring and cover plate and carefully pulling the drum off. Remove the 2 pawls/springs at the top of the drum.
Remove the 4 ss screws that fasten the winch to the boat.
Disassemble the winch by first removing the snap spring on the bottom of the winch base and remove the 2 pawls/springs.
Slide the cage bearing off the shaft
Clean all parts with mineral spirits to remove grease and dirt. A toothbrush is helpful on the cage bearing and bronze wool can be used on the bronze and ss parts. The drum has a chrome plating and bronze wool is safe to use on it.
Assemble in reverse order. Oil the pawls/springs with pawl oil (never use grease). Lightly grease the bronze shaft and cage bearing with winch grease.
Screw winch in place using Tef-Gel on the ss screw threads when going into aluminum mast/boom. Carefully slide drum back onto the winch while squeezing the pawls (front 2 first, then back 2) so they clear the ratchet teeth.
Barient 10 Parts
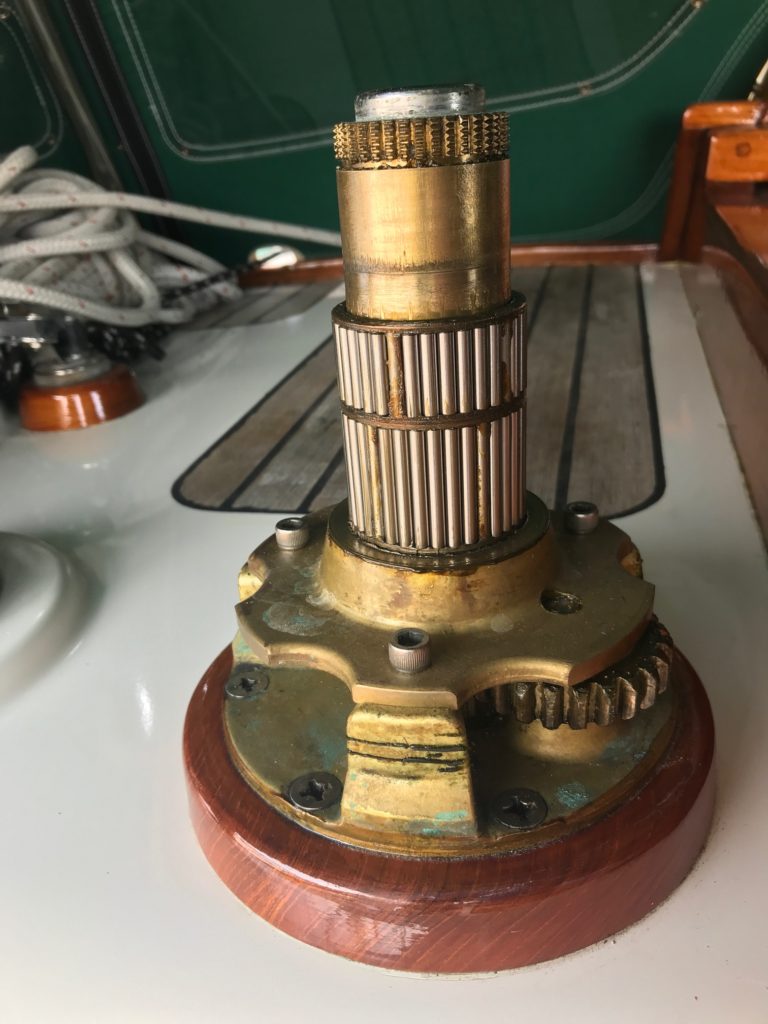
The larger 2-speed winches (Barient 18) steps are similar but there are more gears and bearings. The Barient 23s have even more parts (30 total!). It’s good to take pictures during disassembly to reference when putting it all back together. Apropos has 2 identical 23s next to each other so I was able to look at an assembled one while assembling the other.
Barient 23 2-speed self-tailing (before cleaning)
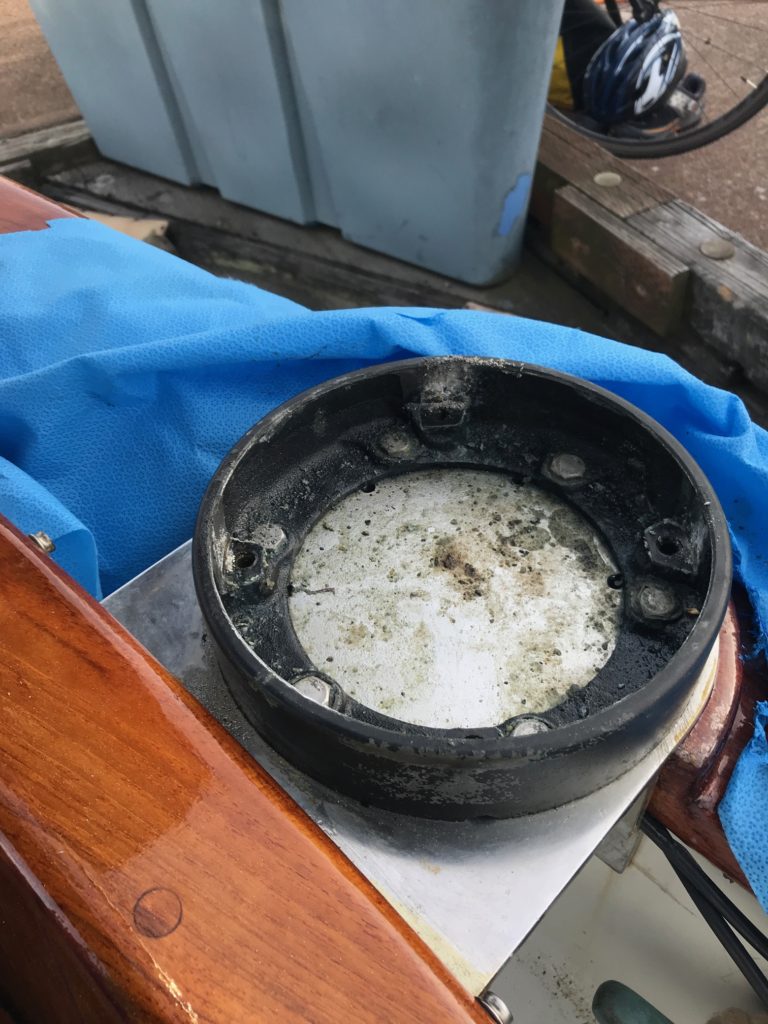
The largest winches on Apropos are the 2 Barient 28ST 2-speed jib-sheet winches. They are also the most exposed winches since they are outboard the cockpit and see the most seawater and dust/debris than the other winches that are under the dodger or on the masts and booms. After removing the drum, there were 4 ss screws holding the winch to the aluminum winch base. But after removing the 4 screws, the winch wouldn’t budge due to corrosion between the bronze and aluminum. We scraped away at the corrosion around the 4 feet and sprayed a generous amount of anti-seize solution on all 4 joints, then allowed it soak for 2 days. It still took some pretty hard hits with a hammer, using a wood block against the winch shaft, to free them.
Aluminum winch base after removing winch
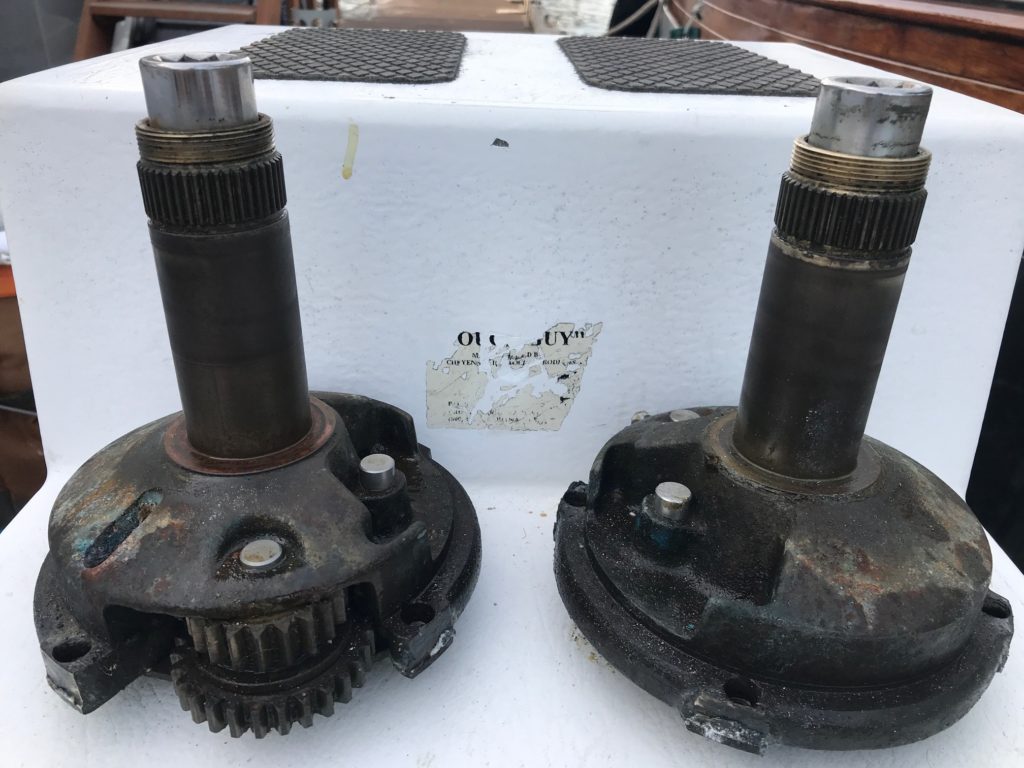
Jib winches removed from base (before cleaning)Cleaned parts from Barient 28 ST 2-speed winchPolished the chrome and painted the black winch bases
Conclusion
Barient winches are built like tanks! There are no plastic parts like in some winches. All the gears are heavy-duty bronze with stainless steel shafts. The cage bearings , pawls & springs are all very high quality. My winches are over 35 years old and after servicing them, are as good as new. I even decided to use my original pawls since they were in great shape, and I read that replacement pawls are not made with as high of quality material as the original Barient pawls, and they cost was something like $12 each (there are 4 pawls per winch X 12 winches, so total cost for just the pawls was going to be $576!).
With so many winches on Apropos, it took a lot of time to service all of them. I estimate it took 2 hours for each of the single speed 10s, and 3 hours for the 2-speed 18s, 23s and 28s. That’s a total of 32 hours spaced out over a week. The only costs were pawl oil, winch grease, and mineral spirits.
A little bit about the history of Barient. The American company was founded by 2 sailing enthusiasts–Derek Baylis, owner of SV Orient, and Jim Michael, owner of SV Baruna. Their purpose of designing and building winches was for use on their own boat (and their friends’ boats). They ended up creating a business by combining the boat names (BARuna orIENT) and produced some of the best winches available. They never really intended to profit from the business, and eventually sold it to Lewmar. Lewmar also purchased the Barlow winch company, then discontinued both the Barient and Barlow manufacturing. Clever way to beat the better competition–buy them out and then keep making only their own inferior product! Parts are no longer made for Barient winches, but the good news is you can find old Barient winches that with some servicing, are probably as good as, or better than the new ones made by other companies.
Winters seem to drag on in Seattle. January was warmer and drier than average, but February was one of the coldest and snowiest on record in Seattle. I still have a few more winter projects that I want to complete before May, like servicing all 8 winches, replacing the canvas along the foot of the Genoa, and replacing some of the parts that are glued onto the main body of the dinghy. But sometimes when I have only a few hours to spend on boat things, I try to pick one thing that improves one aspect of the boat. Today that one thing had to do with storage.
I like an uncluttered boat, but it’s sometimes hard for me to remove something that has been on the boat for a while. When cruising full time, we filled every available nook and cranny with something–gear, spare parts, food, clothing, books, etc. But since we returned, I have to decide what should stay on the boat vs what can be stored in the garage or even thrown away. Things that remain on the boat should have a well thought-out place to live in order to keep the boat organized.
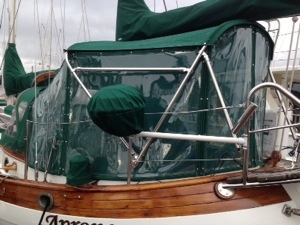
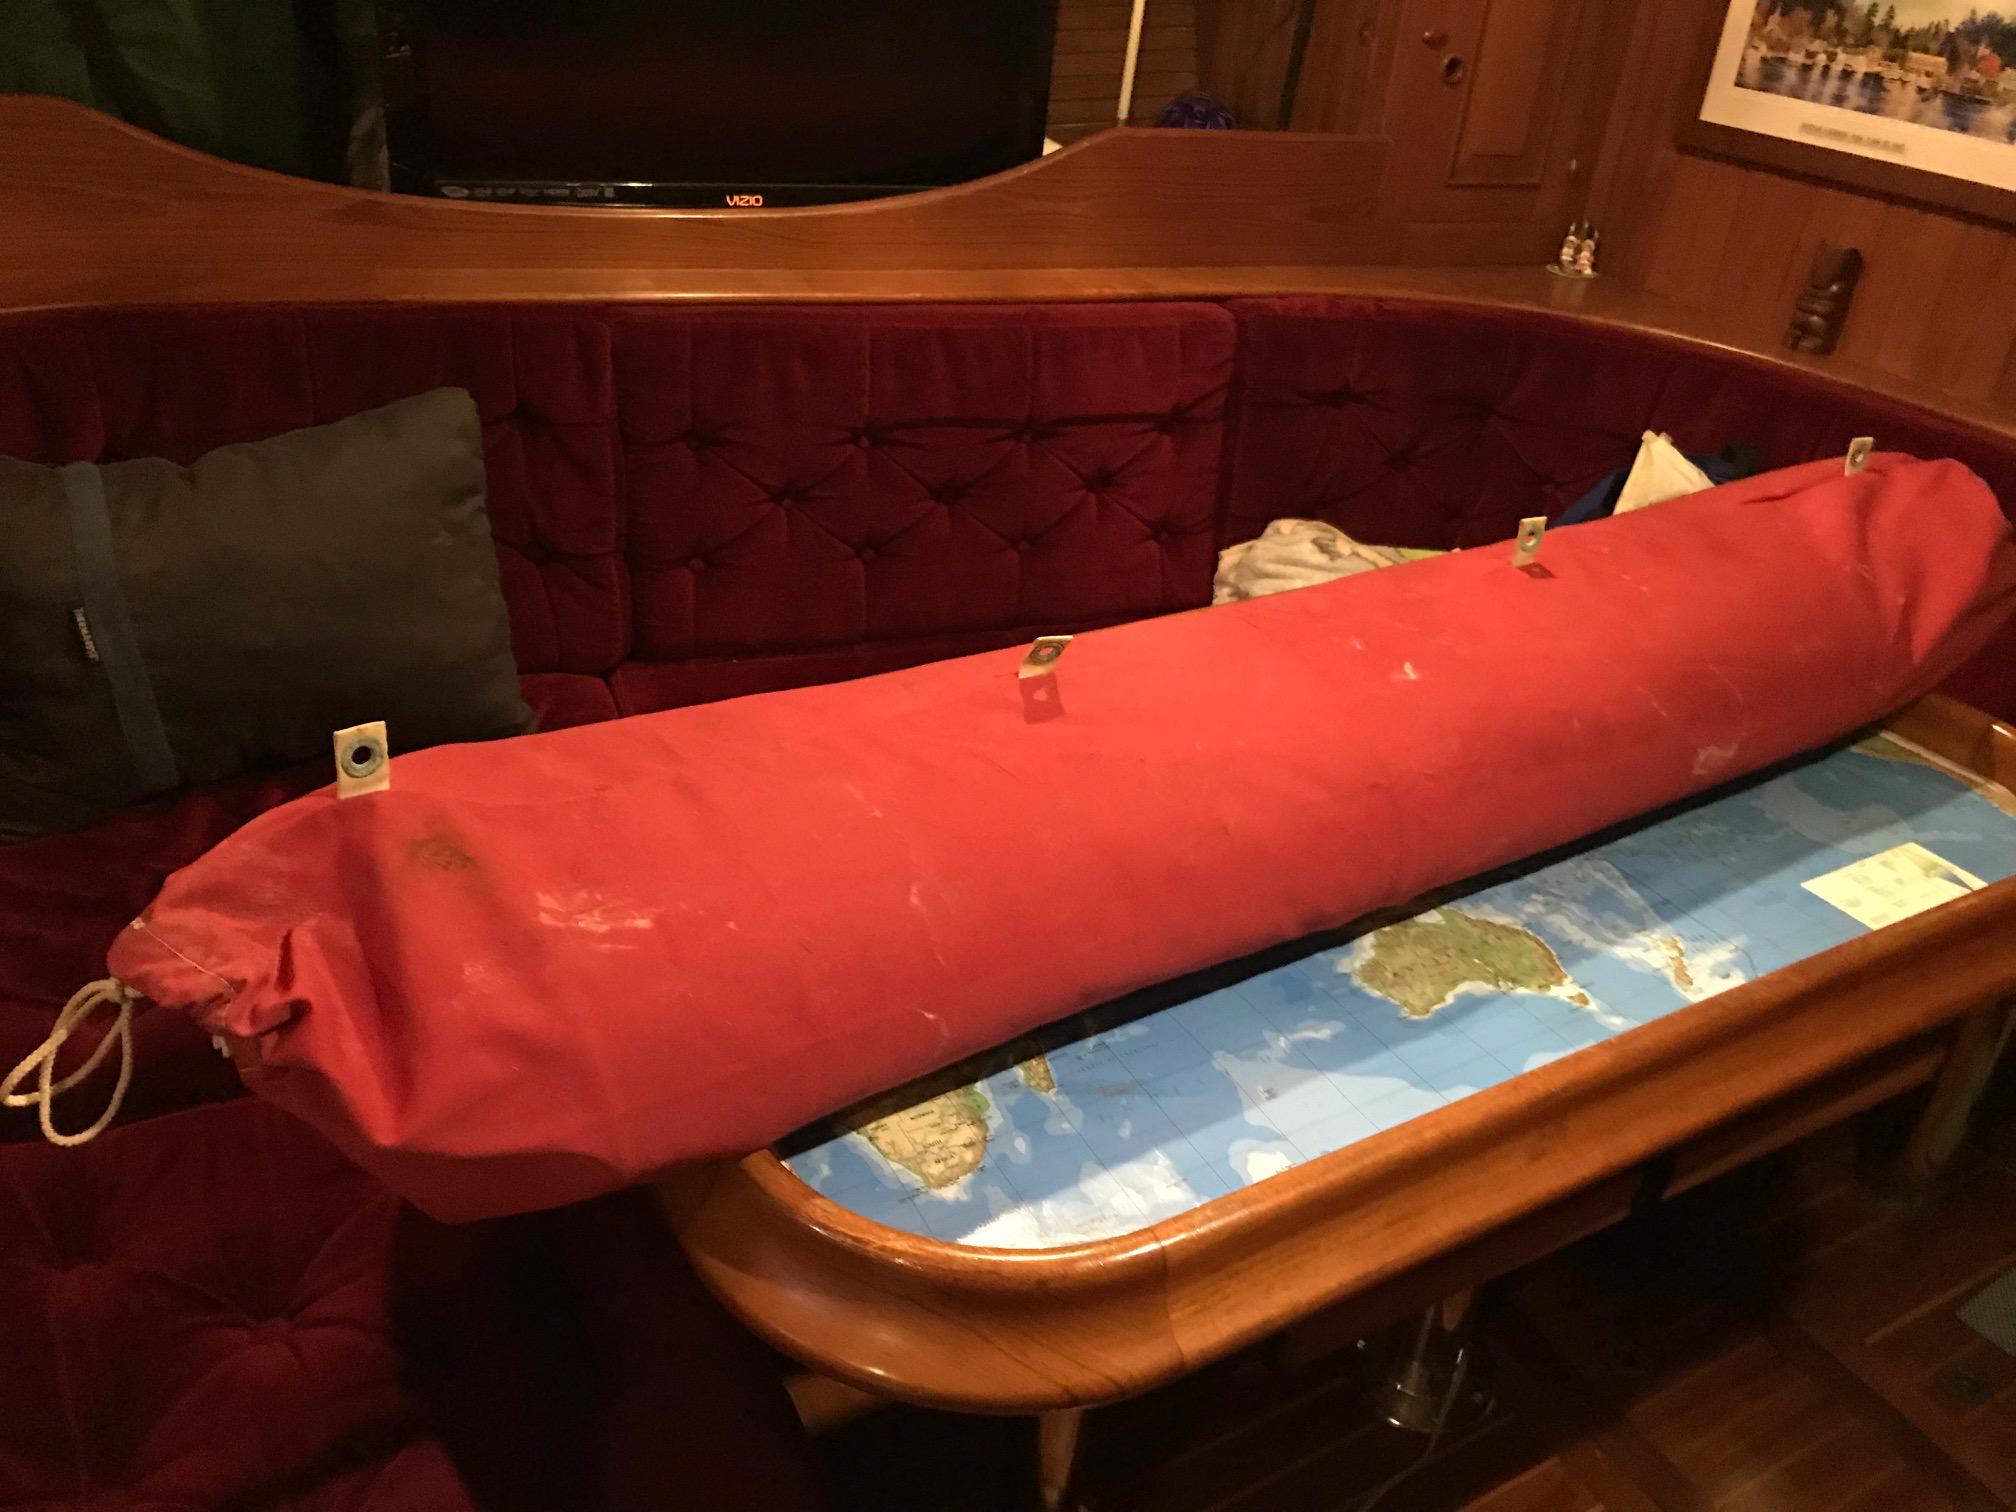
The cockpit surround panels are big and bulky. Most of the time they are not being used, but they are good to keep on the boat for when they are needed. They add an “enclosed porch” to the boat. They consist of 6 mesh panels that zipper onto the bimini when more sun protection and/or privacy is wanted. They also came in handy in a few anchorages in Mexico to keep the mosquitoes out. There are 6 snap-on vinyl panels that can be used to keep rain and wind out of the cockpit. These come in handy at the dock especially in the spring and fall when it rains and the full boat cover is off. But storing them has been a problem. During the trip, when not being used, they were folded up and put in a sail bag. This led to creases in the vinyl because they sat that way for a long time (all passages and during the 6 months the boat sat in Fiji). So today I decided to find a better way to store them. I bought a 5′ length of 3″ pvc pipe and rolled the individual panels around the pipe, using long lengths of velcro to hold them in place. Rolling them this way should keep the vinyl from developing creases. I had a red canvas bag that came with the boat and wasn’t being used and it was the perfect size to store the rolled up panels in.
This bag can be stored in either the pilot berth or in one of the aft cabin berths, and easily be carried up to the cockpit when needed.