Preparing for our 14 month-long cruise has been a huge effort, and for me, a full-time job for the past 6 months. During these months I installed a watermaker, outfitted Apropos with new sails, replaced the whisker stays, replaced 4 halyards, modified the autopilot to rudder post connection, had the fuel tanks polished, re-painted the bottom, changed all zincs, marked the anchor chain, and added more solar. Over the past 2 months we rented out our condo and moved onto the boat, where we’re slowly getting things organized. Deciding what to bring on the boat and where to store it isn’t easy (it was hard saying goodbye to my big-screen TV with surround sound!). One good thing is that we’ve found some new, out of the way areas on the boat that make nice storage for small things that are not often needed (extra watermaker filters, spare parts, etc).
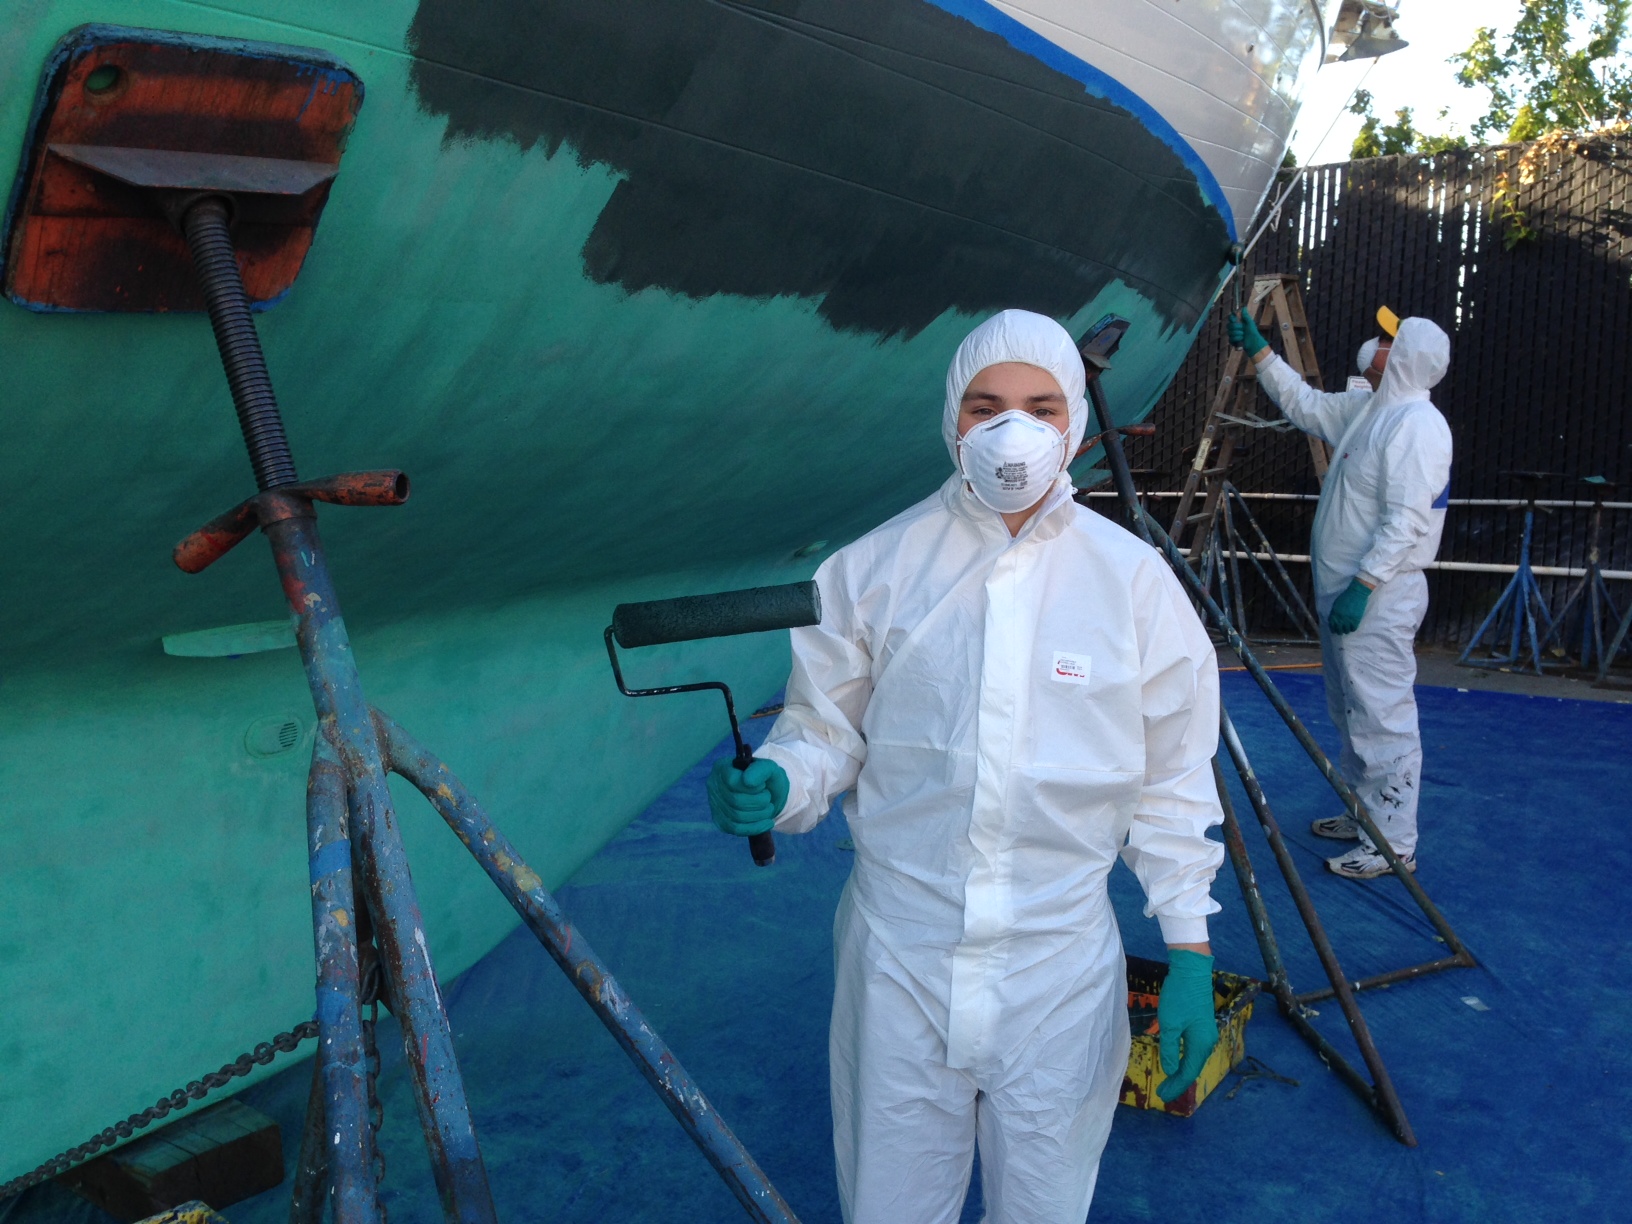
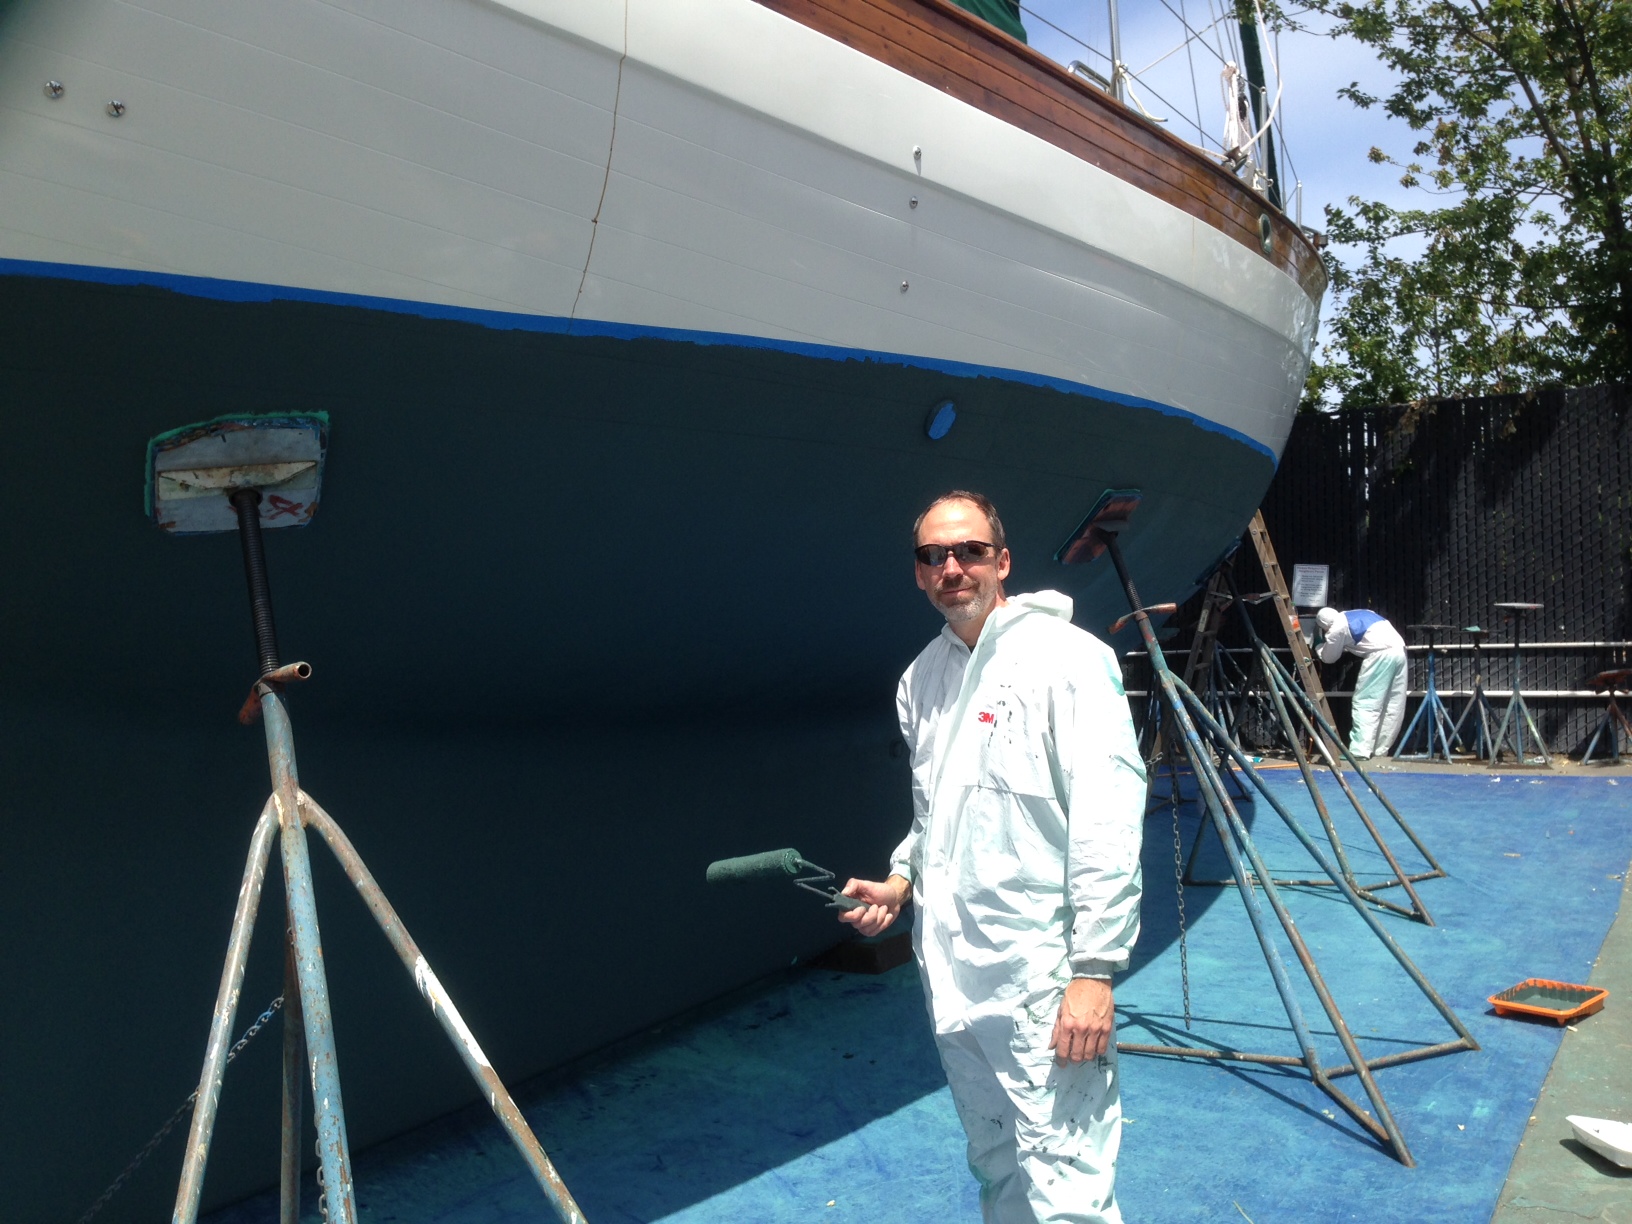
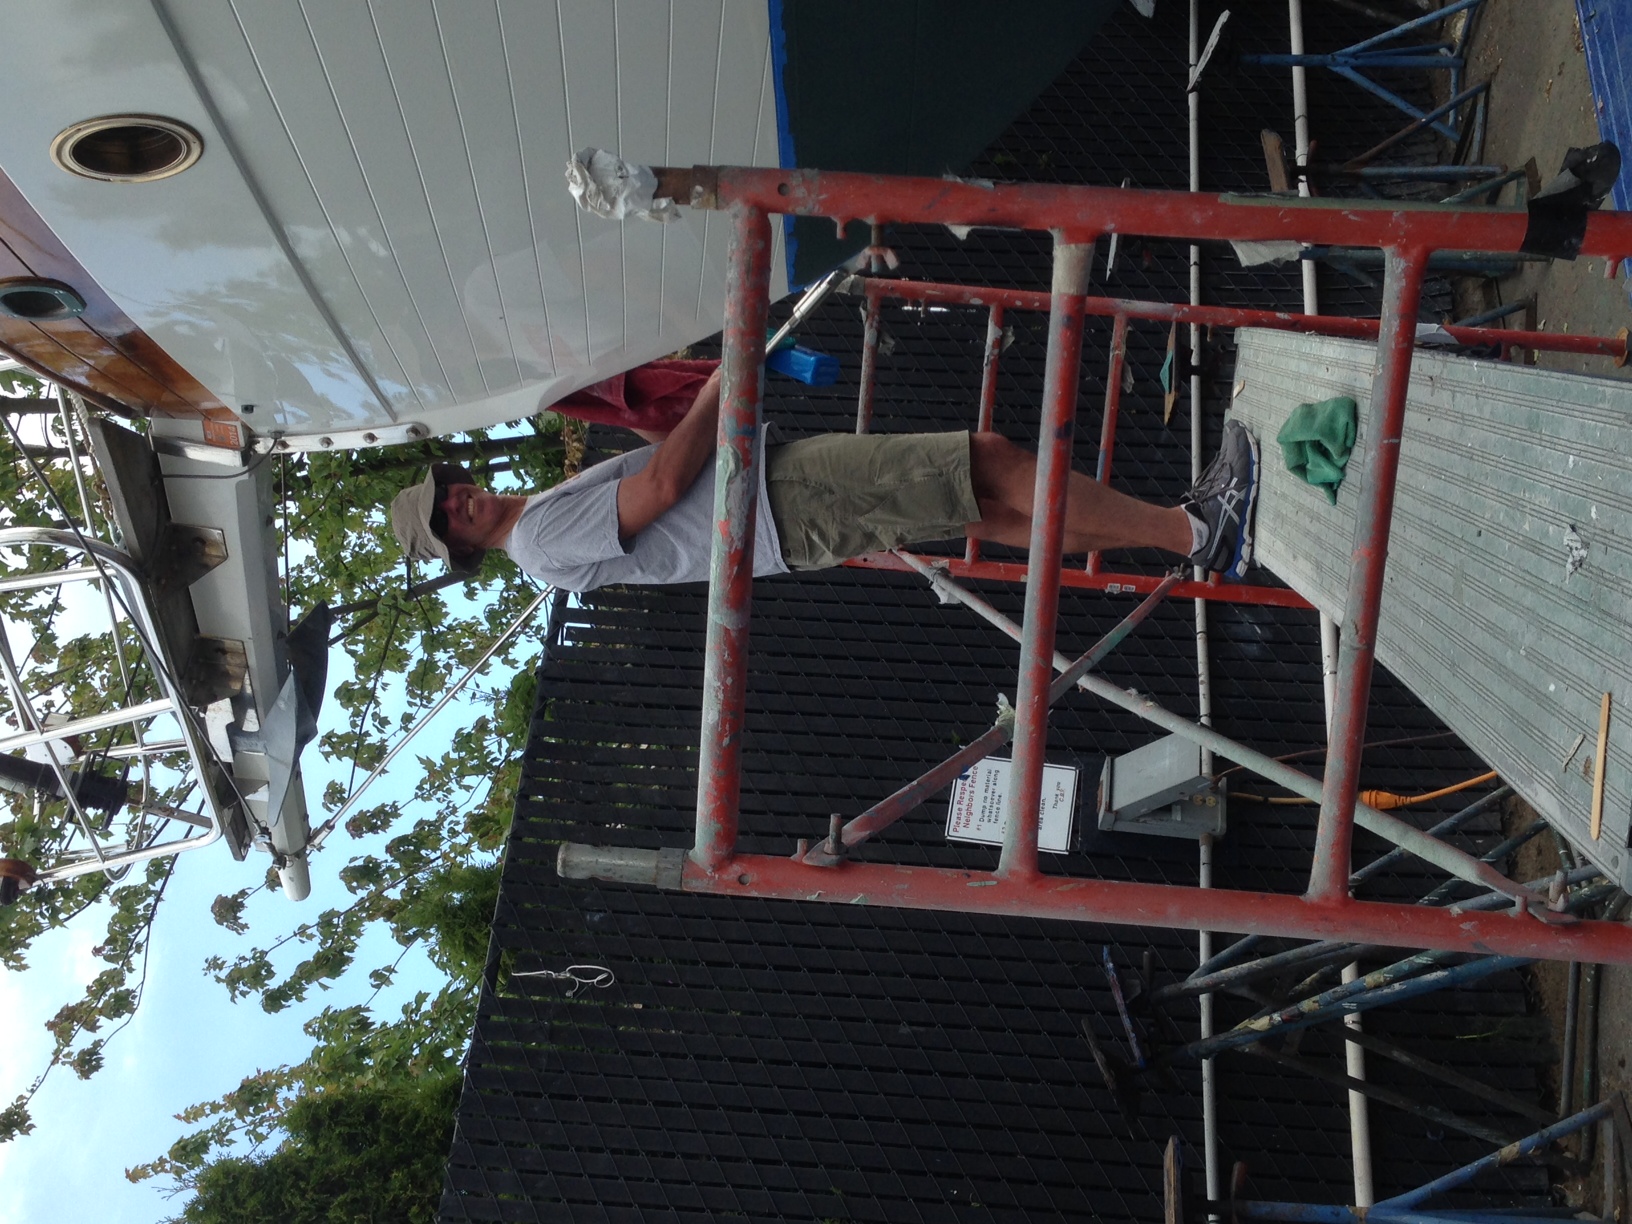
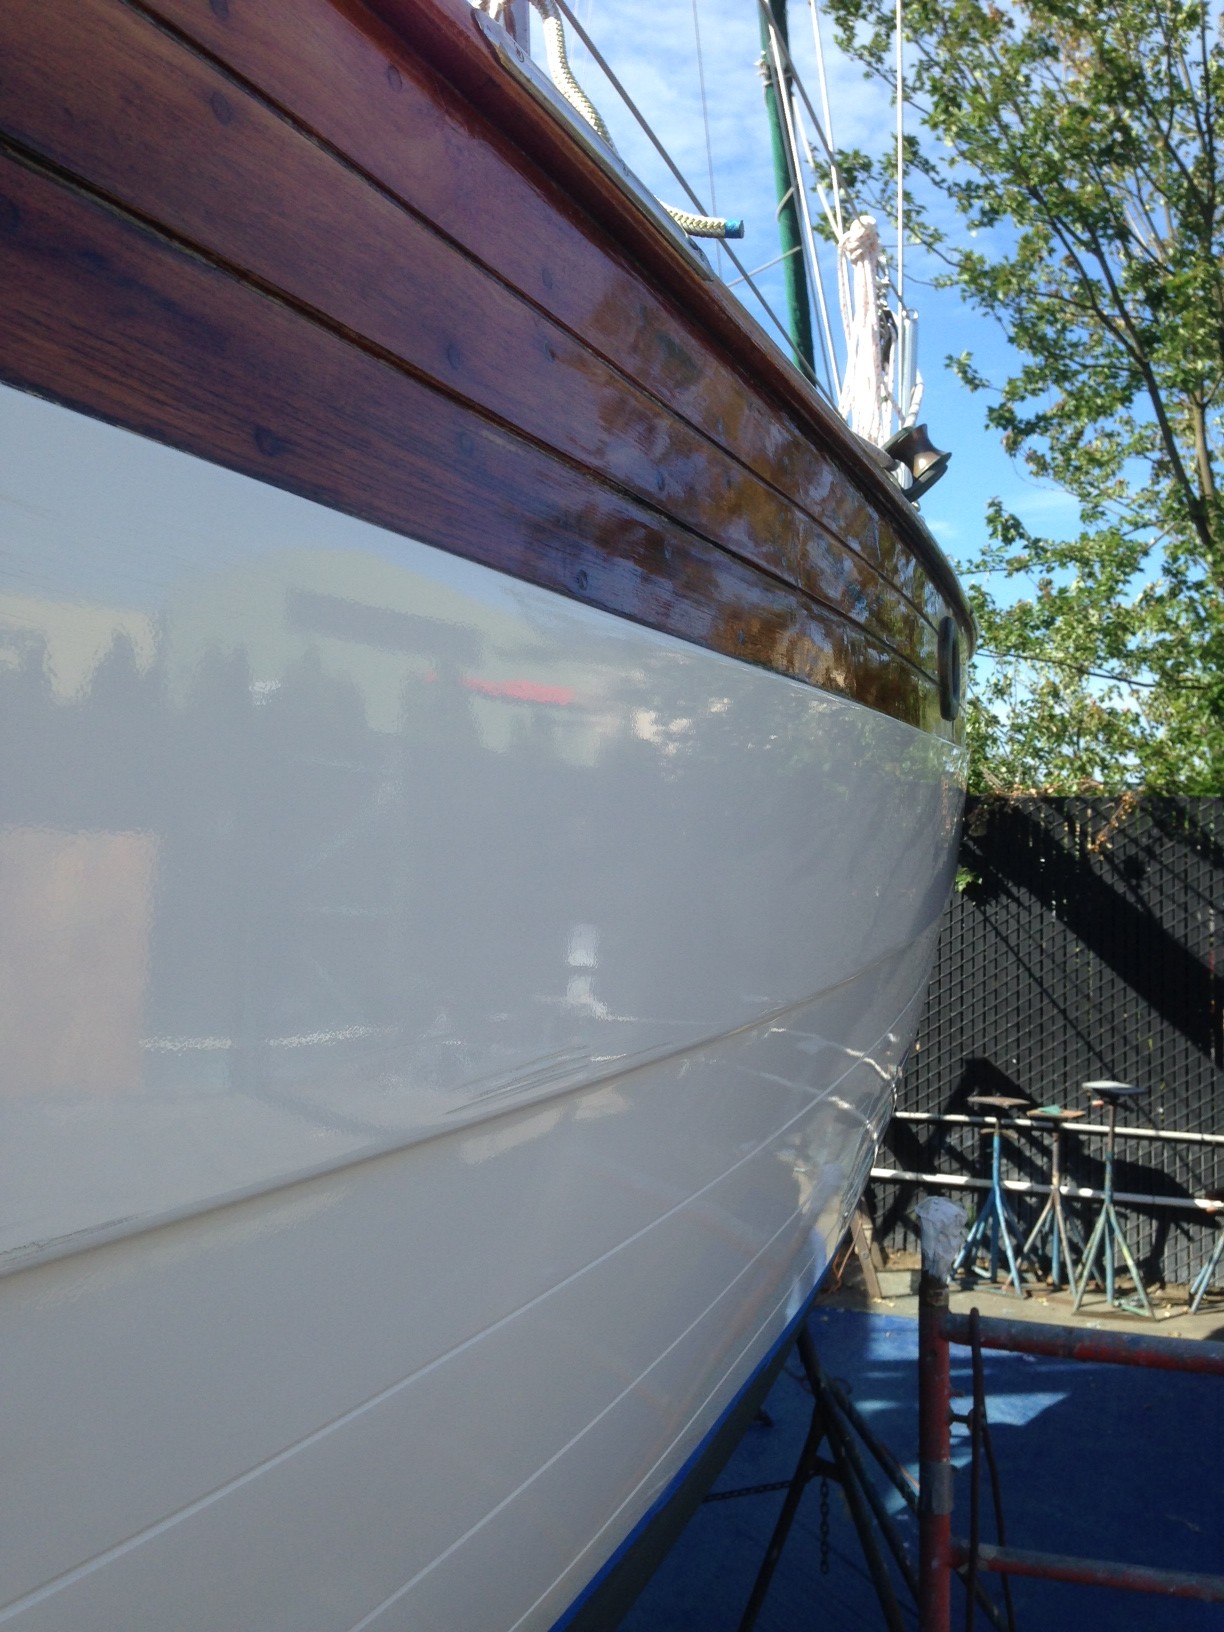
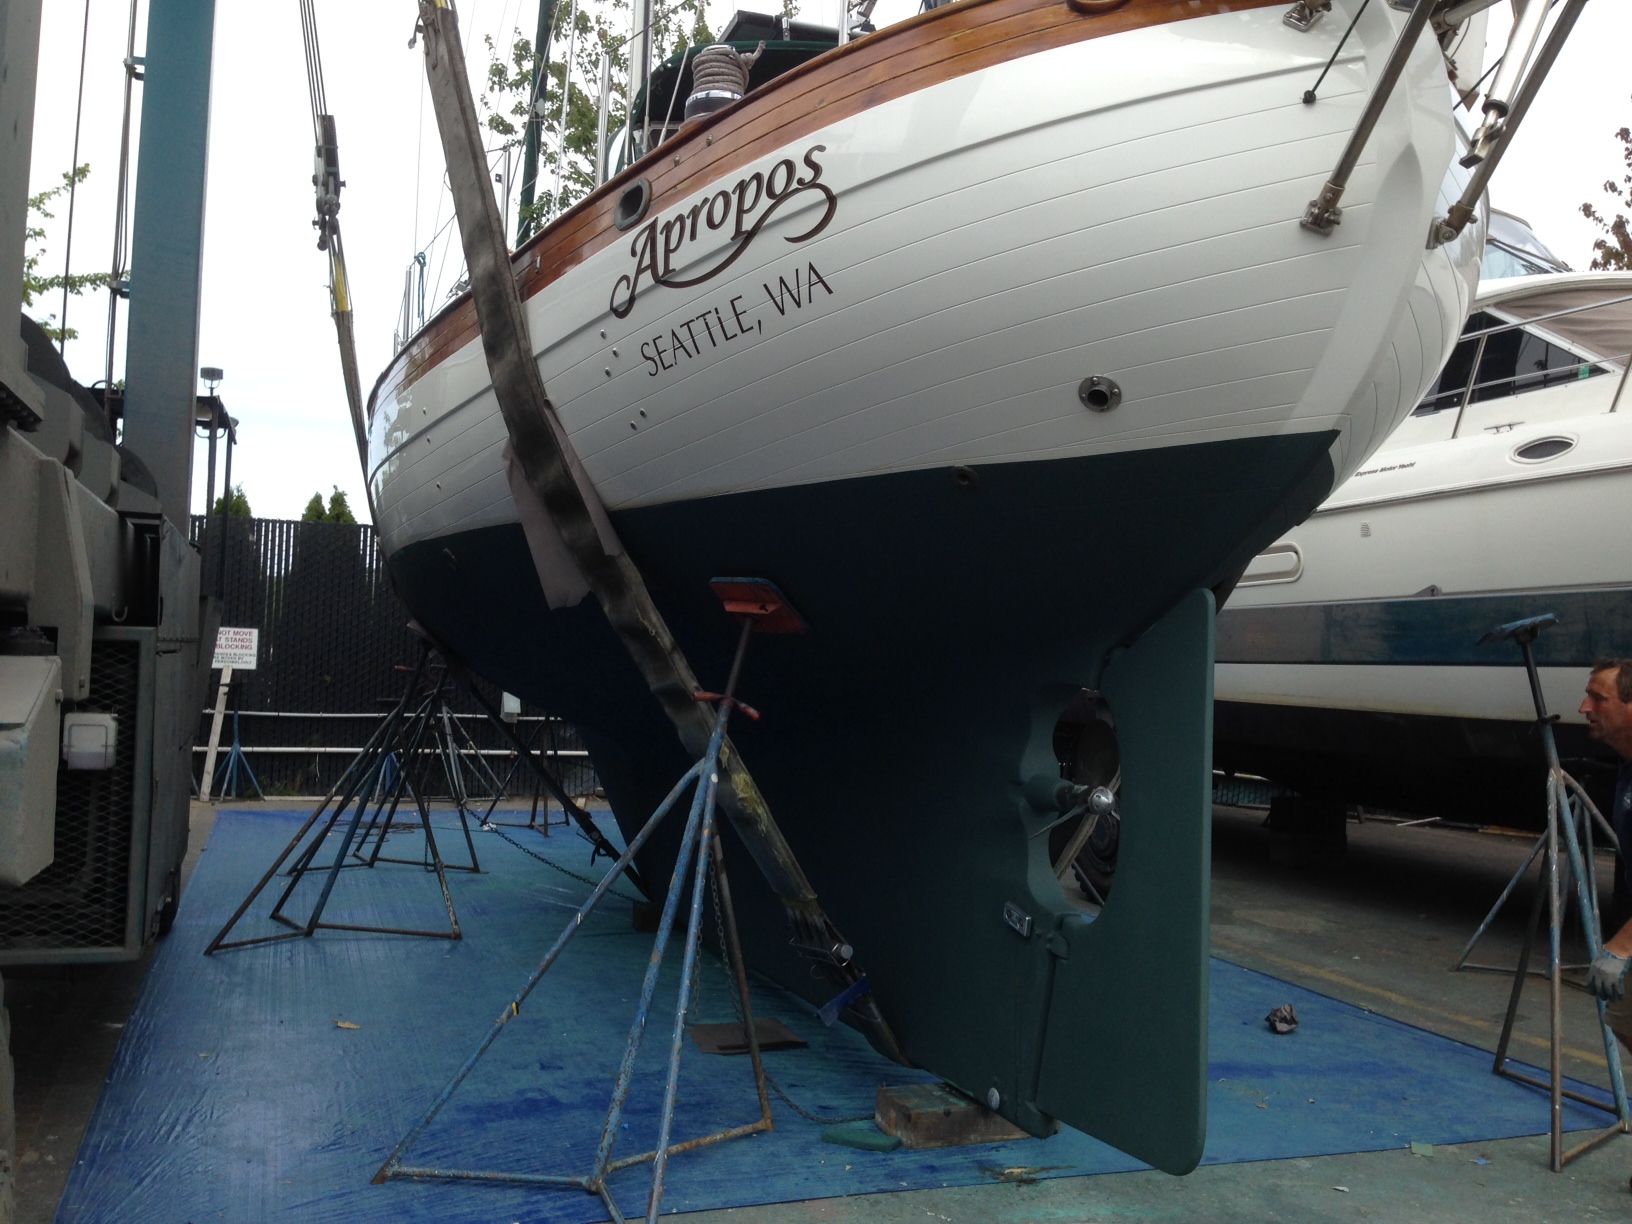
Bottom Paint and Survey This is always an exhausting 3-4 day job. This time I hauled the boat out on a Friday, spent most of that day with a marine surveyor going over nearly every inch of the boat looking for any problems, defects, or issues. The boatyard prepped the bottom by first pressure washing it, then power-sanding. On Saturday we taped above the bottom line and all the thru-hulls, then rolled on the first coat of Cukote Biocide Antifouling paint. On Sunday we applied the second coat, changed the zincs, and greased the feathering 3-blade MaxProp. On Monday we applied a 3rd coat of paint at the waterline, and polished then waxed the entire hull. The good news over these 4 days was that each day I had help from someone. The bad news was that the weekend also coincided with the weekend we were packing up the condo, the weekend of my daughter Jacintha’s birthday party, and the weekend of my other daughter Amanda’s ballet recital. And to top it off, Jacintha got sick at camp on Monday and I had to run and pick her up, race back to the boatyard to finish the polishing and cleaning up before the 3pm haul-in and motor up the canal before the drawbridges stayed down for rush hour traffic! Despite the ultra-busy weekend, everything turned out nicely. No major problems were found in the survey and Apropos is looking good with her darker green bottom!
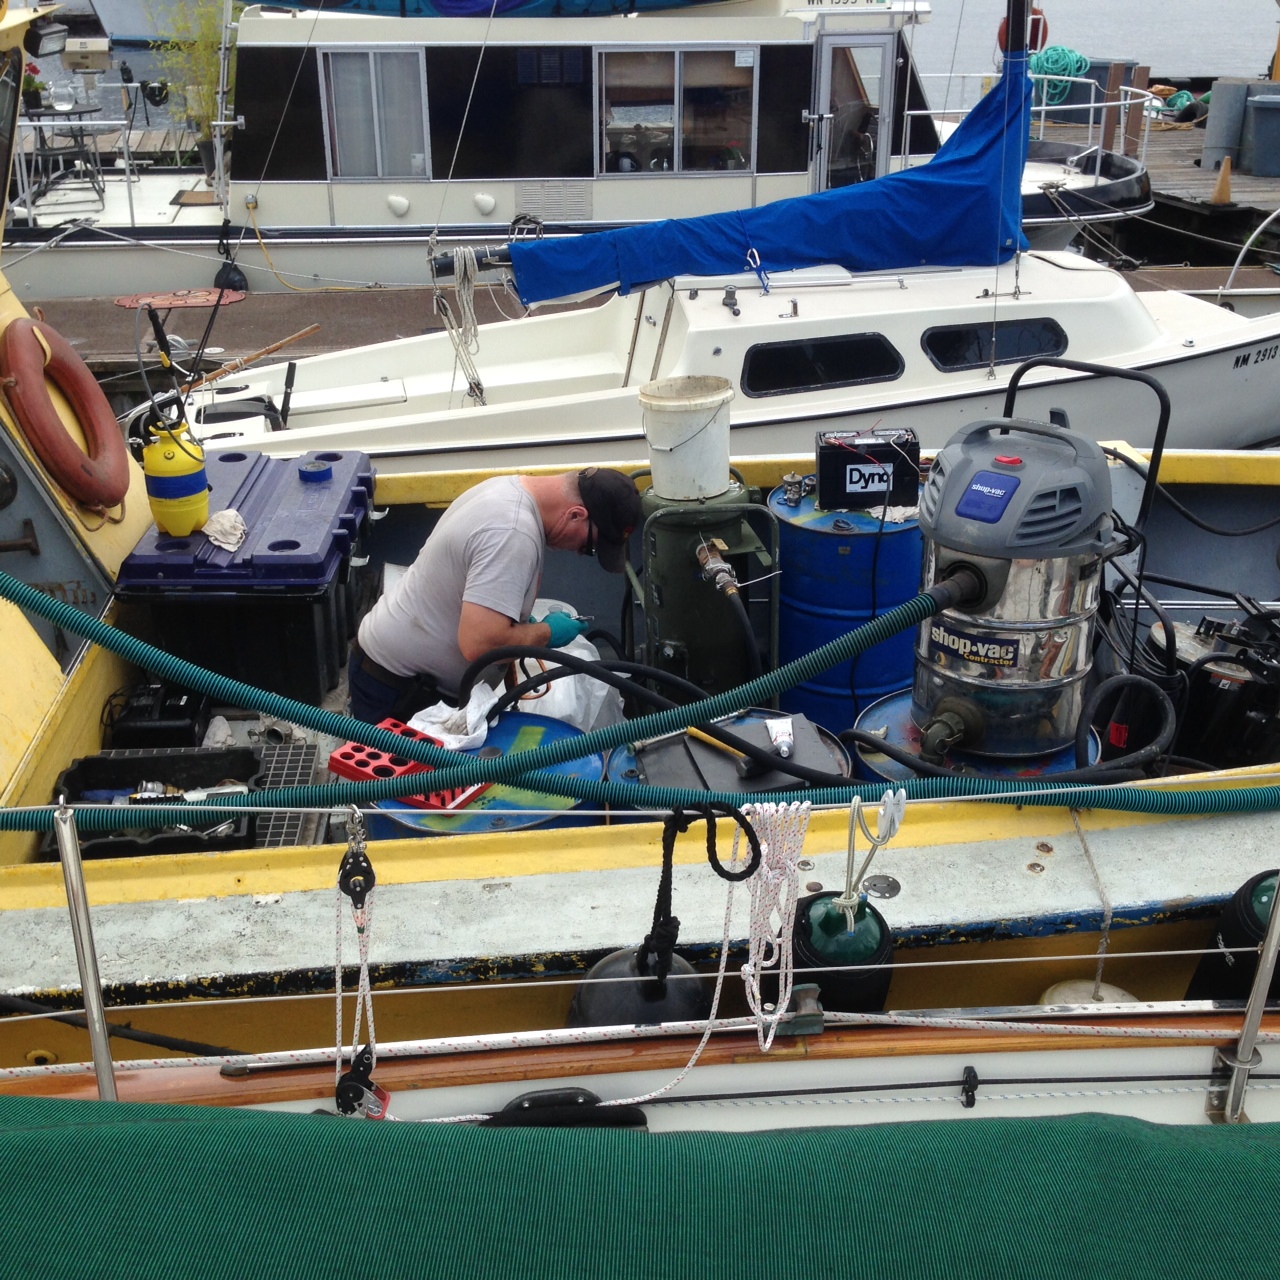
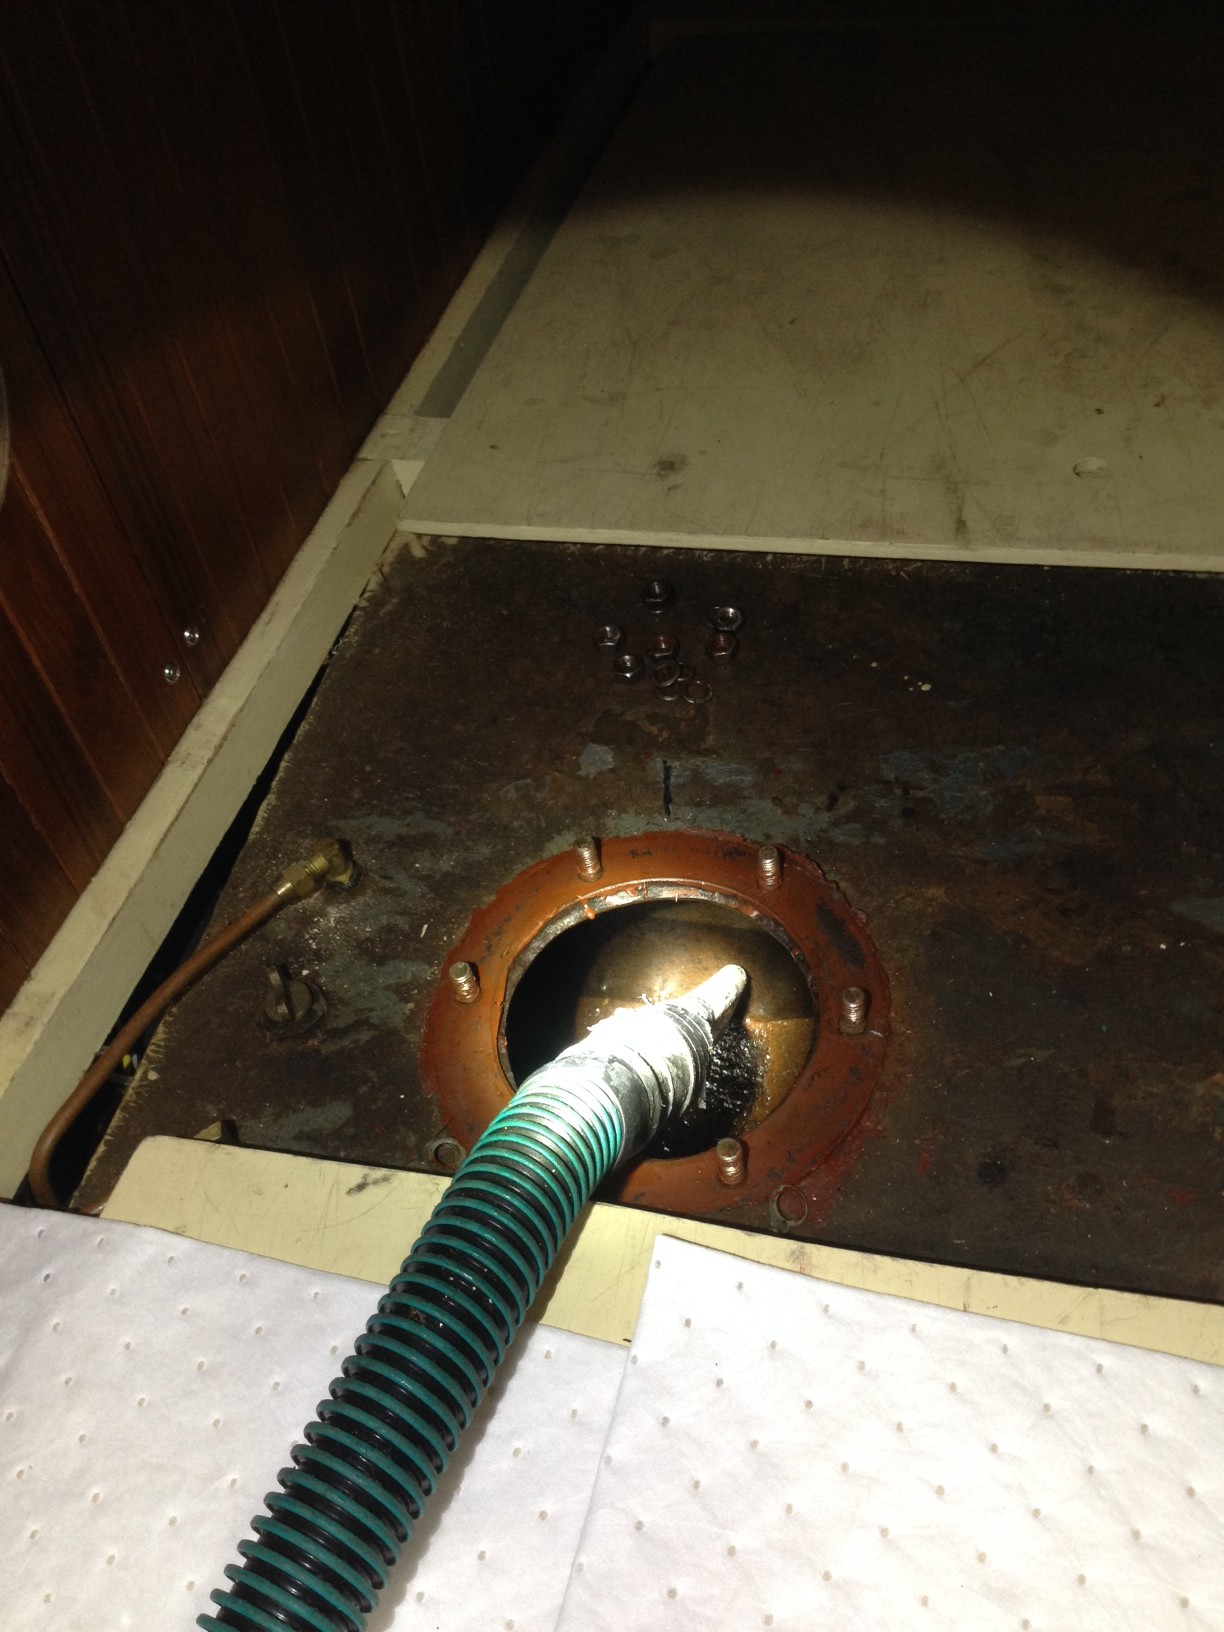
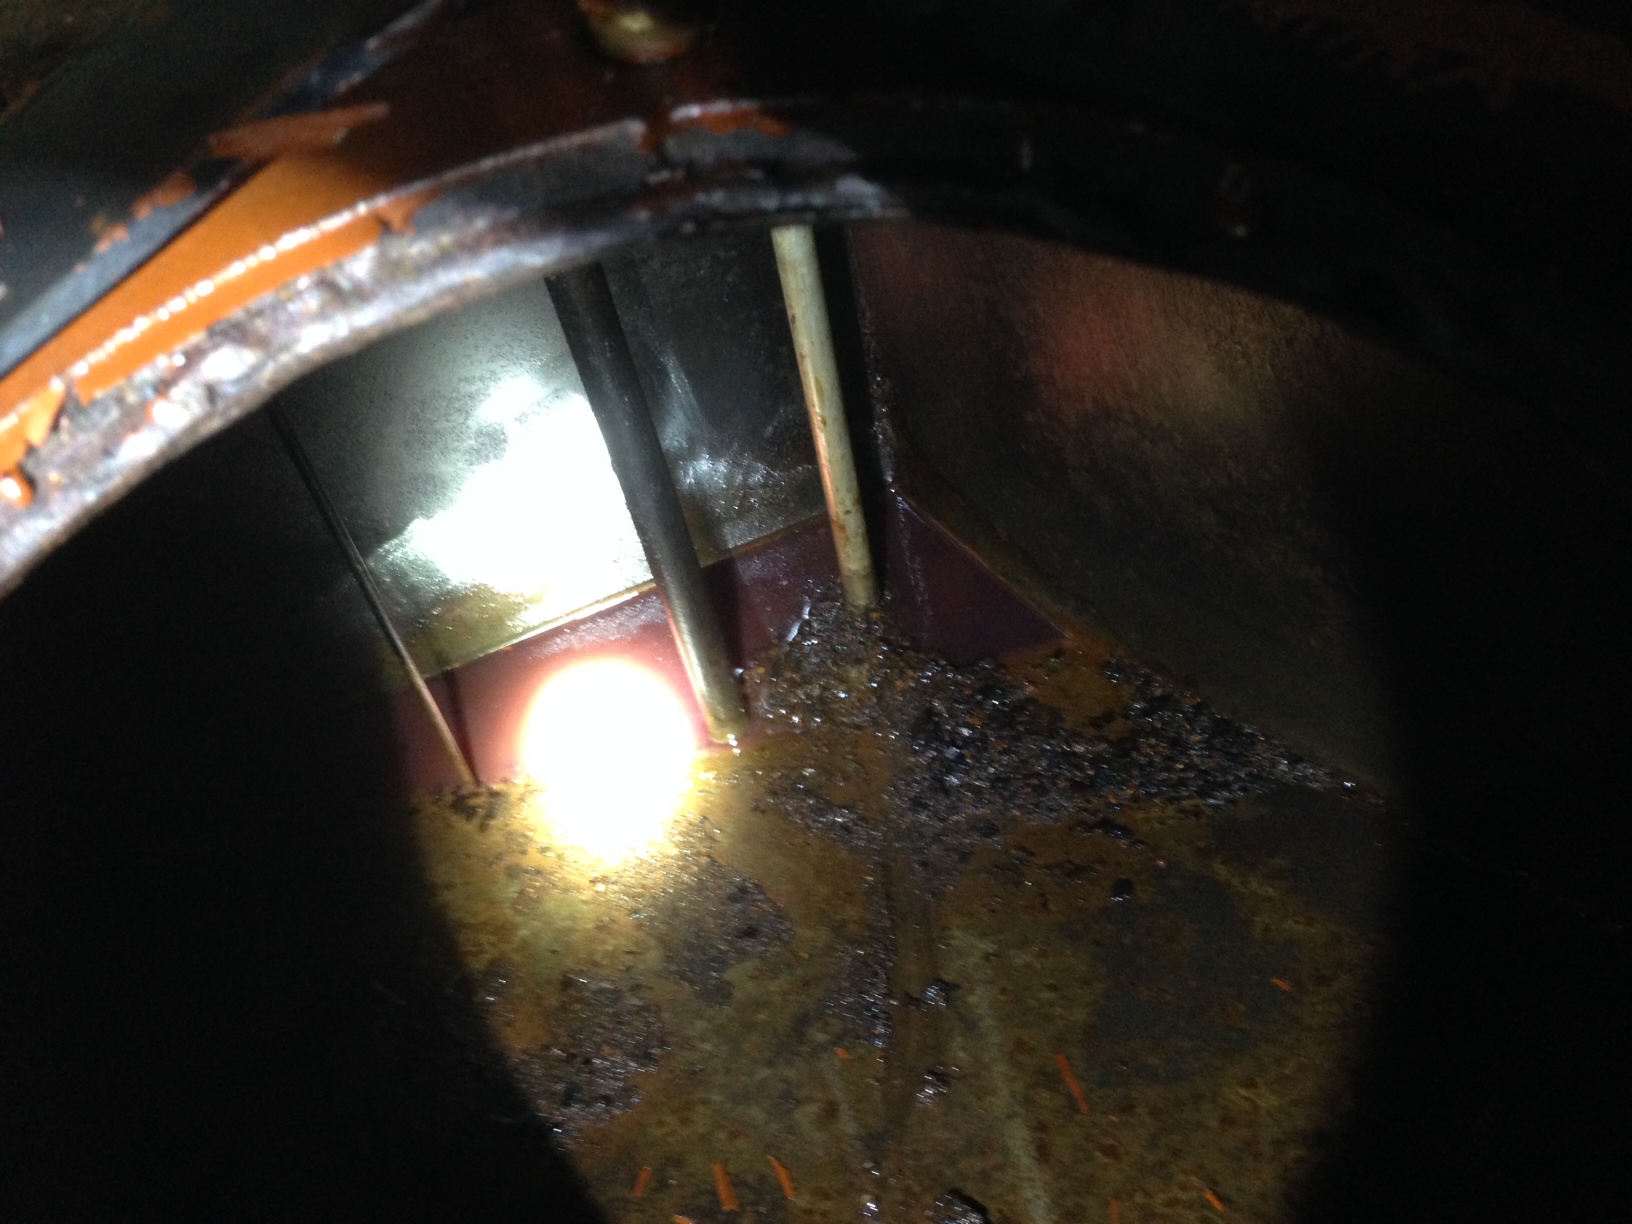
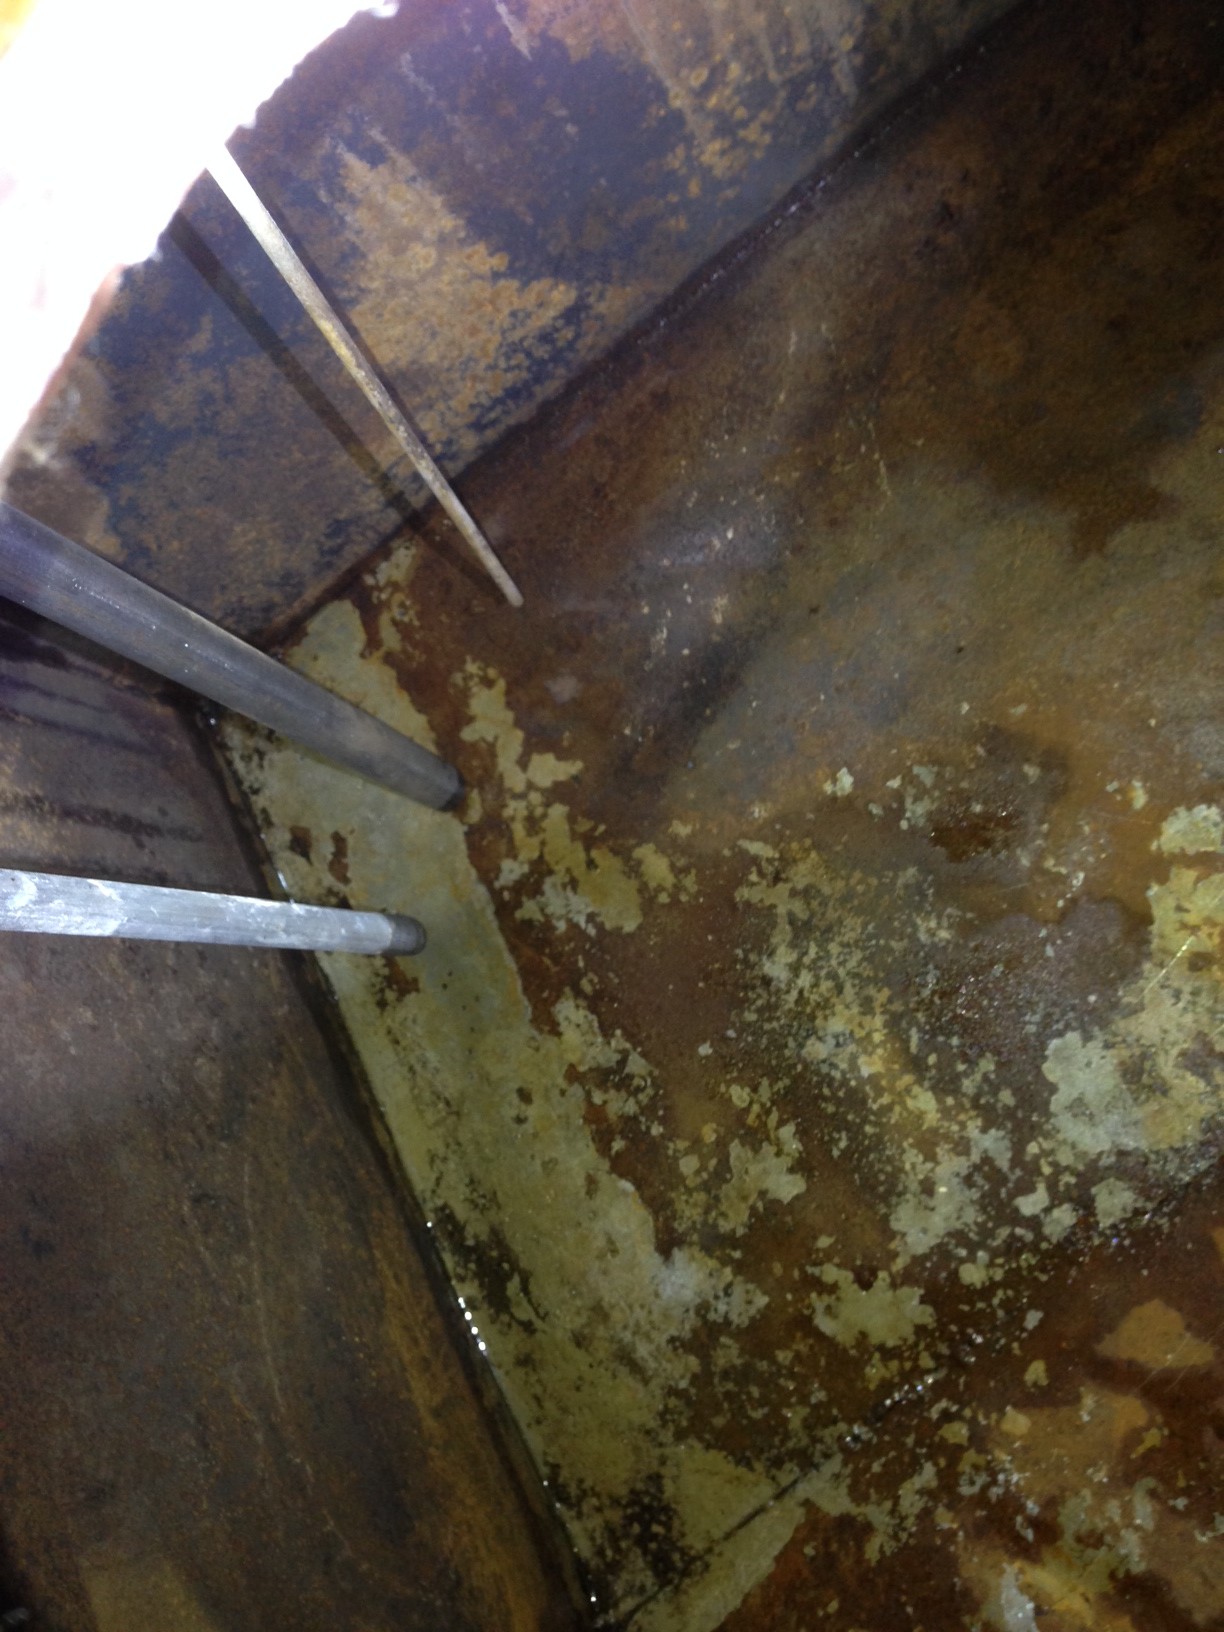
Polishing the Fuel Tanks Apropos has 2 steel 60-gallon diesel tanks located under the port and starboard aft bunks. When diesel fuel sits in tanks, condensation can occur especially if the tanks are not kept full. Water from the condensation sinks to the bottom and living things called microbes grow. These microbes make acidic deposits on the bottom of tanks that can actually eat away at a steel tank and create pinholes. One remedy that works well is to treat the fuel with a biocide that kills the microbes (I do this whenever I add fuel to the tanks). Even so, after so many years the bottom of a tank can get pretty dirty. When going to sea, rough weather can stir up junk in the tank and clog fuel filters, killing the engine–usually at a time where you REALLY need the engine. So as a precaution, I decided to have the tanks polished. Here’s how it worked–a boat came to the marina, removed the 12″ access plates on top each tank, pumped out the diesel from both tanks and filtered it as it went into a barrel on their boat. Next they used an industrial shop vac to remove all the sediment remaining in the tanks, then used a high pressure washer with 200 degree water to clean the tanks. My tanks have a baffle in the middle to reduce sloshing, so they used a 90 degree fitting on the pressure wand to reach around the baffle. After suction-drying the tanks, they inspected the bottoms for any sign of corrosion. There were a few very minor pits at the low points of each tank, but nothing to worry about (for badly pitted tanks, they need to epoxy the bottoms). Finally, they returned the diesel to the tanks, filtering it again as they pumped it back in. Now we can have some peace of mind when bouncing around in rough seas off the Washington/Oregon/California coasts.
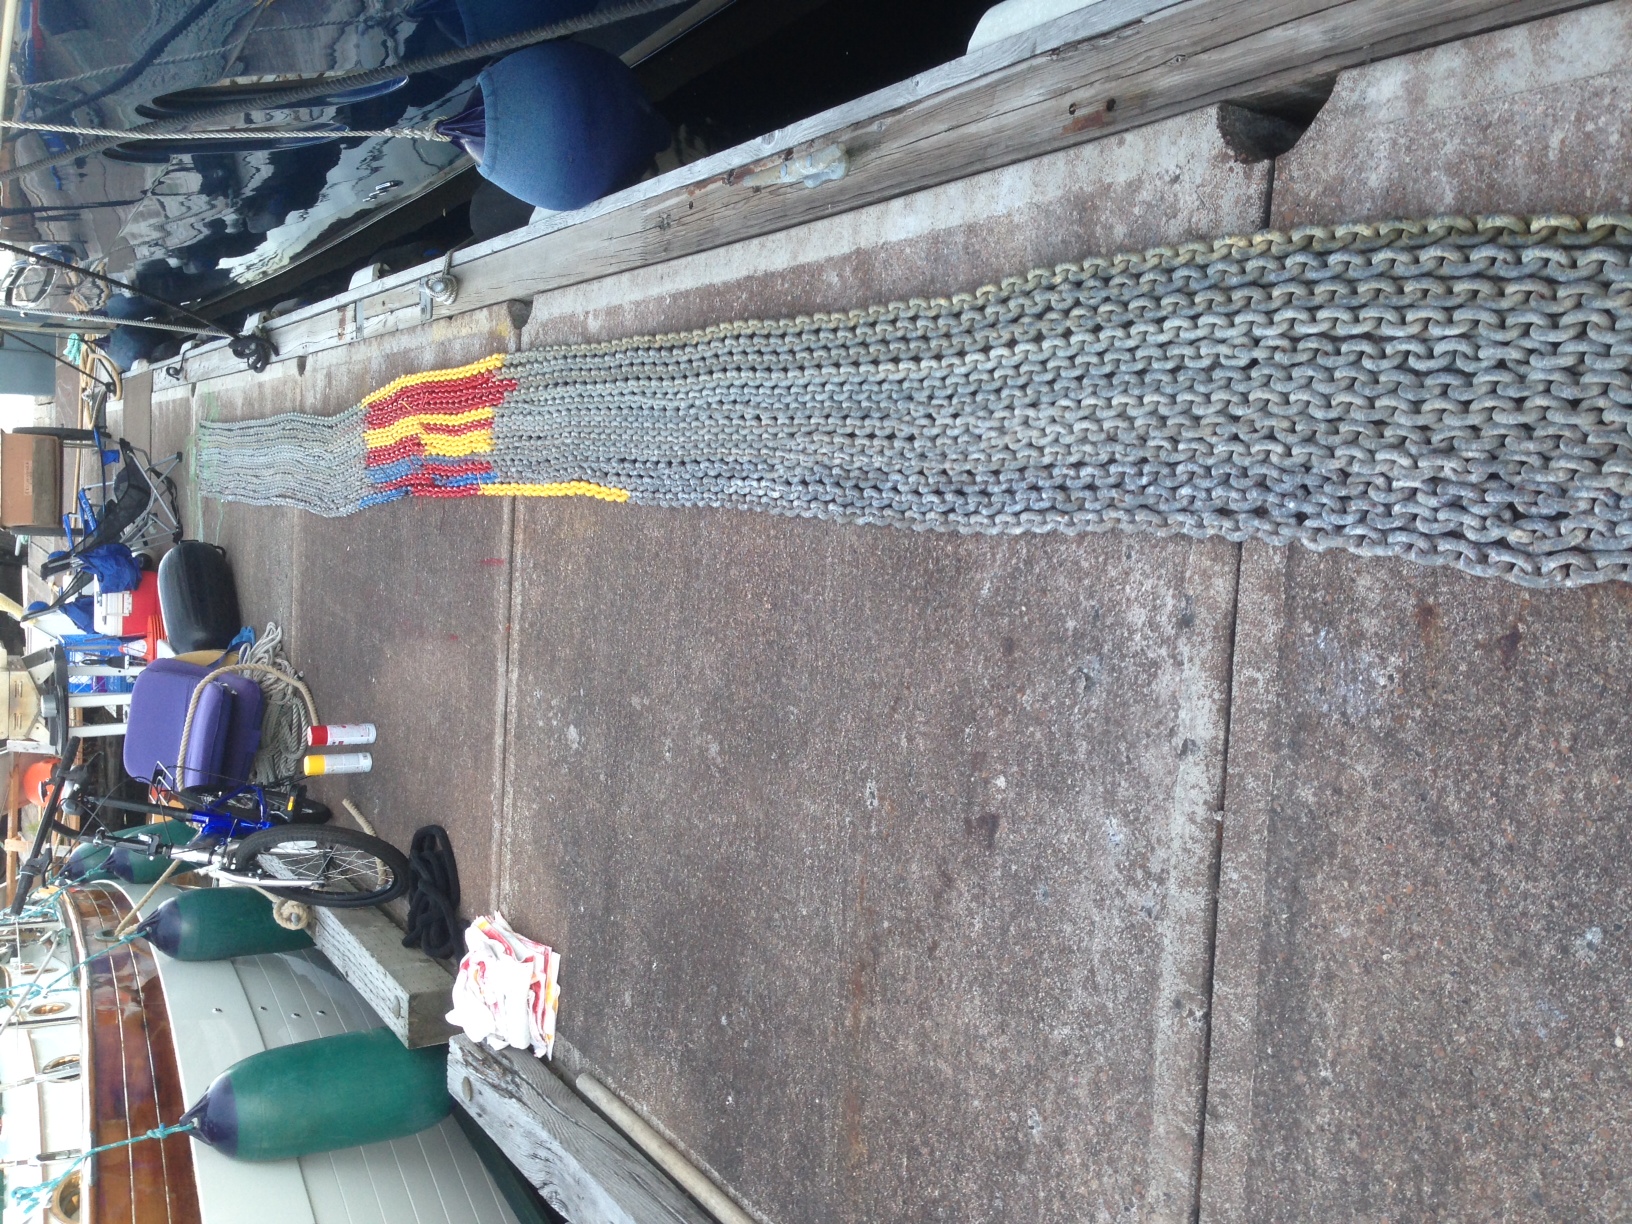
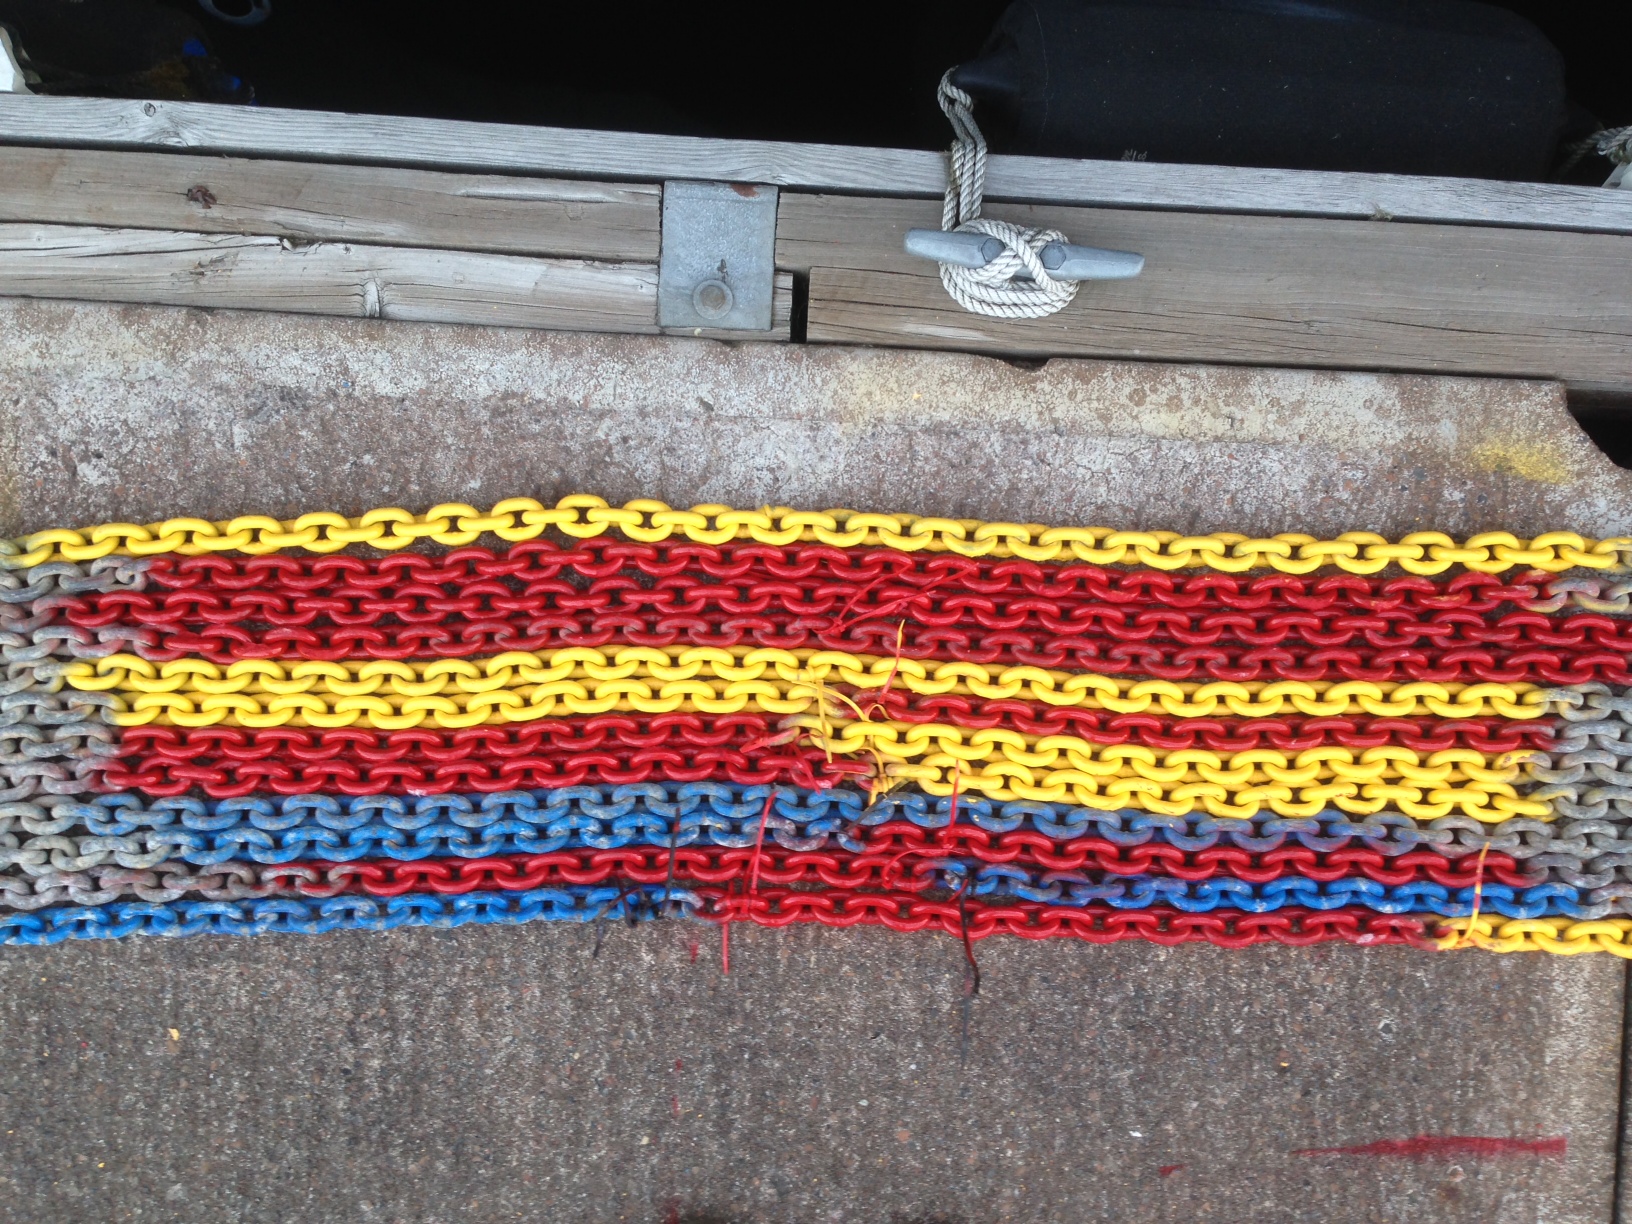
Marking the Anchor Chain The main anchor on Apropos is a 60 lb CQR plow-type with 300′ of 3/8″ chain. When anchoring, it’s important to know how much chain is out, so I like to mark the chain at 25′ intervals. I do this with a combination of paint and colored zip ties. The last time I did this was 8 years ago and the paint was still ok, but I thought I’d re-do it since we’ll be anchoring most of the time on the trip. I lowered about 25′ of chain at a time into the water, then pulled it on the dock for marking. I used 3 spray cans of Rustoleum paint–red, yellow, and blue. The chain markings are observed as they come off the windlass gypsy and the code is as follows:
- yellow–anchor is just below the waterline
- 1st red (1 red zip tie)–25′
- 2nd red (2 red zip ties)–50′
- 3rd red (3 red zip ties)–75′
- yellow (1 yellow zip tie)–100′
- yellow/red (1 red zip tie)–125′
- yellow/red (2 red zip ties)–150′
- yellow/red (3 red zip ties)–175′
- blue (1 blue zip tie)–200′
- blue/red (1 red zip tie)–225′
- blue/red (2 red zip ties)–250′
- blue/red/yellow (3 red zip ties)–275′
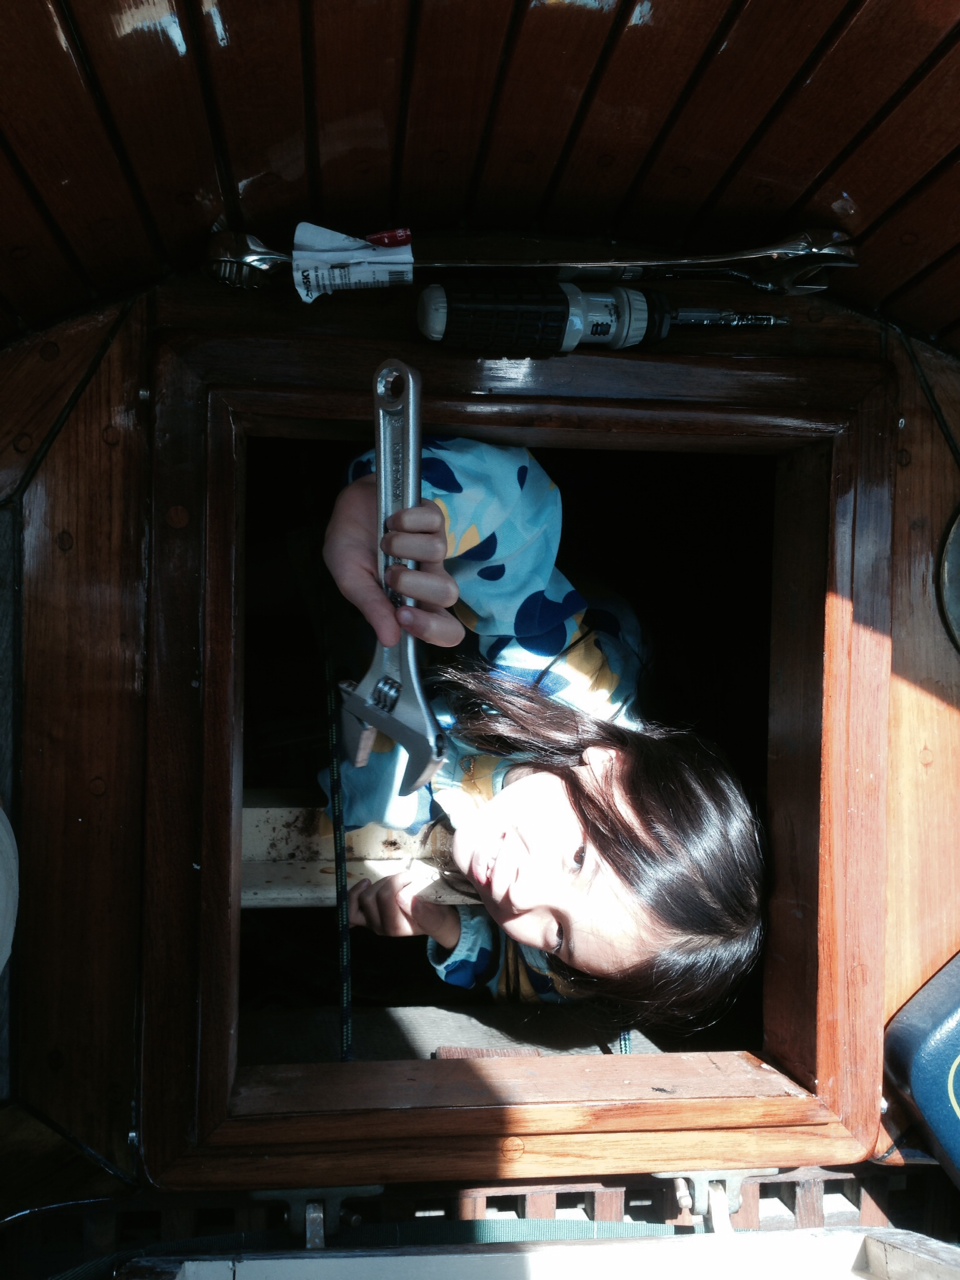
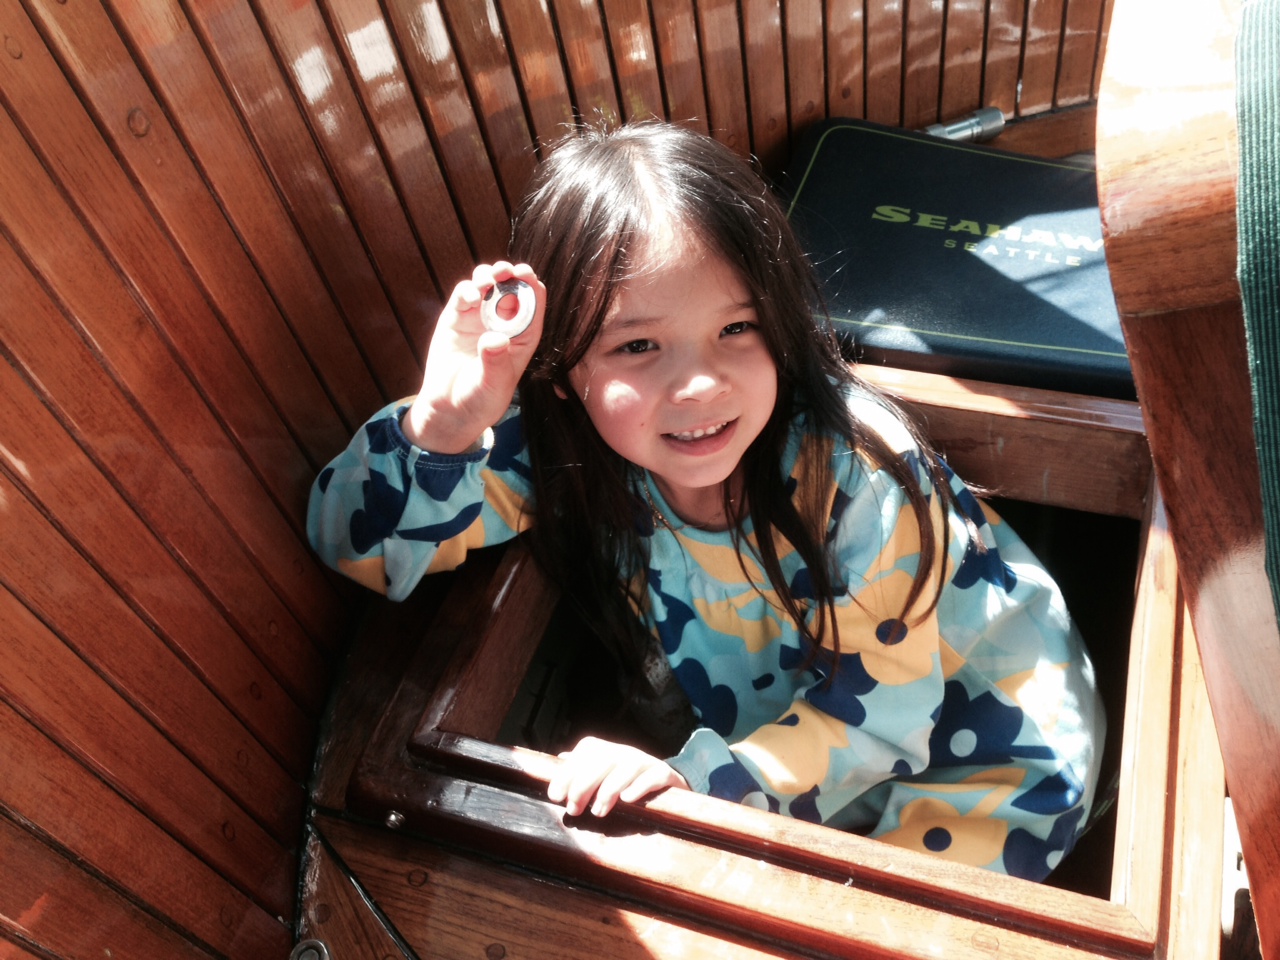
Rudder Post Modification The wheel turns the rudder via gears, a large diameter stainless steel cable, and a quadrant. The centerpoint of the quadrant is the rudder post. If the gears or cable fail, steering with the wheel won’t work, but an emergency tiller fitted atop the rudder post will work. The problem with the setup on Apropos was that there was less than a half inch of rudder post available to connect the collar on the tiller to. This had to do with fitting the boat with an electrical autopilot, which has a electro-hydraulic ram that moves the quadrant. The fix was to use ss washers as a spacer that stacks up to about 1.25″ to essentially lower the arm the ties the rudder post to the end of the autopilot ram. Lower the arm by 1.25″ exposed that much more of the top of the rudder post for connecting the emergency tiller. This was a simple fix in theory but made somewhat difficult by the cramped quarters inside the lazerette and the heavy-duty large fasteners (most wrench and socket sets end at 7/8″, this required a 1-1/8″). And working from above, accessing things from the opened helm seat, was difficult. But I had a 7 year old helper who I twice lowered down through the opening to retrieve a dropped washer and wrench!