Canvas–I washed and treated all the boat Sunbrella canvas. I have a ton of canvas–a full boat cover, 2 boom sail covers, a dodger, 2 deck box covers, helm seat cover, binnacle cover, 2 winch covers, 4 grab rail covers, 2 hatch covers, 2 stantion covers, and a BBQ cover. Most of the canvas is 10 years old but in pretty good shape, so they’re worth taking care of. The wash was done using Simple Green diluted to a medium strength and just a small amount of clorox cleanup. A light scrub with a stiff bristle brush helped remove some of the dirt and mildew. After rinsing and letting them dry well in the sun, I sprayed a waterproofing material on them using a small pump type garden sprayer. I used a product by Gold Eagle called 303 Fabric Guard that was given a best rating by Practical Sailor magazine and is endorsed by Sunbrella. It’s not cheap at $75/gal (and I went through 4 gallons!), but the results turned out great. After years in the Seattle rain, the canvas wasn’t repelling water like when it was new. Now the water beads up and runs right off. I’ll have to see how long it stays that way and decide how ofter to repeat the treatment. Shown below are photos of untreated canvas (top) and treated canvas (bottom) that were sprayed with water.
Untreated Canvas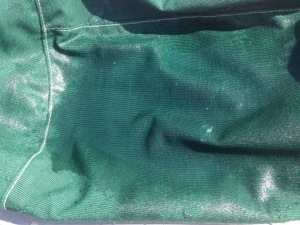
Treated Canvas
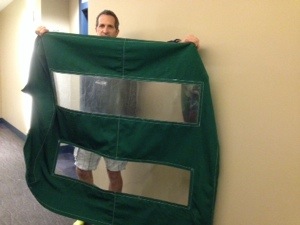
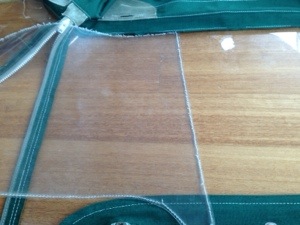
Dodger Windows–The dodger was brand new when I bought the boat 10 years ago and is still in good shape. But the vinyl windows have become scratched and are not nearly as clear as they were 10 years ago, so I decided to replace them. I used double polished 40 mil vinyl by Regalite, which is the same as the original. The procedure was to first cut the new vinyl the same shape as the old. Next remove the outside stitching and trim back the old vinyl to the inside stitching. Then sew in the new vinyl with the outside stitch. Next remove the inside stitch which will allow the old vinyl to be completely removed. Finally sew the inside stitch and you’re done. This procedure ensures the dodger will keep the same shape when all done (removing the old vinyl first would make it nearly impossible to keep the dodger shape the same). The dodger consisted of 3 large forward facing windows and 2 small side windows. This project turned out to be very time consuming but we’re pleased with the results. Here’s a picture of the old and new vinyl:
.
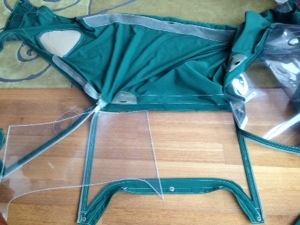
I also replaced the vinyl on the butterfly hatch cover. Here’s when it was half done showing the difference between the new (bottom) and old (top).